MPG Project Main Options
📝 Note: This feature is part of the MPG plugin, which you can get from here. If you want to learn more about it, check out our dedicated doc.
When creating a project, even if it's from scratch or by using a template, MPG offers you a wide palette of options so that you can customize the pages / posts however you desire.
| Template |
Source |
| Data Preview |
URL Generation |
Template
- Project name - insert a suitable name for your project to identify it easier; it will only be visible in the dashboard.
- Entity type - from here, you can choose the content type that will be generated by MPG. MPG supports all entity types in your WordPress installation, including posts and pages, but it also supports any custom entity created by any other WordPress plugins. Many plugins create custom entities for portfolios, landing pages, e-commerce shop pages, etc. You can generate any of those with MPG.
- Template - depending on the entity type, here will be displayed in the dropdown all those pages / posts, from which you can select one that will become a template for the ones generated now. MPG will replace any shortcodes accessing the site through the generated URL to your source file.
- 📝Note: Check this doc about how to design your own template.
- Apply template if URL contain - this works like a filter, deciding what pages from your list will contain the new template, depending on what the URL contains.
- Exclude template from crawlers and site loops - make the template invisible to the site crawlers and within the website. It’s highly recommended to exclude the template page from indexing by search engines as it contains shortcodes. All other generated pages will remain visible.
- 📝Note: Check this dedicated doc for more details.
- Participate in the search - this option should be enabled in order to find the generated pages within your website during the search of your website.
- 📝Note: This option works together with the Search Settings, making your generated pages to be searchable within the website.
- Participate in the default loop - this option should be enabled in order to show dynamically generated posts on the default loop of your website (wp_posts).
- 📝Note: If you don't see this option in your settings, please go to the Advanced Settings page and click the Update button there in the Update Tables Structure section.

Source
The source can be a direct link or an uploaded file and the options depend on the choice you make.
Direct link
- Direct link to source file - insert the link of the file ( Google Sheets or CSV ) that will generate data for the MPG pages. It needs to have public access.
- Worksheet ID - copy and paste the worksheet ID from Google Sheets or leave it as it is.
- 💰Set periodicity - set how often you want the project to check and sync with the content of the source file.
- 💰First Fetch Date / Time - pick the first date and time for the fetching process.
- 💰Notification - you can choose to receive notifications related to the fetching process ( Do not notify, Errors only, or Every Time ).
- 💰Notification Email - insert the email address where the notifications will be sent; by default, it will be the admin email.
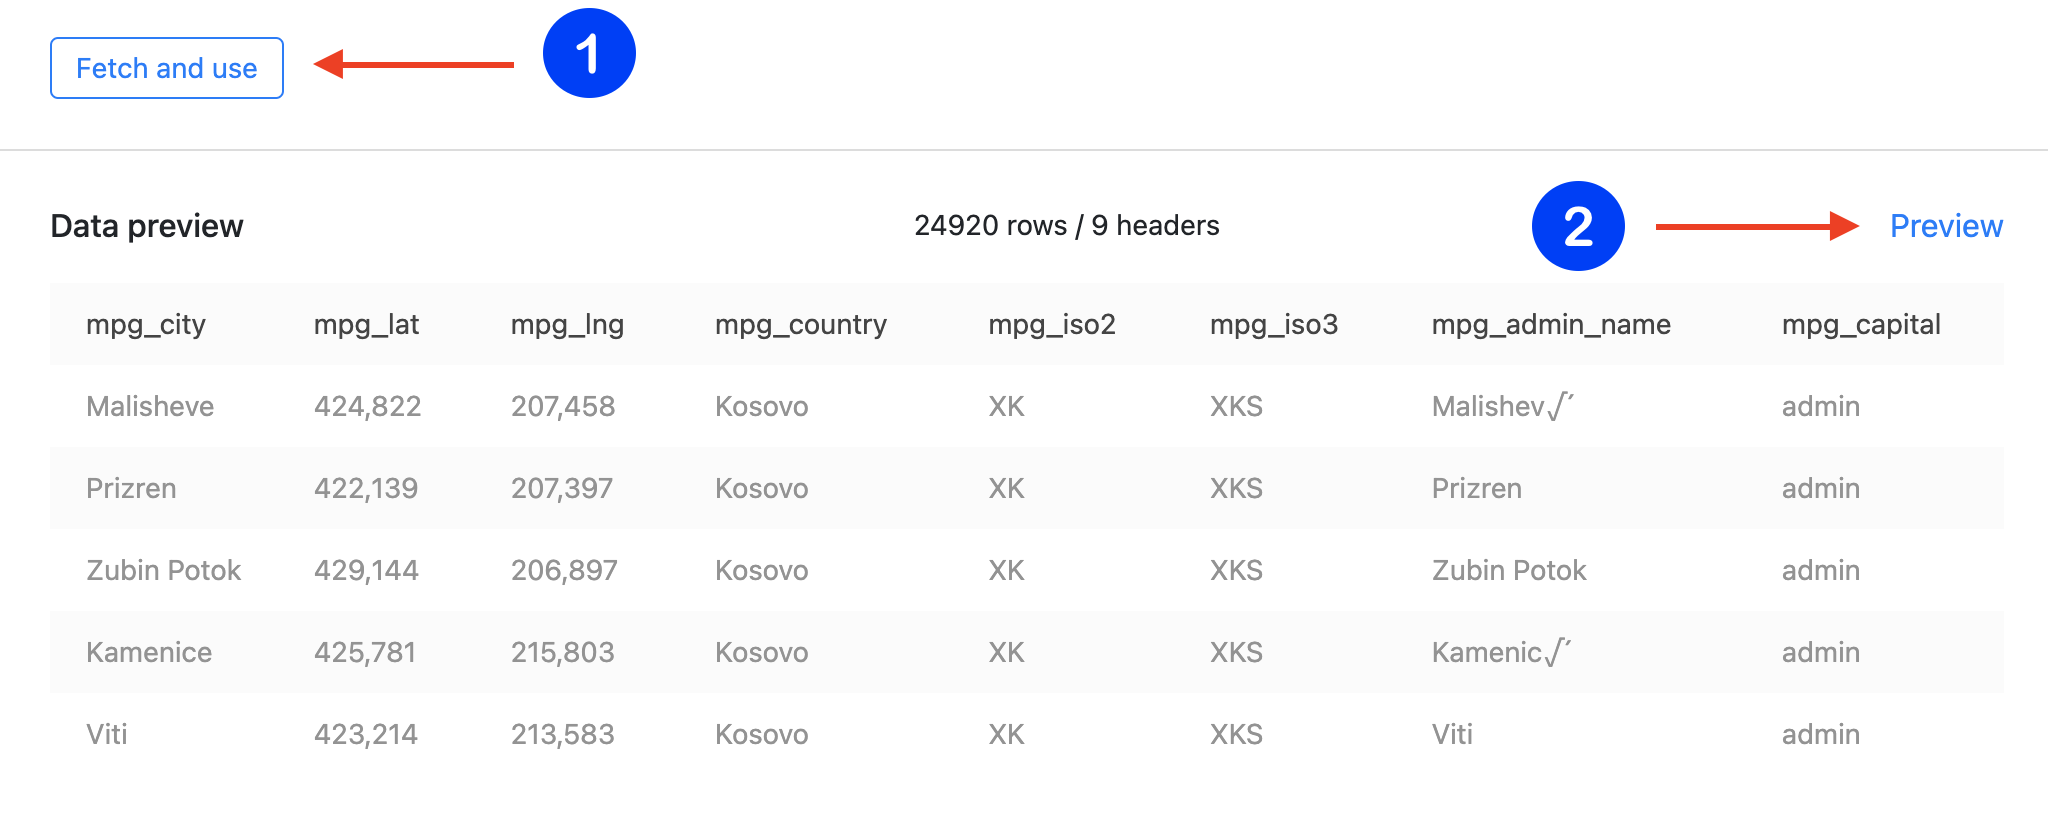
Click on the Fetch and use button to sync the data, and click on Preview if you want to check how it looks.

📝 Note: You can create your own data source file, and here is a doc to help you with this.
Upload file
For this method, you only have to browse a specific file ( .csv, .xlsx, .ods ).

Data Preview
📝 Note: This is available only after you have clicked the Fetch and use button.
Quickly glance at the Data preview. Click the “ Preview” button to view all the data collected from your spreadsheet.
URL Generation
The URL Generation is a very important part of the plugin because it ensures the accessibility of the pages.
- URL Generation - you can select from the dropdown list the shortcode that would create a great URL. It will be added to the URL format template.
- 📝Note: Make sure that the combination creates unique links that do not match any of the physical URLs that your website already has.
- URL Format Template - it is used to form the permalinks of the pages; you can use here any combination of shortcodes, and plain text with separators.
📝 Note: To generate a URL, click on a shortcode available in the URL Generation list, insert ( from the keyboard ) a separator, if you wish, and add any other shortcode you need to create a unique URL.
- Trailing slash settings - you can choose if you want to display the trailing slash (the last / ) or not.
- URL preview - check what the URLs look like and make some changes if there's needed.

📝 Note: Make sure you Save the changes in order to access the See all URLs option.
📝 Note: There are five other menus with options for the project: Shortcode, Sitemap, Spintax. Cache, Logs.