How to Create a Site Specific Plugin
Sometimes we provide you with little snippets of code to add or change a feature of one of our themes or plugins. The best way to implement those changes when they deal with PHP code is to create a Site Specific Plugin. These are plugins that never really update (unless you change the code) but just contain little pieces of code to do small tasks.
In this tutorial, we'll show you how to create a site-specific plugin without even using FTP or our touching code (other than the code you need to paste!).
Manually create a site-specific plugin
1. Create a new folder on your Desktop and name it after your website.
2. Open a plain text editor, like Notepad or TextEdit.
3. Create a new file and save it as {name_of_website}.php in your previously created folder.
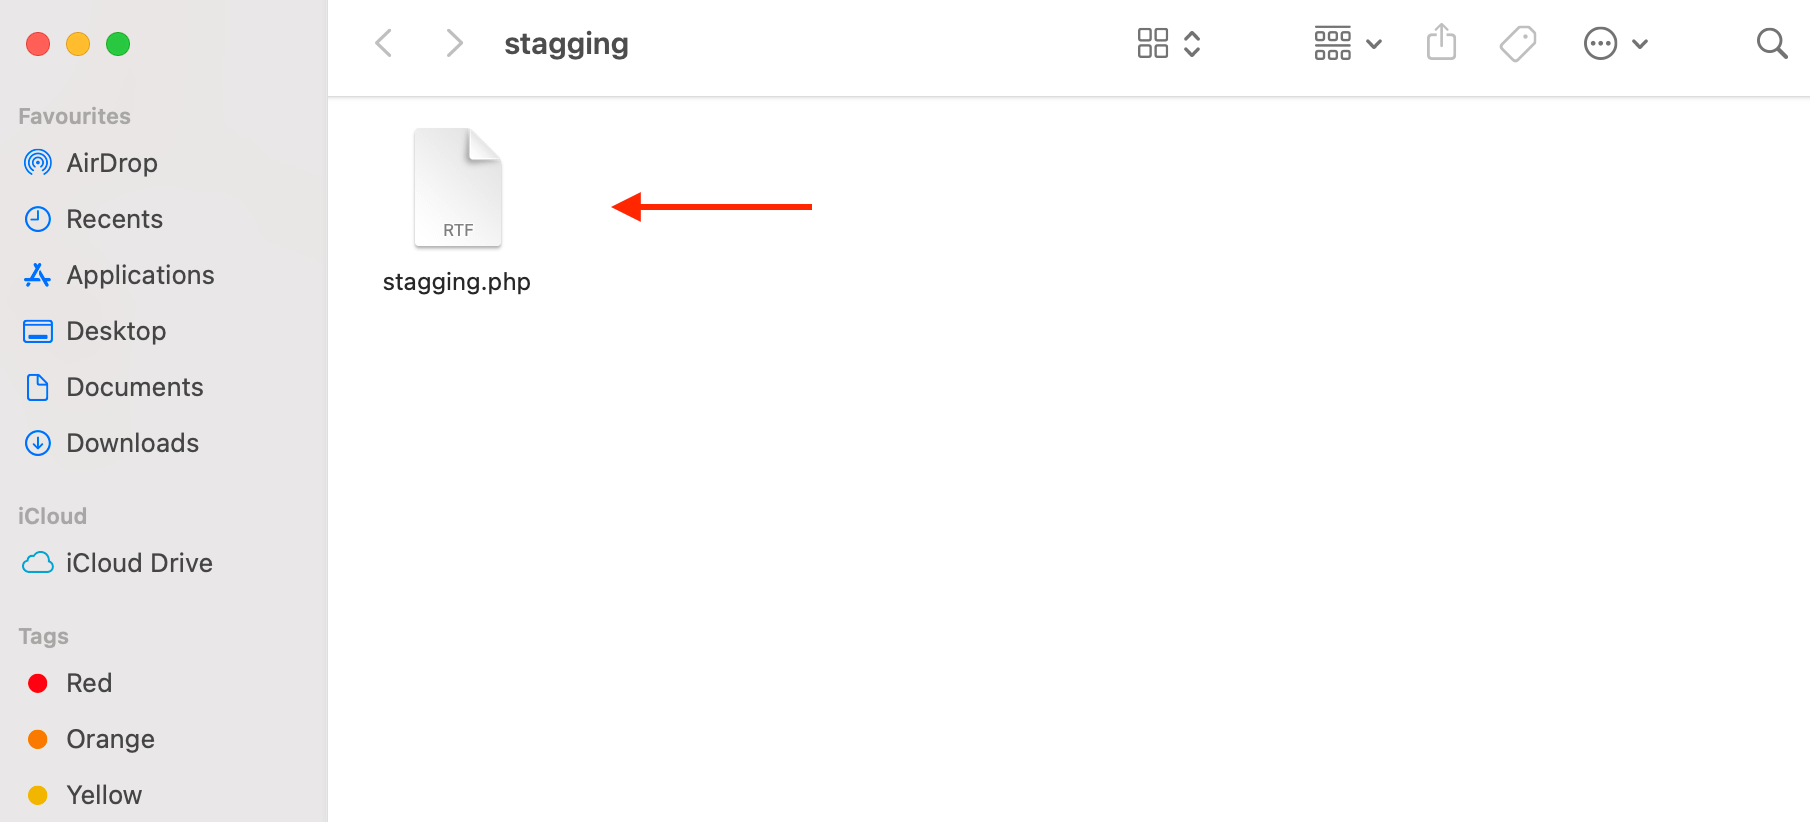
4. Paste the specific header code in the file so WordPress can recognize it as a plugin.
<?php
/*
Plugin Name: Site Plugin for example.com
Description: Site specific code changes for example.com
*/
/* Start Adding Functions Below this Line */

/* Stop Adding Functions Below this Line */
?>
You can replace the example.com name with your own domain name.
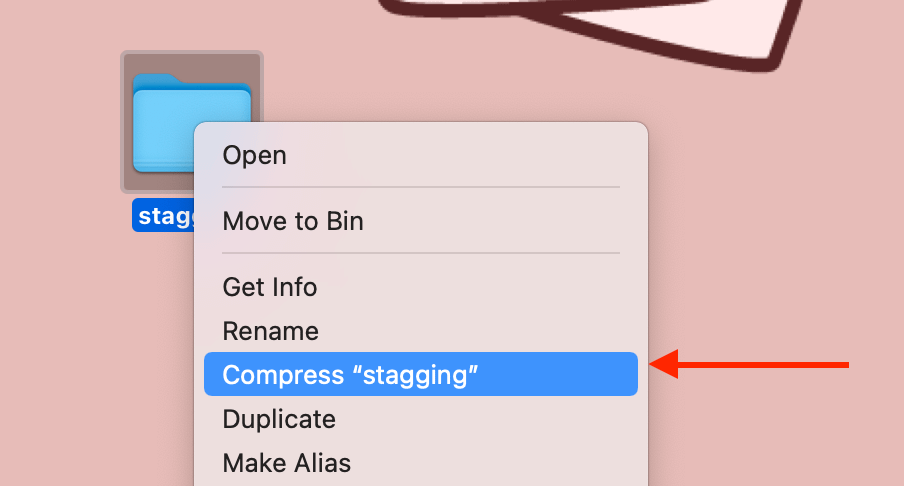
5. The next step is to upload this site-specific plugin to WordPress. Select the folder and compress it.
6. Go to Plugins > Add New and upload the site-specific plugin archive.
7. Click on Install and then Activate.

That's it! You have installed the site-specific plugin.
Using the Pluginception plugin
1. Install the Pluginception plugin: https://wordpress.org/plugins/pluginception/
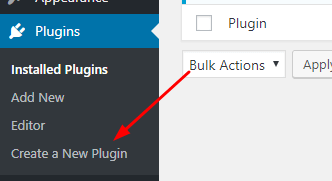
2. Select Create a New Plugin under the plugin menu options
3. Fill out the plugin options, be sure to include the word Site Specific in the title so any other WordPress webmaster debugging your website will know that the plugin is a custom one.
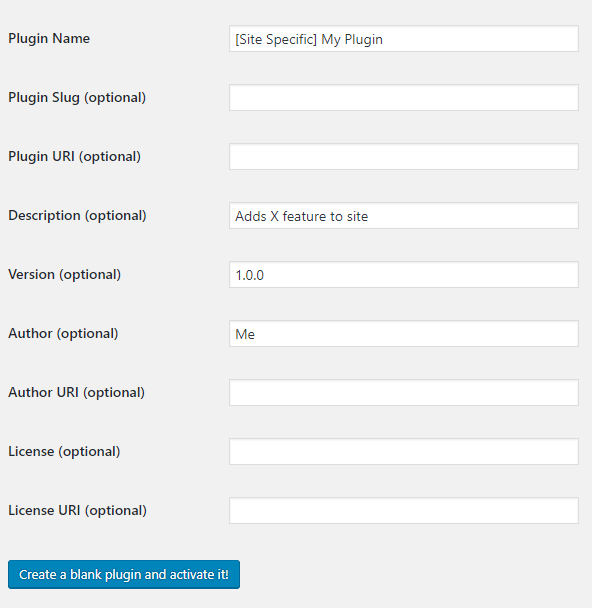
Click Create a blank plugin and activate it!
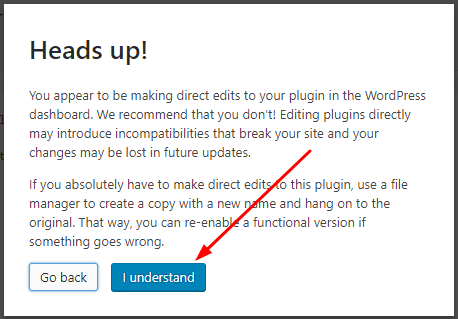
4. The page will automatically be redirected to the plugin edit screen. You might get a message like the one below; simply click I understand.
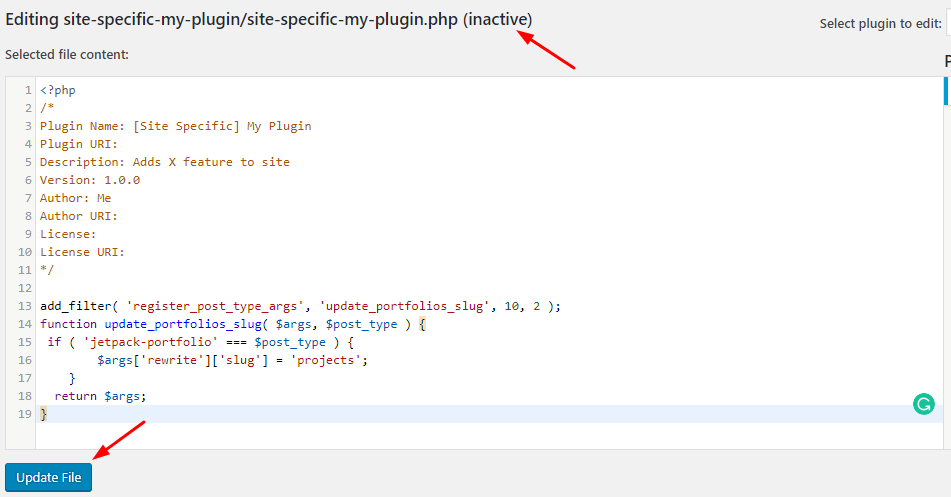
Paste the code snippet you received from our doc into the edit area and click Update File. Notice the activation status at the top next to the plugin file path. If it says inactive, you need to activate the plugin from your plugins area after updating the file.
 That's it! You should now have a site-specific plugin with the modification from our doc without having to create a child theme or log into your site via FTP.