How to Configure the Very Top Bar in Hestia
The Very Top Bar is the highest-positioned section on the site, just above the navigation area. It is divided into two panels: General Settings and Appearance Settings.

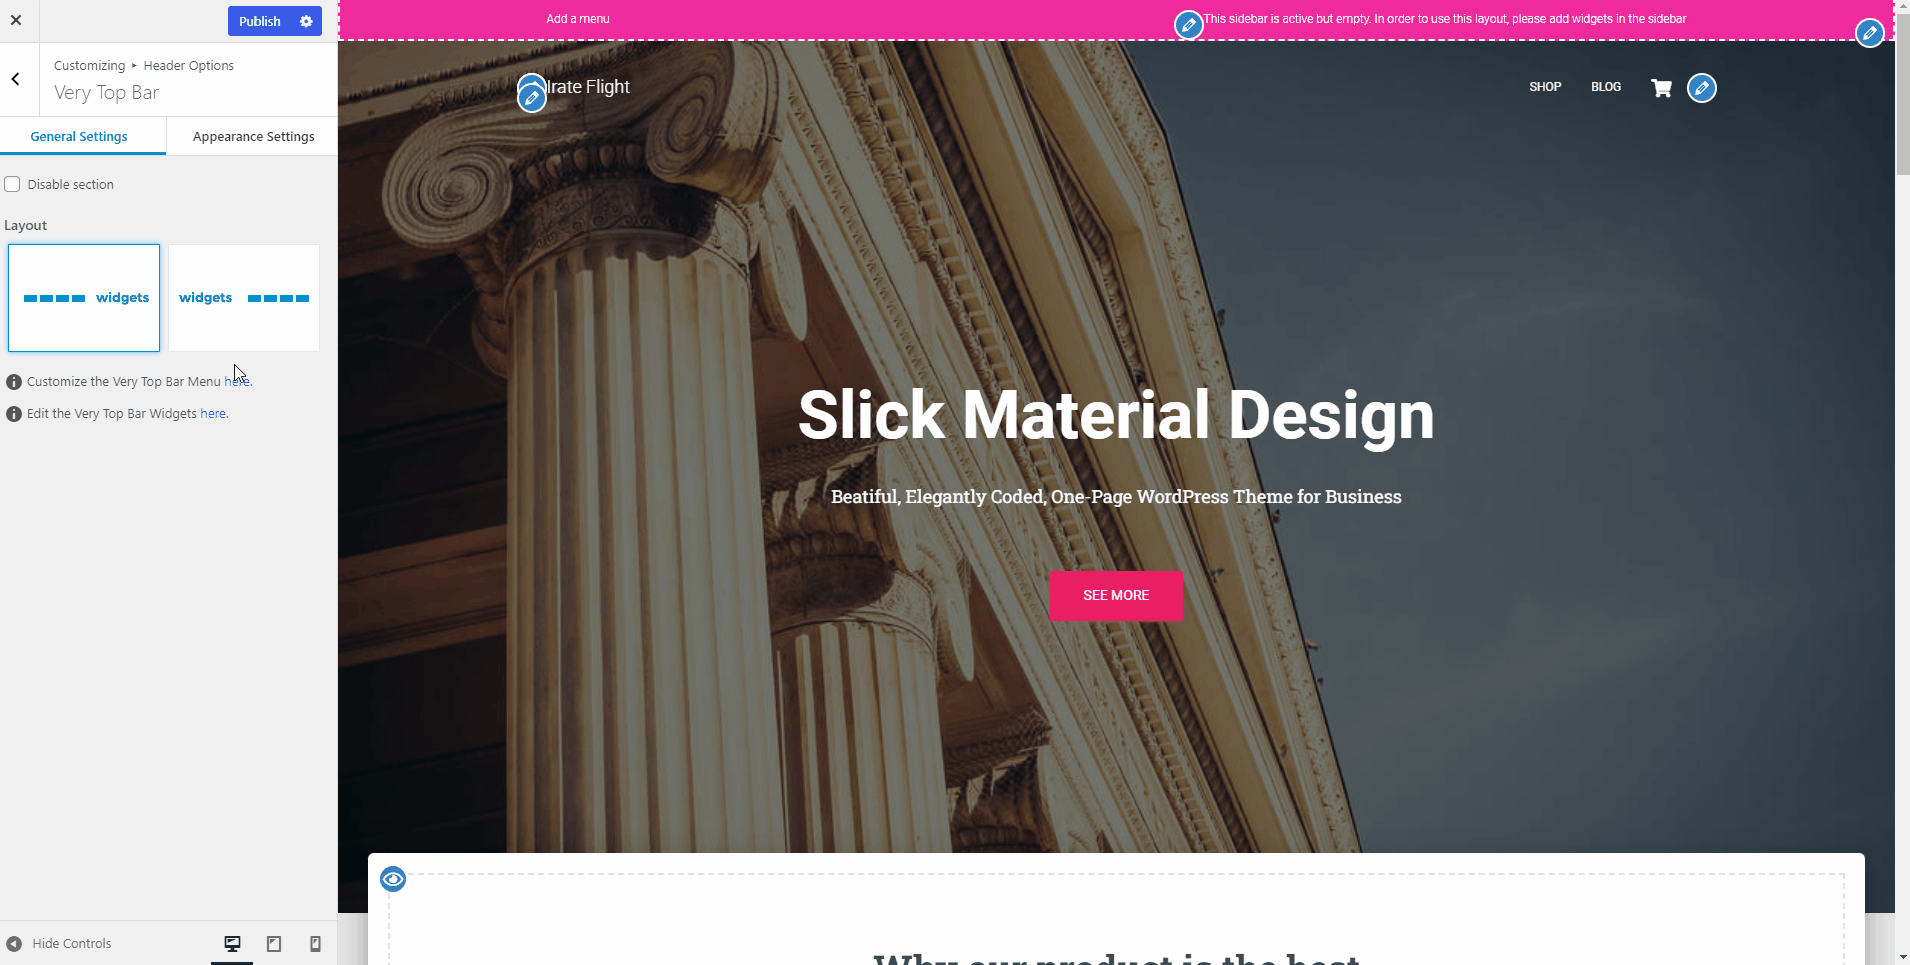
By navigating to Header Options > Very Top Bar, you will find the following panel:
- General Settings
- Enable / disable the section
- The Very Top Bar menu
- The Very Top Bar widget area
- Layout
- Appearance Settings
- Colors
In this doc, we'll show you step-by-step how to configure the very top bar menu in Hestia.
In this article
Enabling the Very Top Bar section
The first step in configuring the Very Top Bar in Hestia is activating it from Customizer.
1. Navigate to Appearance > Customize > Header Options.
2. Open the Very Top Bar panel.
3. Uncheck the " Disable section" option.
- The section is disabled by default.

The Very Top Bar menu
To add elements to the menu, navigate to Appearance > Menus > Add menu items > Custom Links:
- in the URL - mention the link.
- in the link text - add the name/number.
There are two ways to configure the Very Top Bar menu:
- directly from Header Options > Very Top Bar.
- from the admin area: Appearance > Menus > Manage Locations and check the Very Top Bar Menu.
In this menu, you can add:
contact details like e-mail and phone number (preceded by icons)
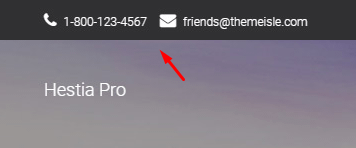
- E-mails and phone numbers will be preceded by icons only if the links are preceded by tel: and mailto: in the URLs_; otherwise_, they will be displayed as normal links.
social media icons (display only icons)
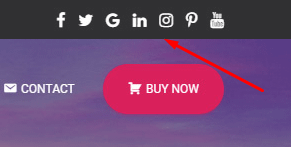
The external links to social media accounts will be displayed only as icons in the top bar menu
normal links
📝 Note: The Very Top Bar menu supports only one level of the dropdown menu.
The Very Top Bar widgets area
In Header Options > Very Top Bar, you can add widgets in the widget area. Any widget can be used in this widget area, but for proper display, we recommend using one of the following widgets:
- Custom menu
- Categories
- Search
- Text
- WooCommerce Cart
- WooCommerce Product Categories
- WooCommerce Product Search

Layout and alignment [PRO only]
The Very Top Bar layout is composed of a menu and a widget area. By default, the menu is positioned on the left side, while the widget area is on the right. You can also change this layout in Header Options > Very Top Bar > General Settings.
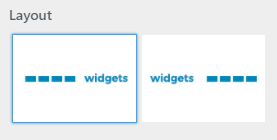
📝 Note: Only the area on the left side will be displayed on mobile devices (responsive mode).
📌If you want to have only one of the areas ( menu or widget area ), you need just not select a menu for the Top menu location or don't add widgets in the corresponding widgets area.
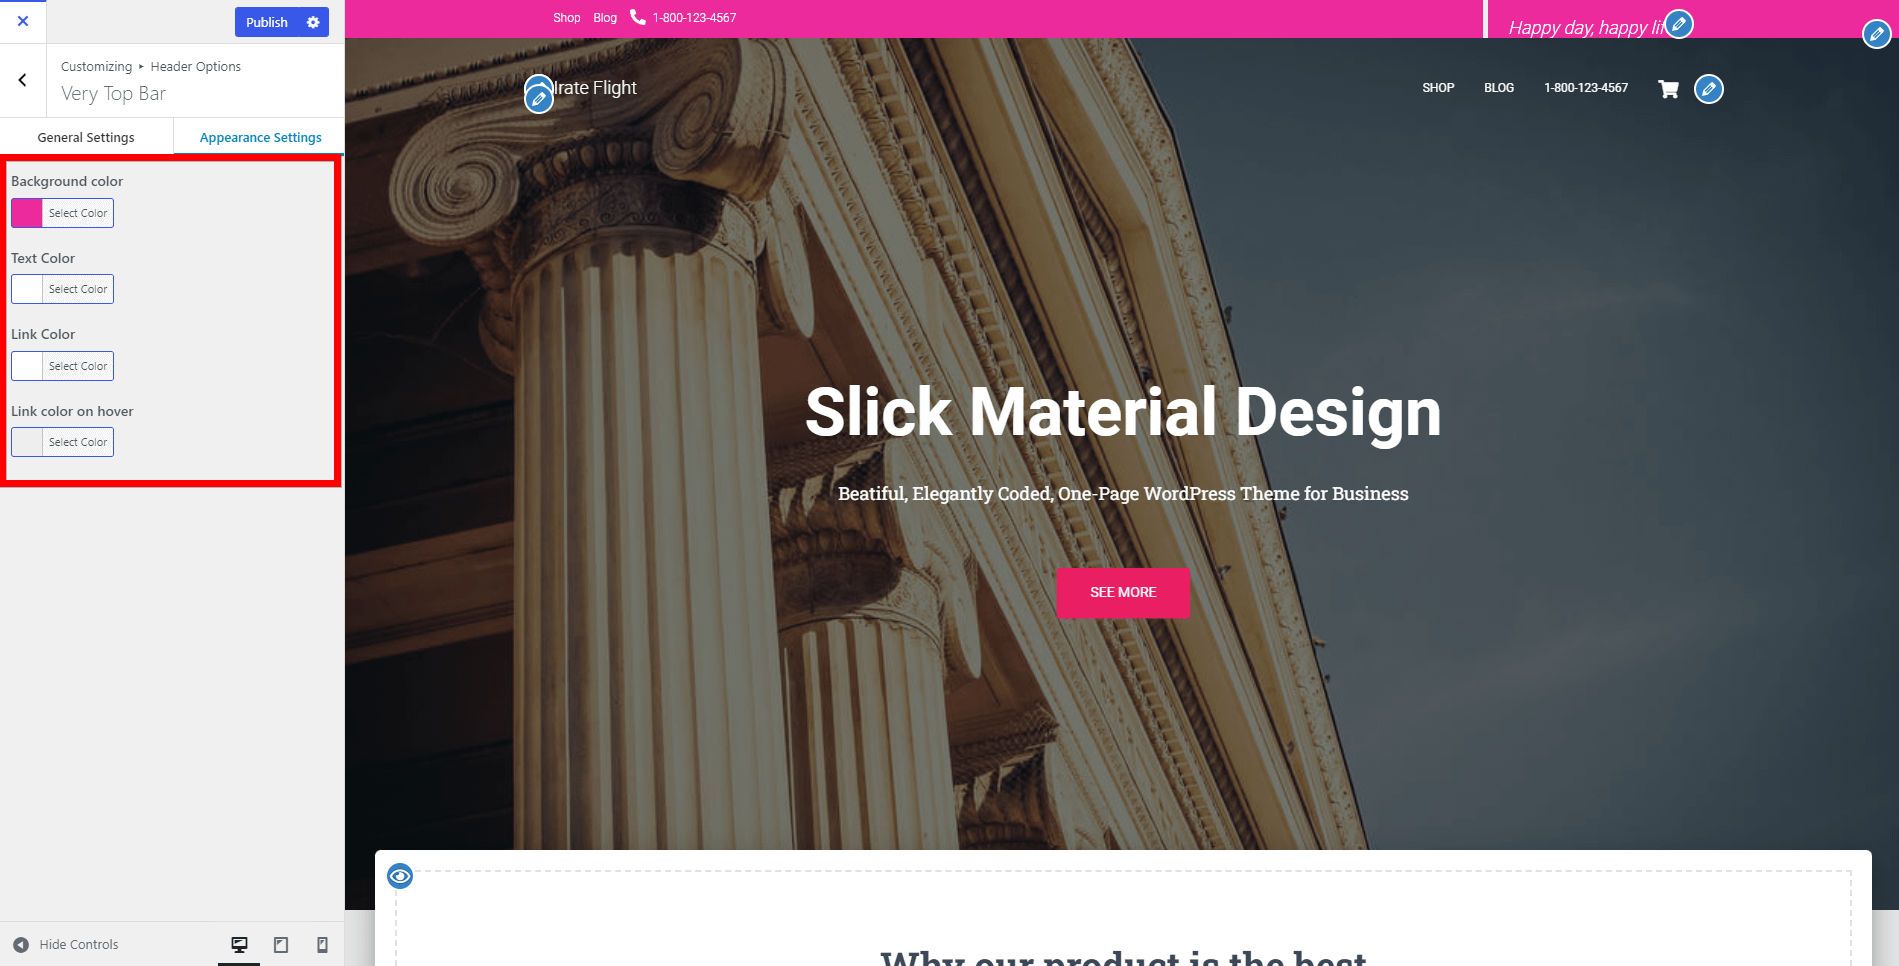
Changing the colors [PRO only]
In Header Options > Very Top Bar > Appearance Settings, you can also change the background color of the entire section, as well as the colors of the text and links.
- Background color - choose a color for the very top bar.
- Text Color - choose the color of the test.
- Link Color - choose a color for the link (eg. Add a menu).
- Link color on hover - choose the color of the link when you hover with the mouse.
Making the Very Top Bar Sticky [PRO only]
By default, the Very Top Bar scrolls away when the visitor scrolls down the page. The built-in Sticky Navbar option in Hestia Pro applies only to the main navigation bar, not to the Very Top Bar. To keep the Very Top Bar fixed at the top of the screen at all times, you need to add custom CSS.
1. Navigate to Appearance > Customize > Additional CSS.
2. Paste the following snippet and click Publish:
/* === Sticky Very Top Bar === */

/* Logged-out visitors (no WP admin bar) */
.hestia-top-bar {
  position: fixed !important;
  top: 0 !important;
  left: 0 !important;
  right: 0 !important;
  width: 100% !important;
  z-index: 1031 !important;
}

nav.navbar.navbar-fixed-top,
.navbar-fixed-top {
  top: 40px !important; /* height of the top bar */
}

.wrapper {
  padding-top: 40px !important;
}

/* Logged-in users (WP admin bar adds 32px at top) */
.admin-bar .hestia-top-bar {
  top: 32px !important;
}

.admin-bar nav.navbar.navbar-fixed-top,
.admin-bar .navbar-fixed-top {
  top: 72px !important; /* 32px admin bar + 40px top bar */
}
📝 Note: The top: 40px value assumes your Very Top Bar is approximately 40 px tall. If you have changed the font size or padding, adjust this value to match the actual rendered height of your top bar.
⚠️ Important: If elements such as dropdown menus or the sticky header overlap the Very Top Bar after applying this CSS, increase the z-index value on .hestia-top-bar until the layering looks correct.
Examples of Top Bar
1. Right: Top bar menu (contact information and social media links )

2. Left: Top bar menu (contact information )Right: Custom menu widget (social media links )

3. Left: Top bar menu ( social media links )

4. Right: Custom menu widget (e-commerce useful links )

5. Left: Top bar menu (contact information )Right: Custom menu widget (e-commerce useful links )

6. Left: Top bar menu (contact information and social media links )Right: WooCommerce Product Categories widget

7. Left: Text widget (simple text) Right:(links and contact information )

8. Left: Top bar menu (contact information)Right: WooCommerce Cart and WooCommerce Product Search widgets

9. Left: Top bar menu (social media links)Right: Search widget

10. Right: Categories widget (with show post counts option checked)
