How to Use Webhooks in Otter Forms?
📝 Note: This article presents specific settings of the Otter Forms, and it is a premium feature that you can get from here.
The Otter Forms creates a wide palette of use cases, including the communication between form submissions and an external given URL (application). For example, after submitting the form, an SMS, email, or message can be sent to specific applications using this Webhook service.
In this article
Webhook Editor
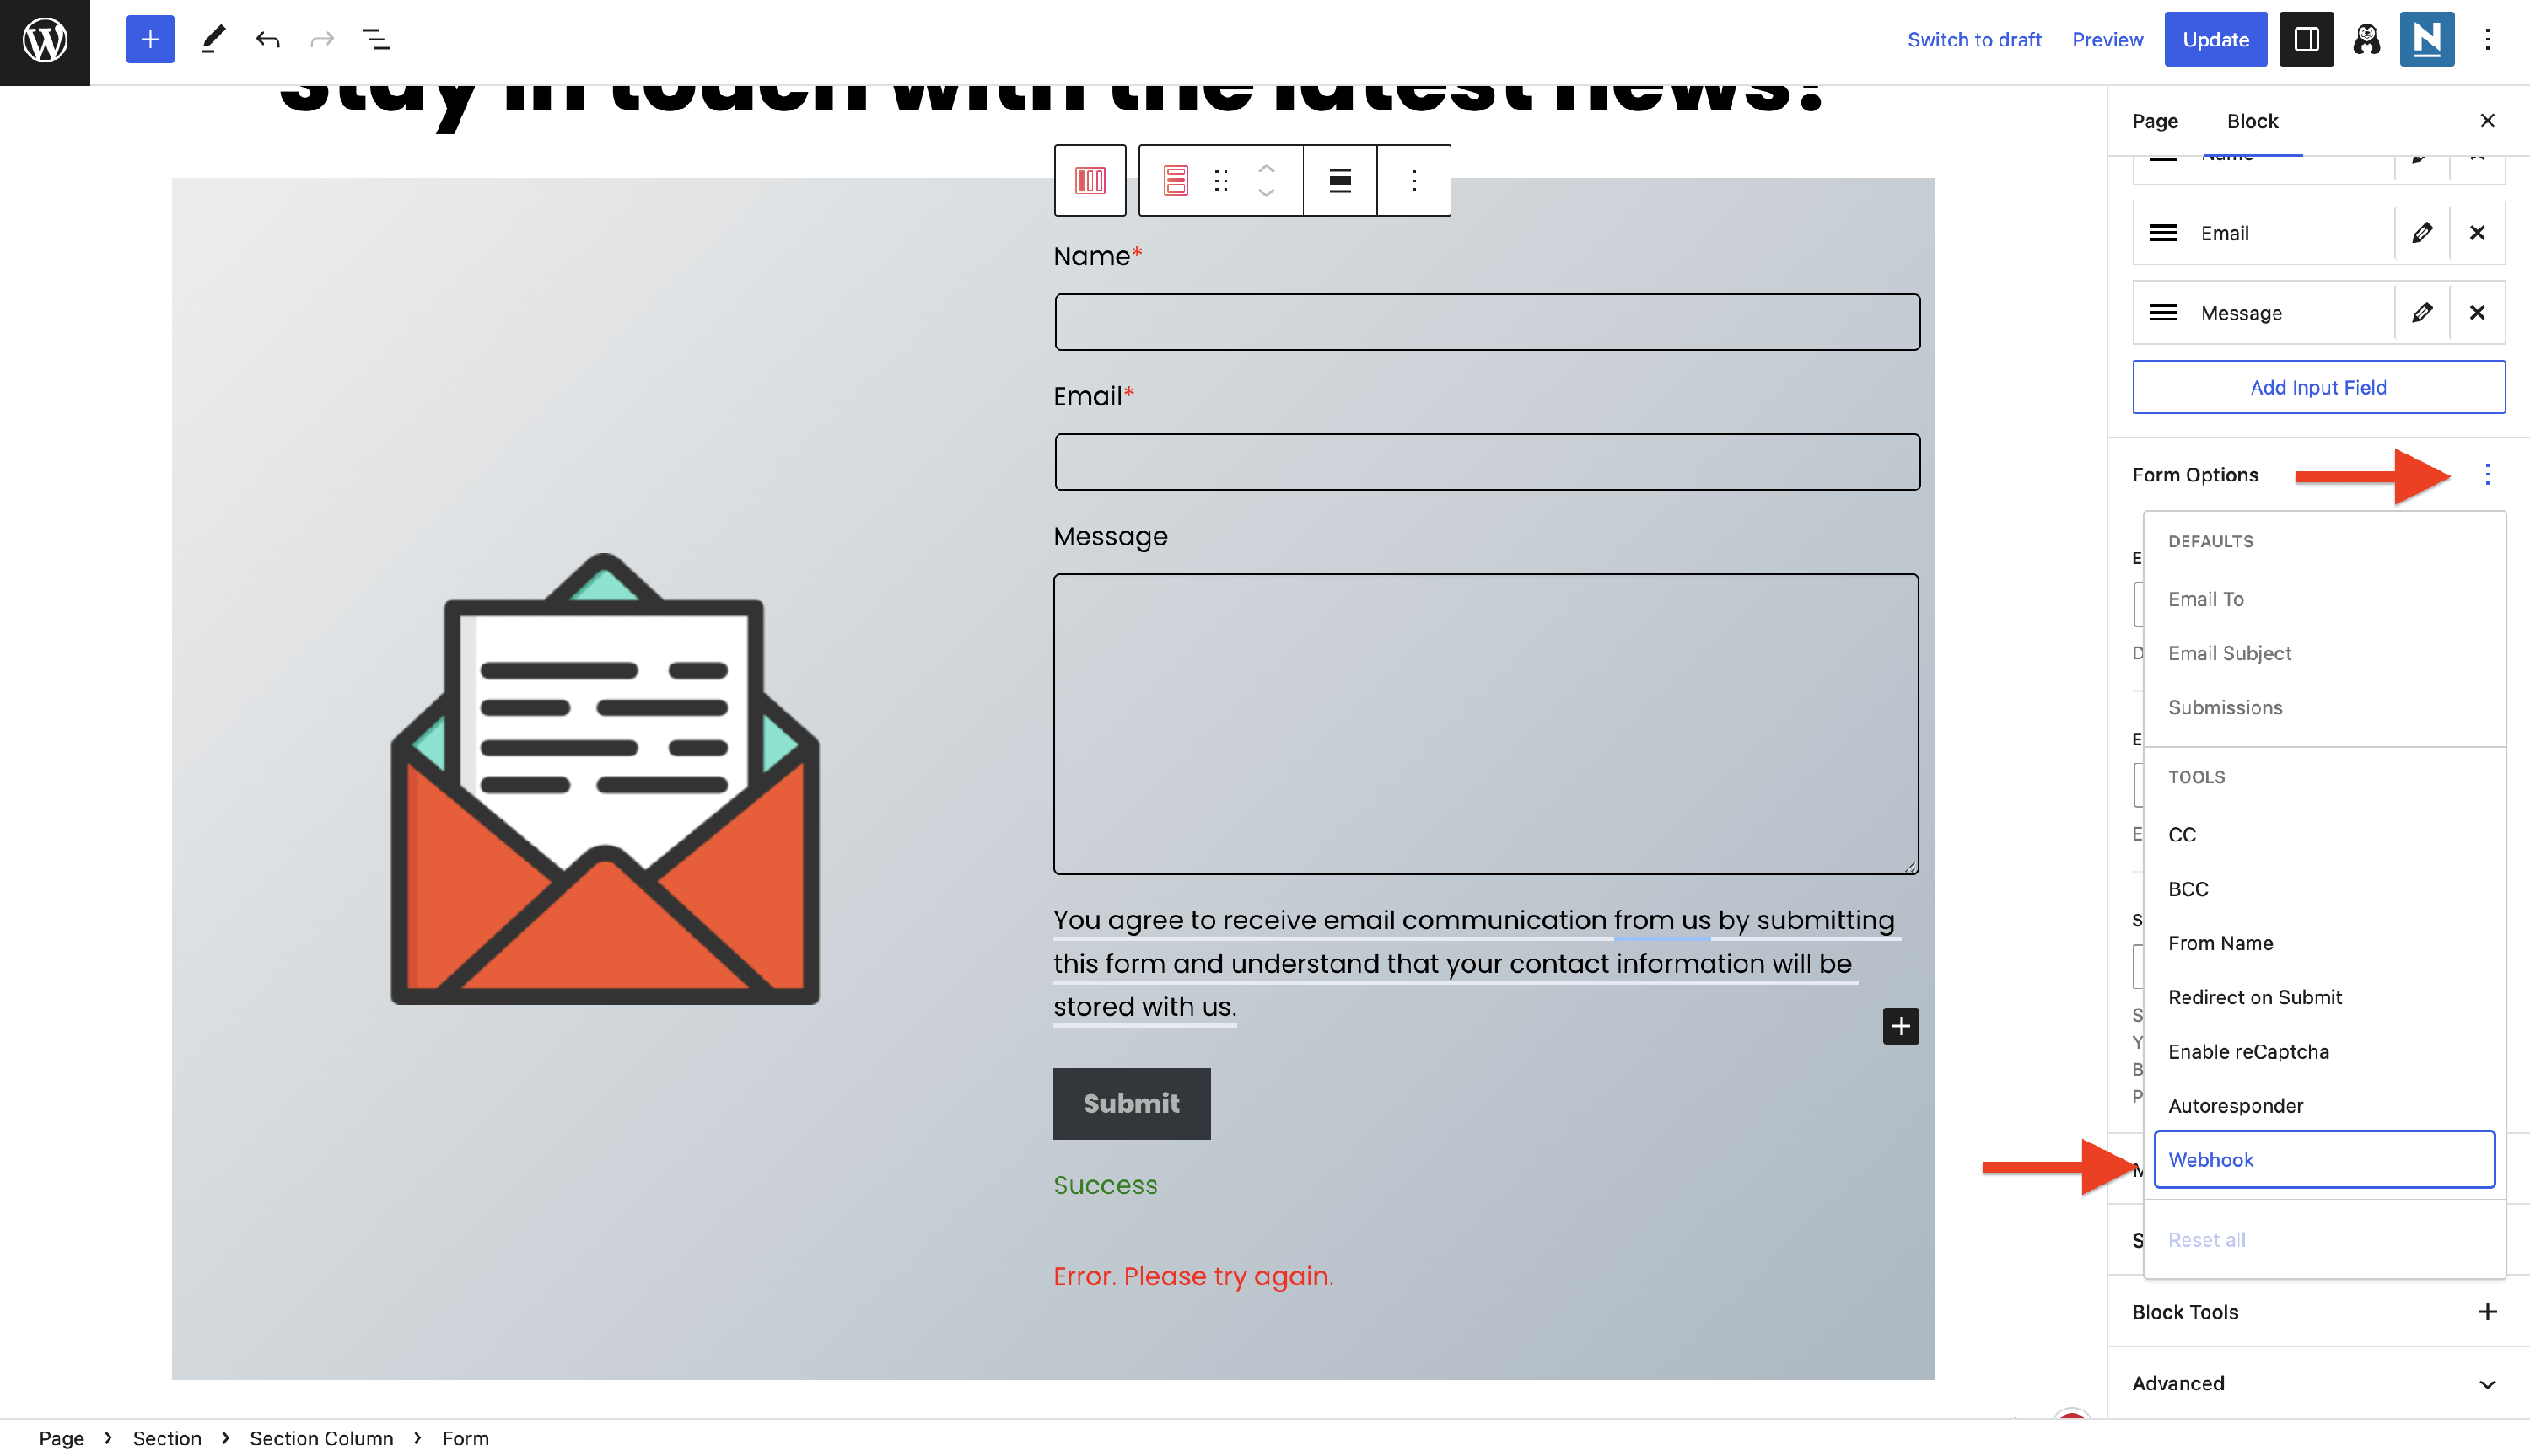
To enable the Webhook, open Form settings, click on the three dots, and select Webhook.
After this, you will be able to select existing Webhooks, edit them, or create new ones:
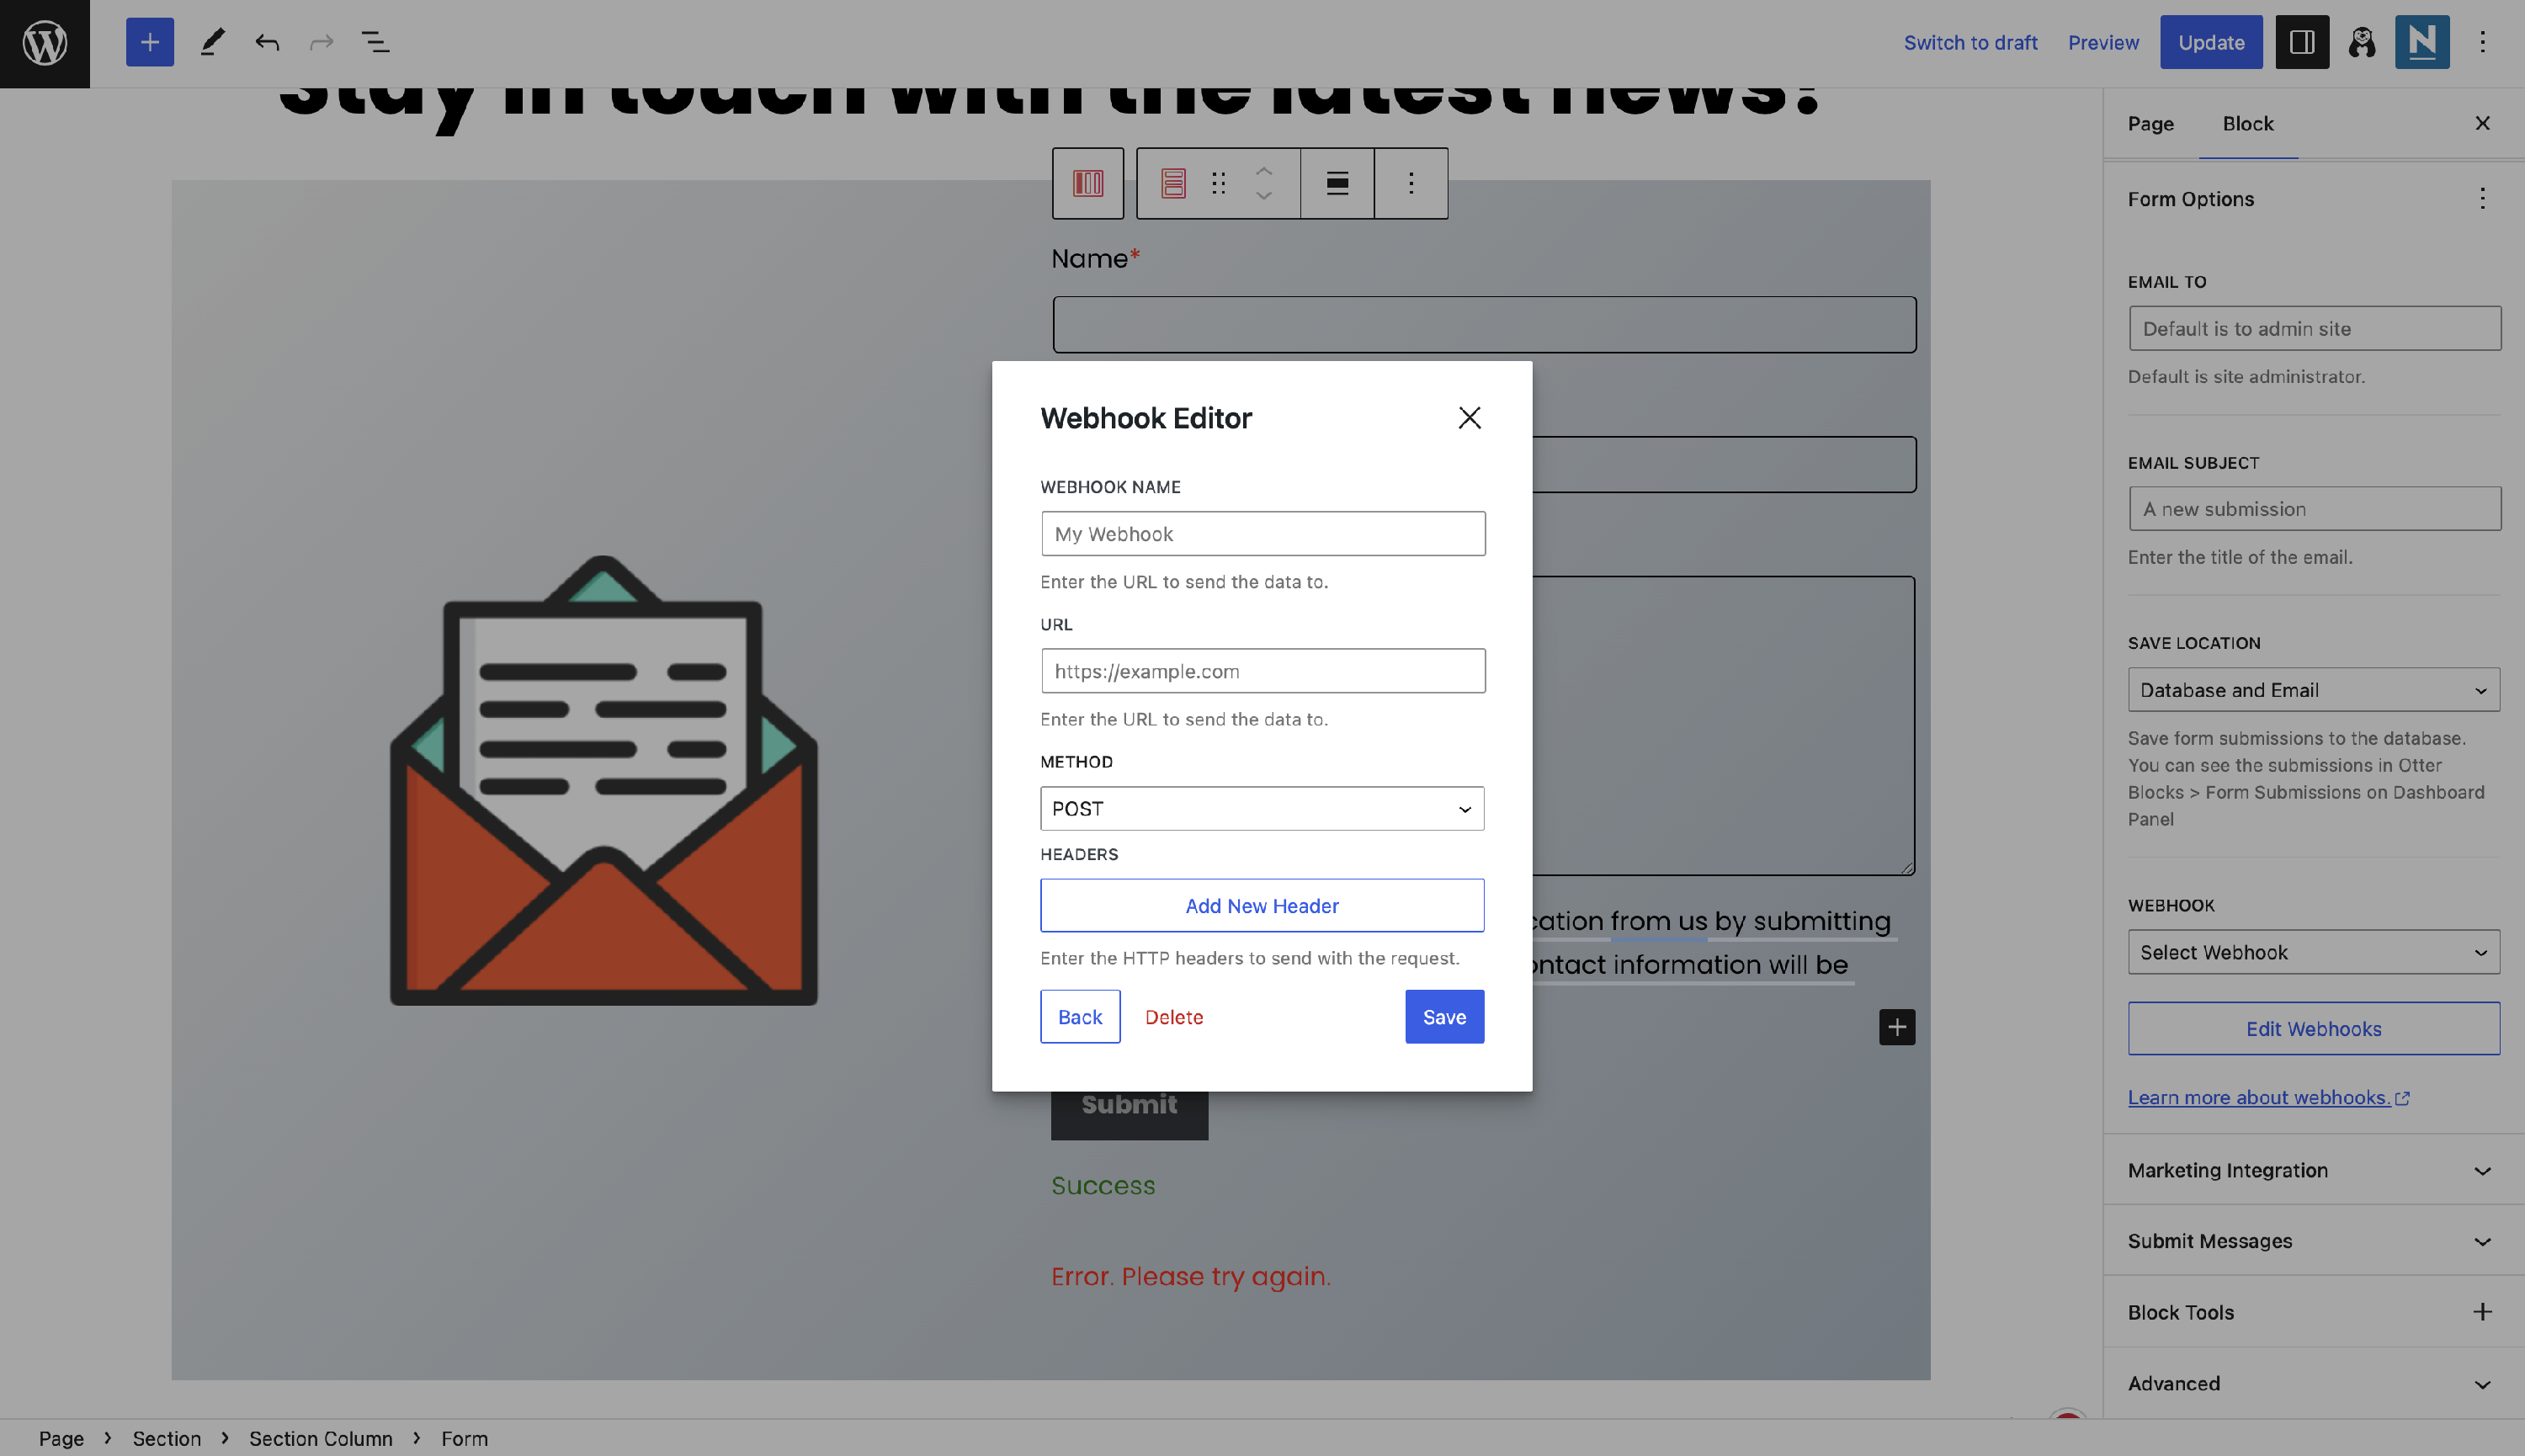
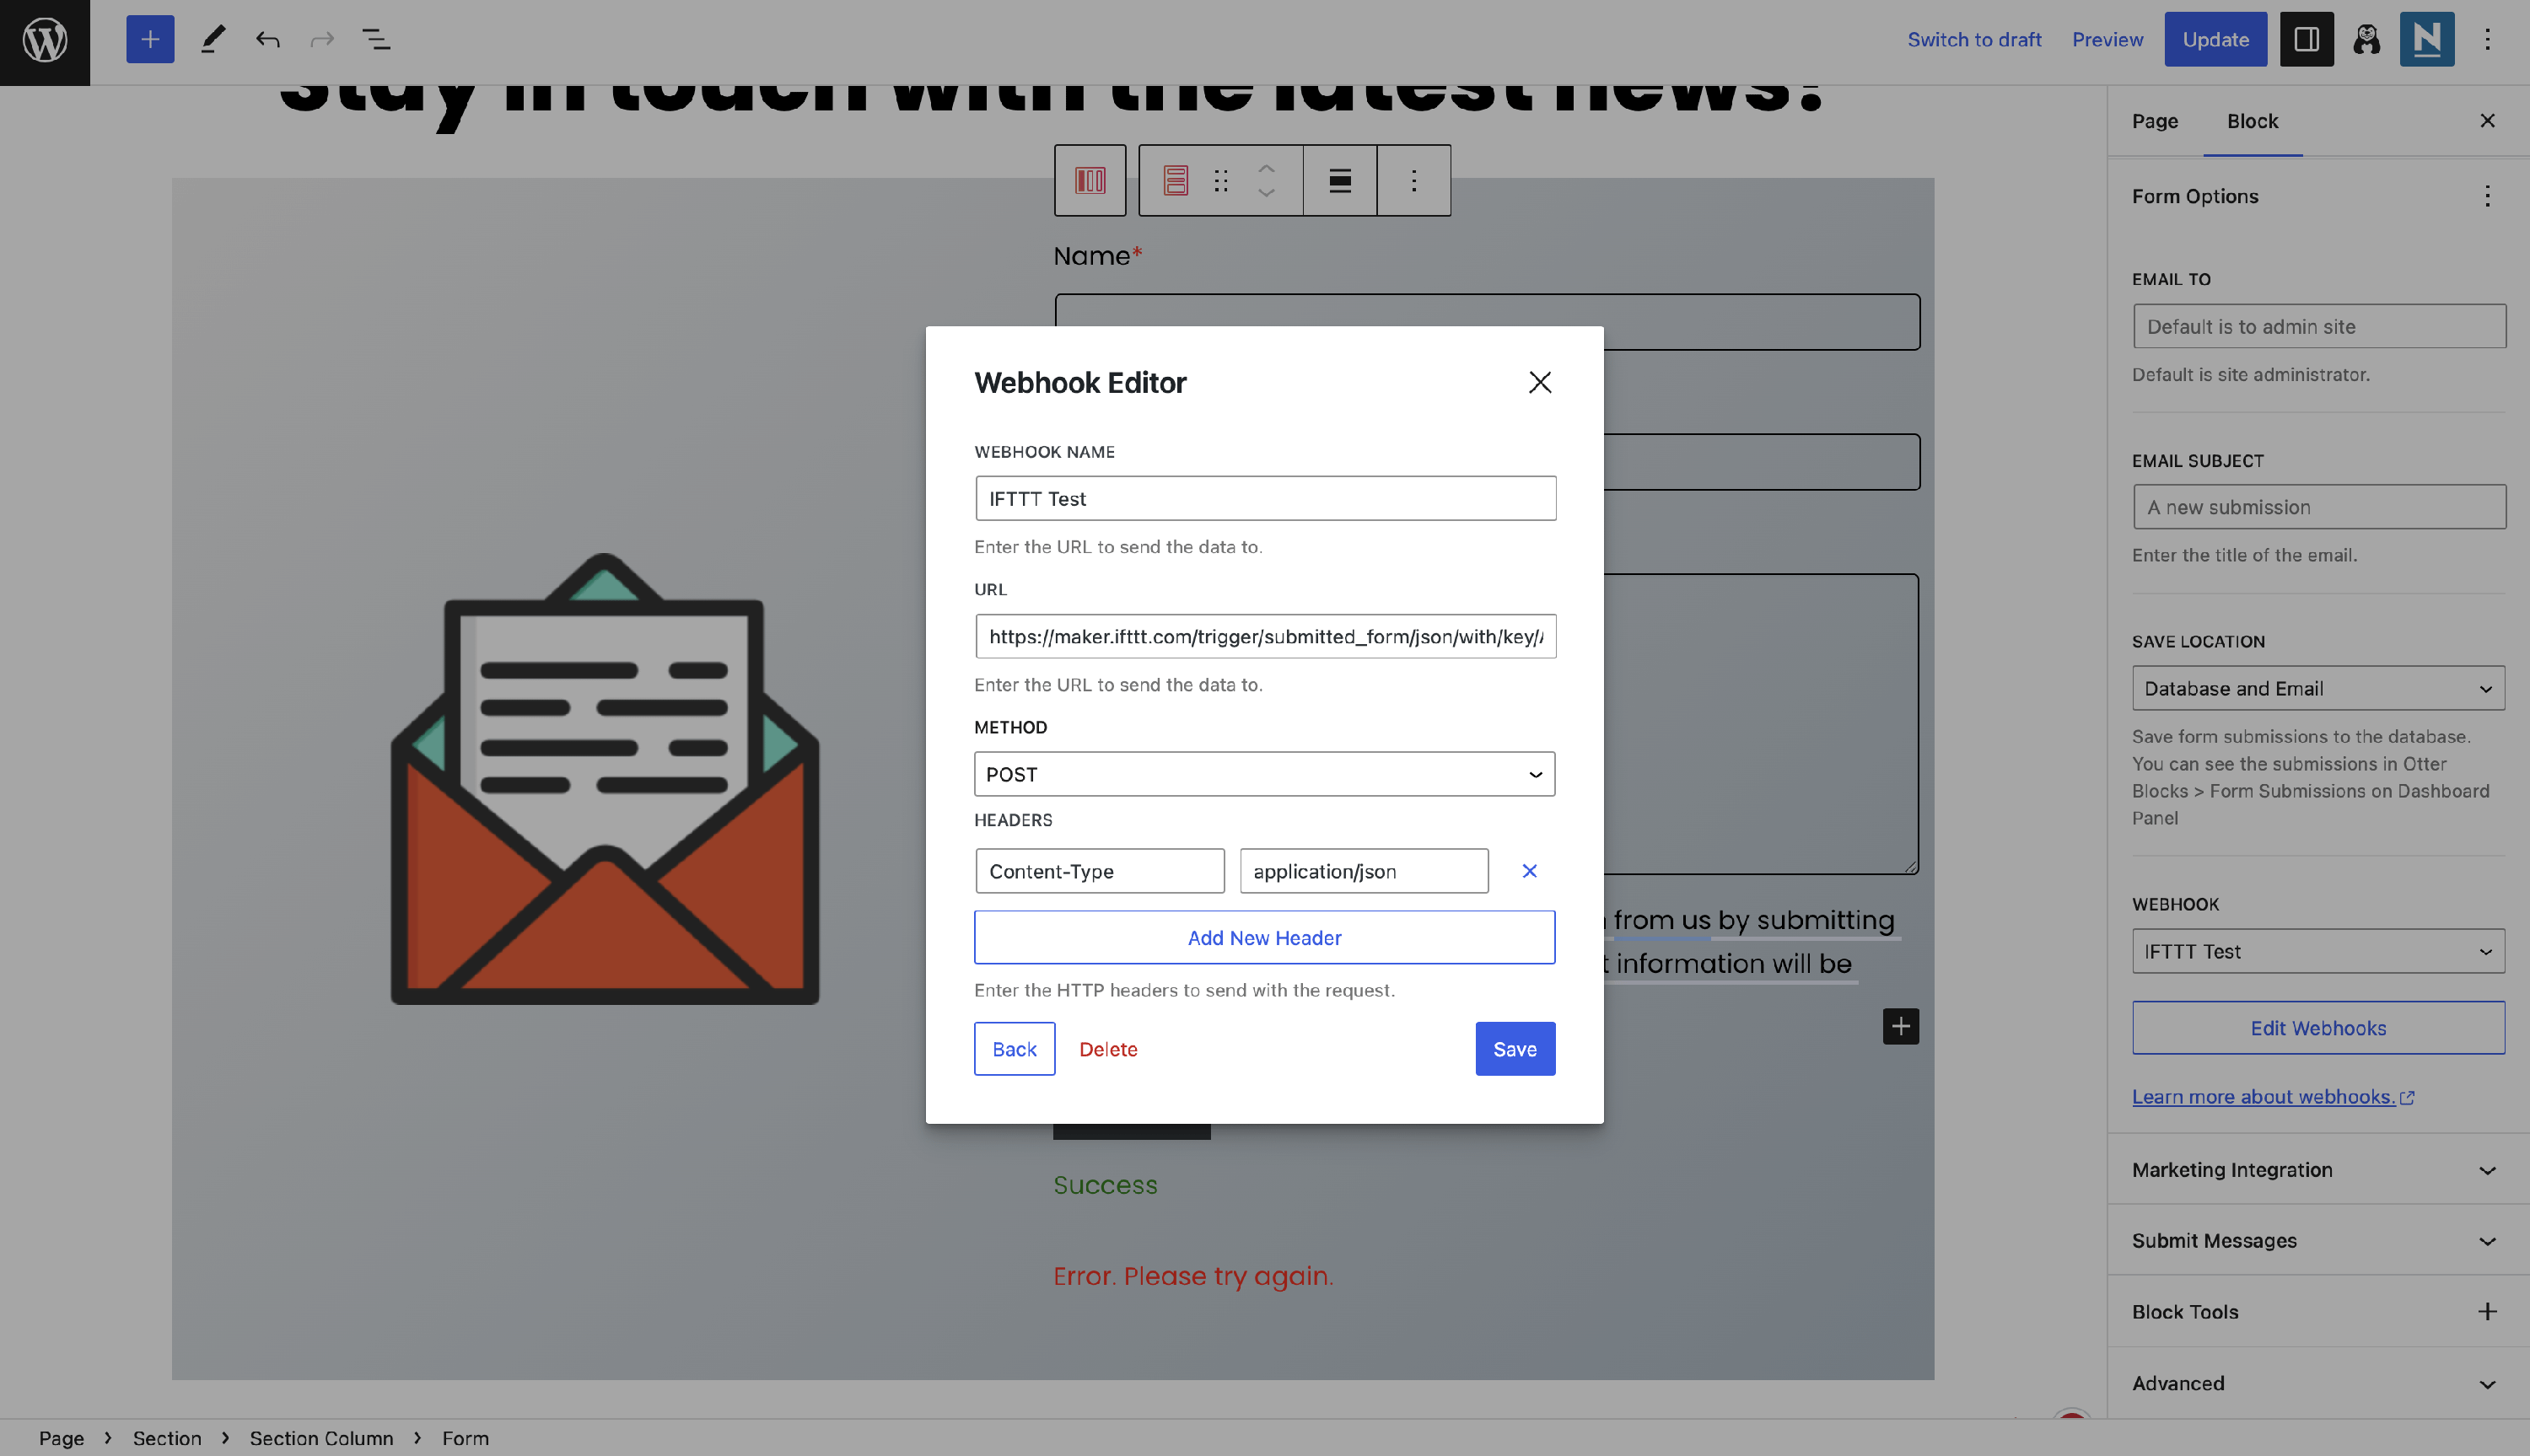
When you try to create a new Webhook, the modal from the above screenshot appears. Here are the available options:
- Webhook Name - as suggested, insert the name of the application where the data goes.
- URL - insert the URL that will be used in the Webhook request. where the data is sent.
- Method - select from the dropdown the method that best suits your needs (POST/GET/PUT).
- Headers - allows you to specify HTTP headers to be sent along with the request.
Connect with Zapier
📝 Note: The steps presented in this doc are available after you create a Zapier account. The necessary trigger requires the Zapier Pro version.
In this example, we will establish a connection between the form submissions and our Slack workspace so that any time an answer is submitted, a Slack message will appear.
1. Create/Log into your Zapier account.
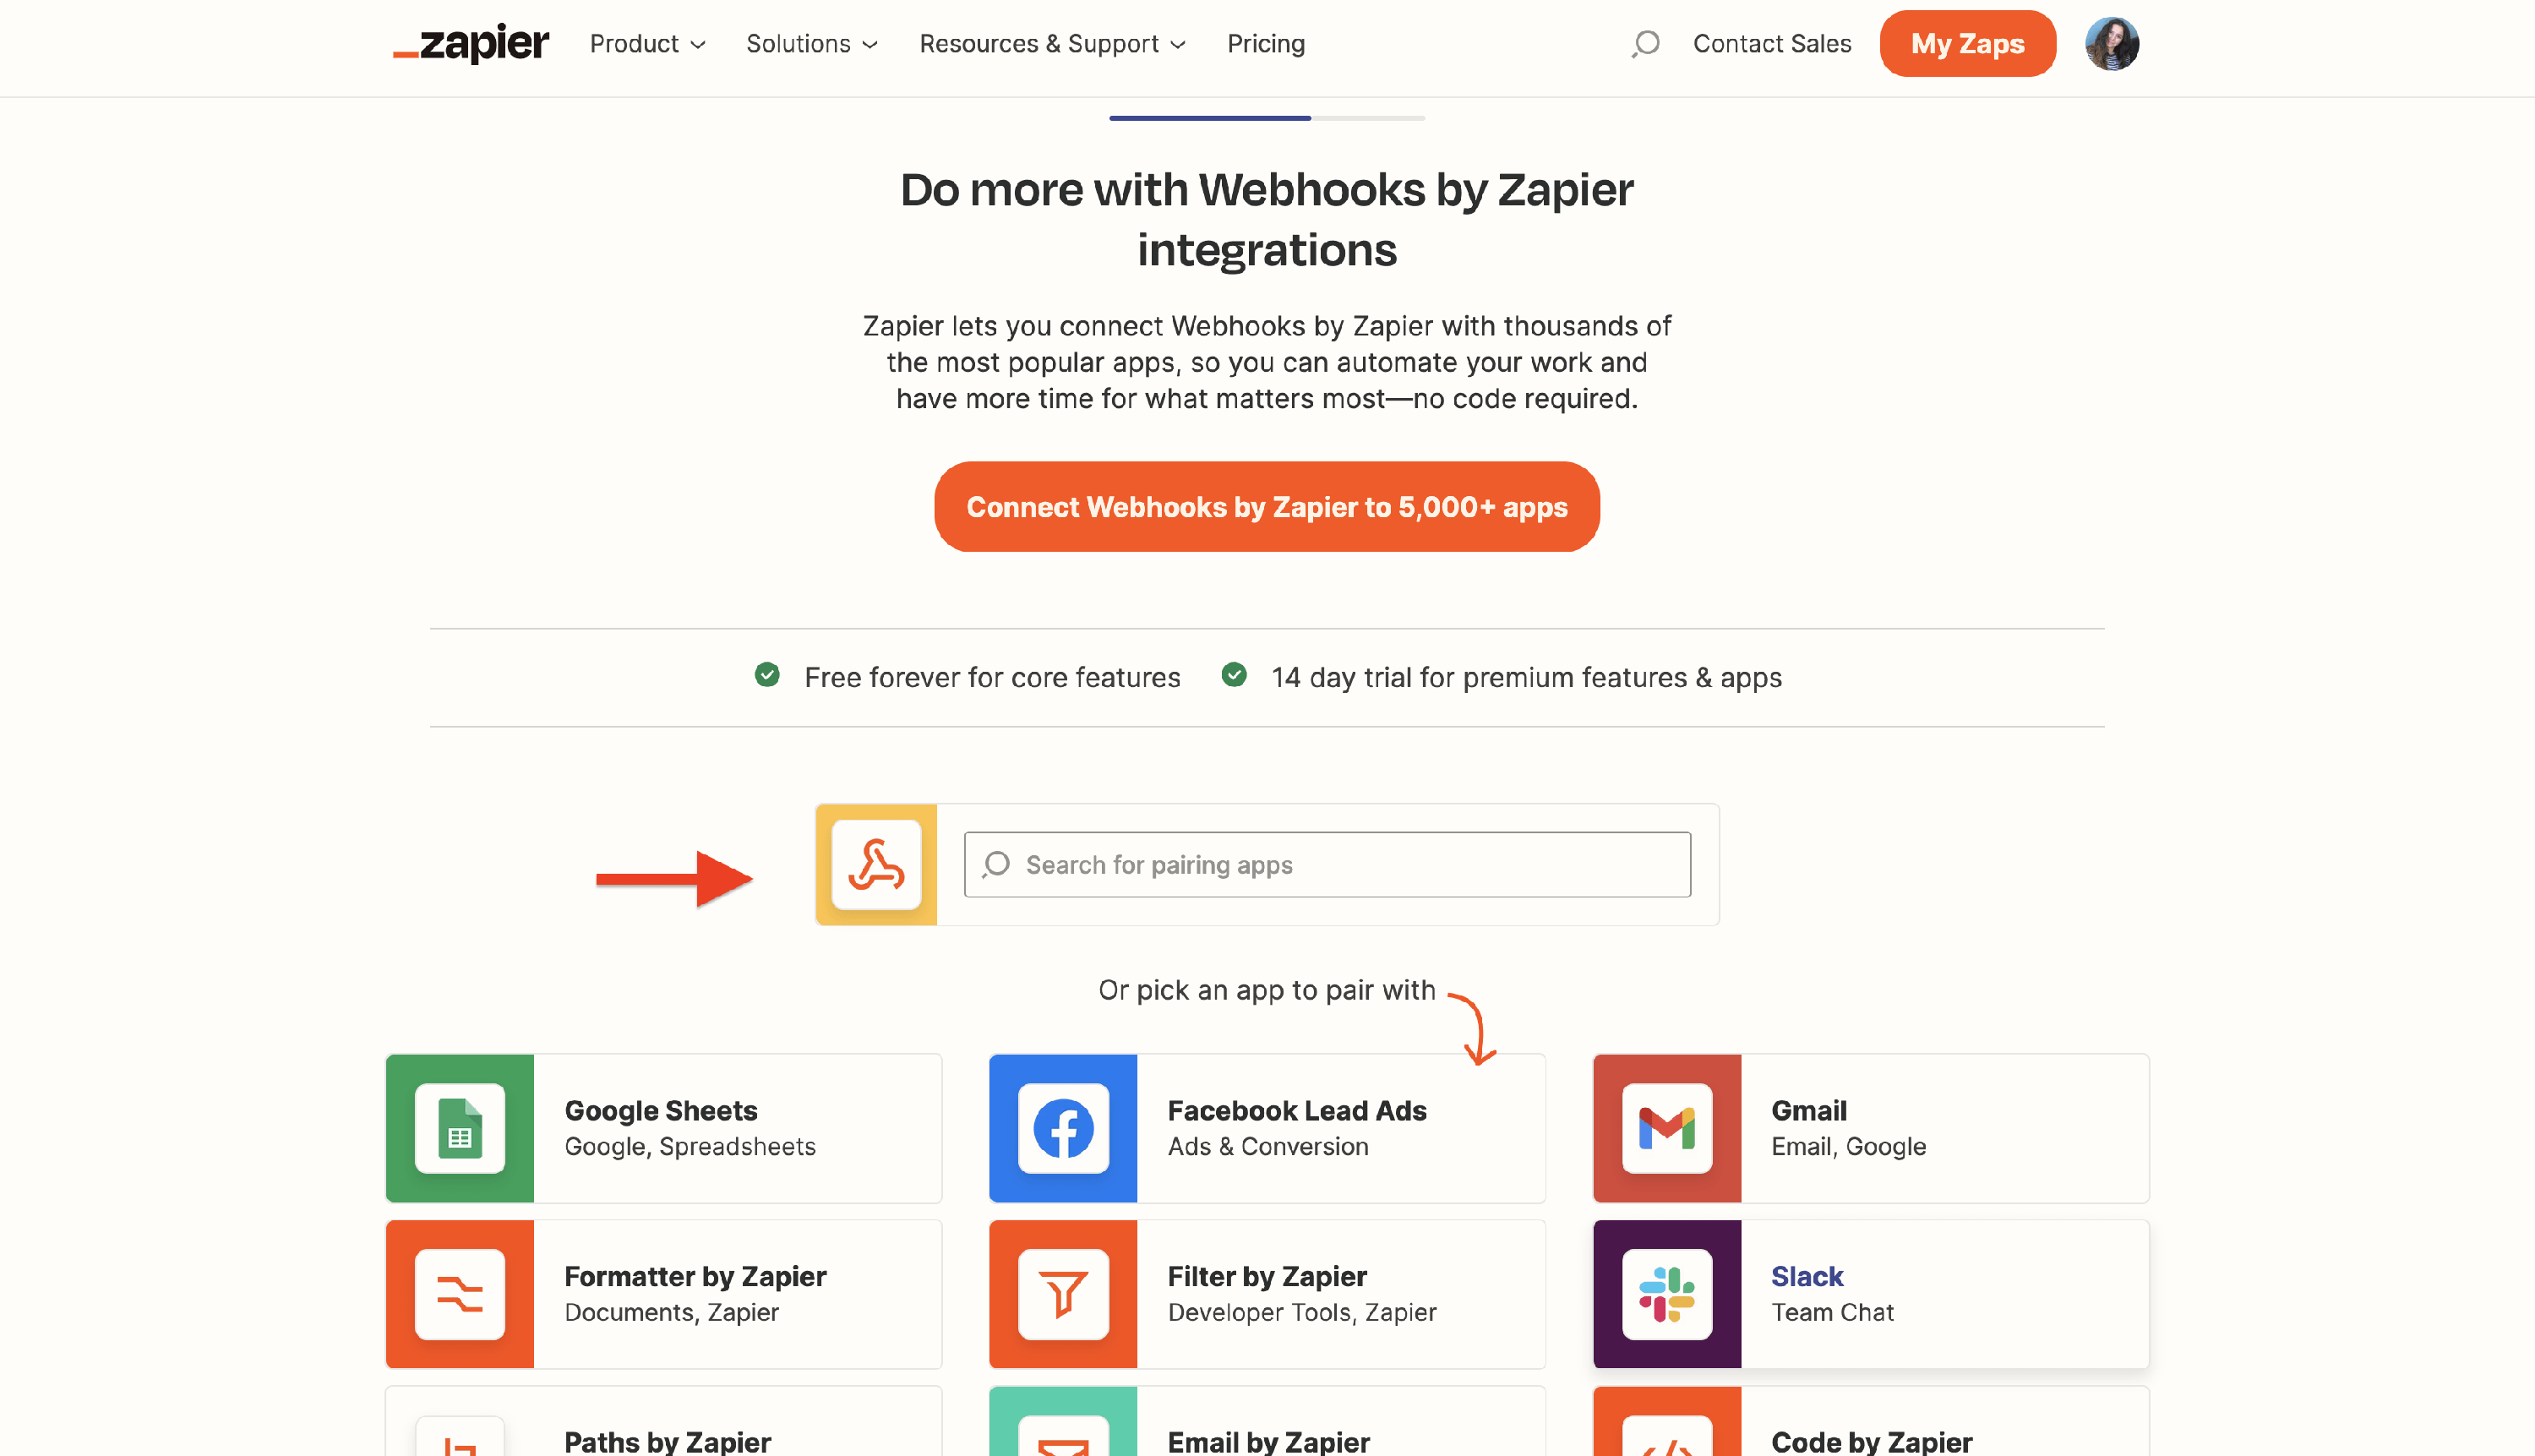
2. On the Webhook Integrations page, search for the external app (e.g. Slack).
3. In the Choose a Trigger dropdown, select Catch Hook.
4. In the Choose an Action dropdown, select the desired output (e.g. Send Channel Message).

5. After this, click on the Connect My Apps button.
6. Once the editor opens, click on the Trigger field.
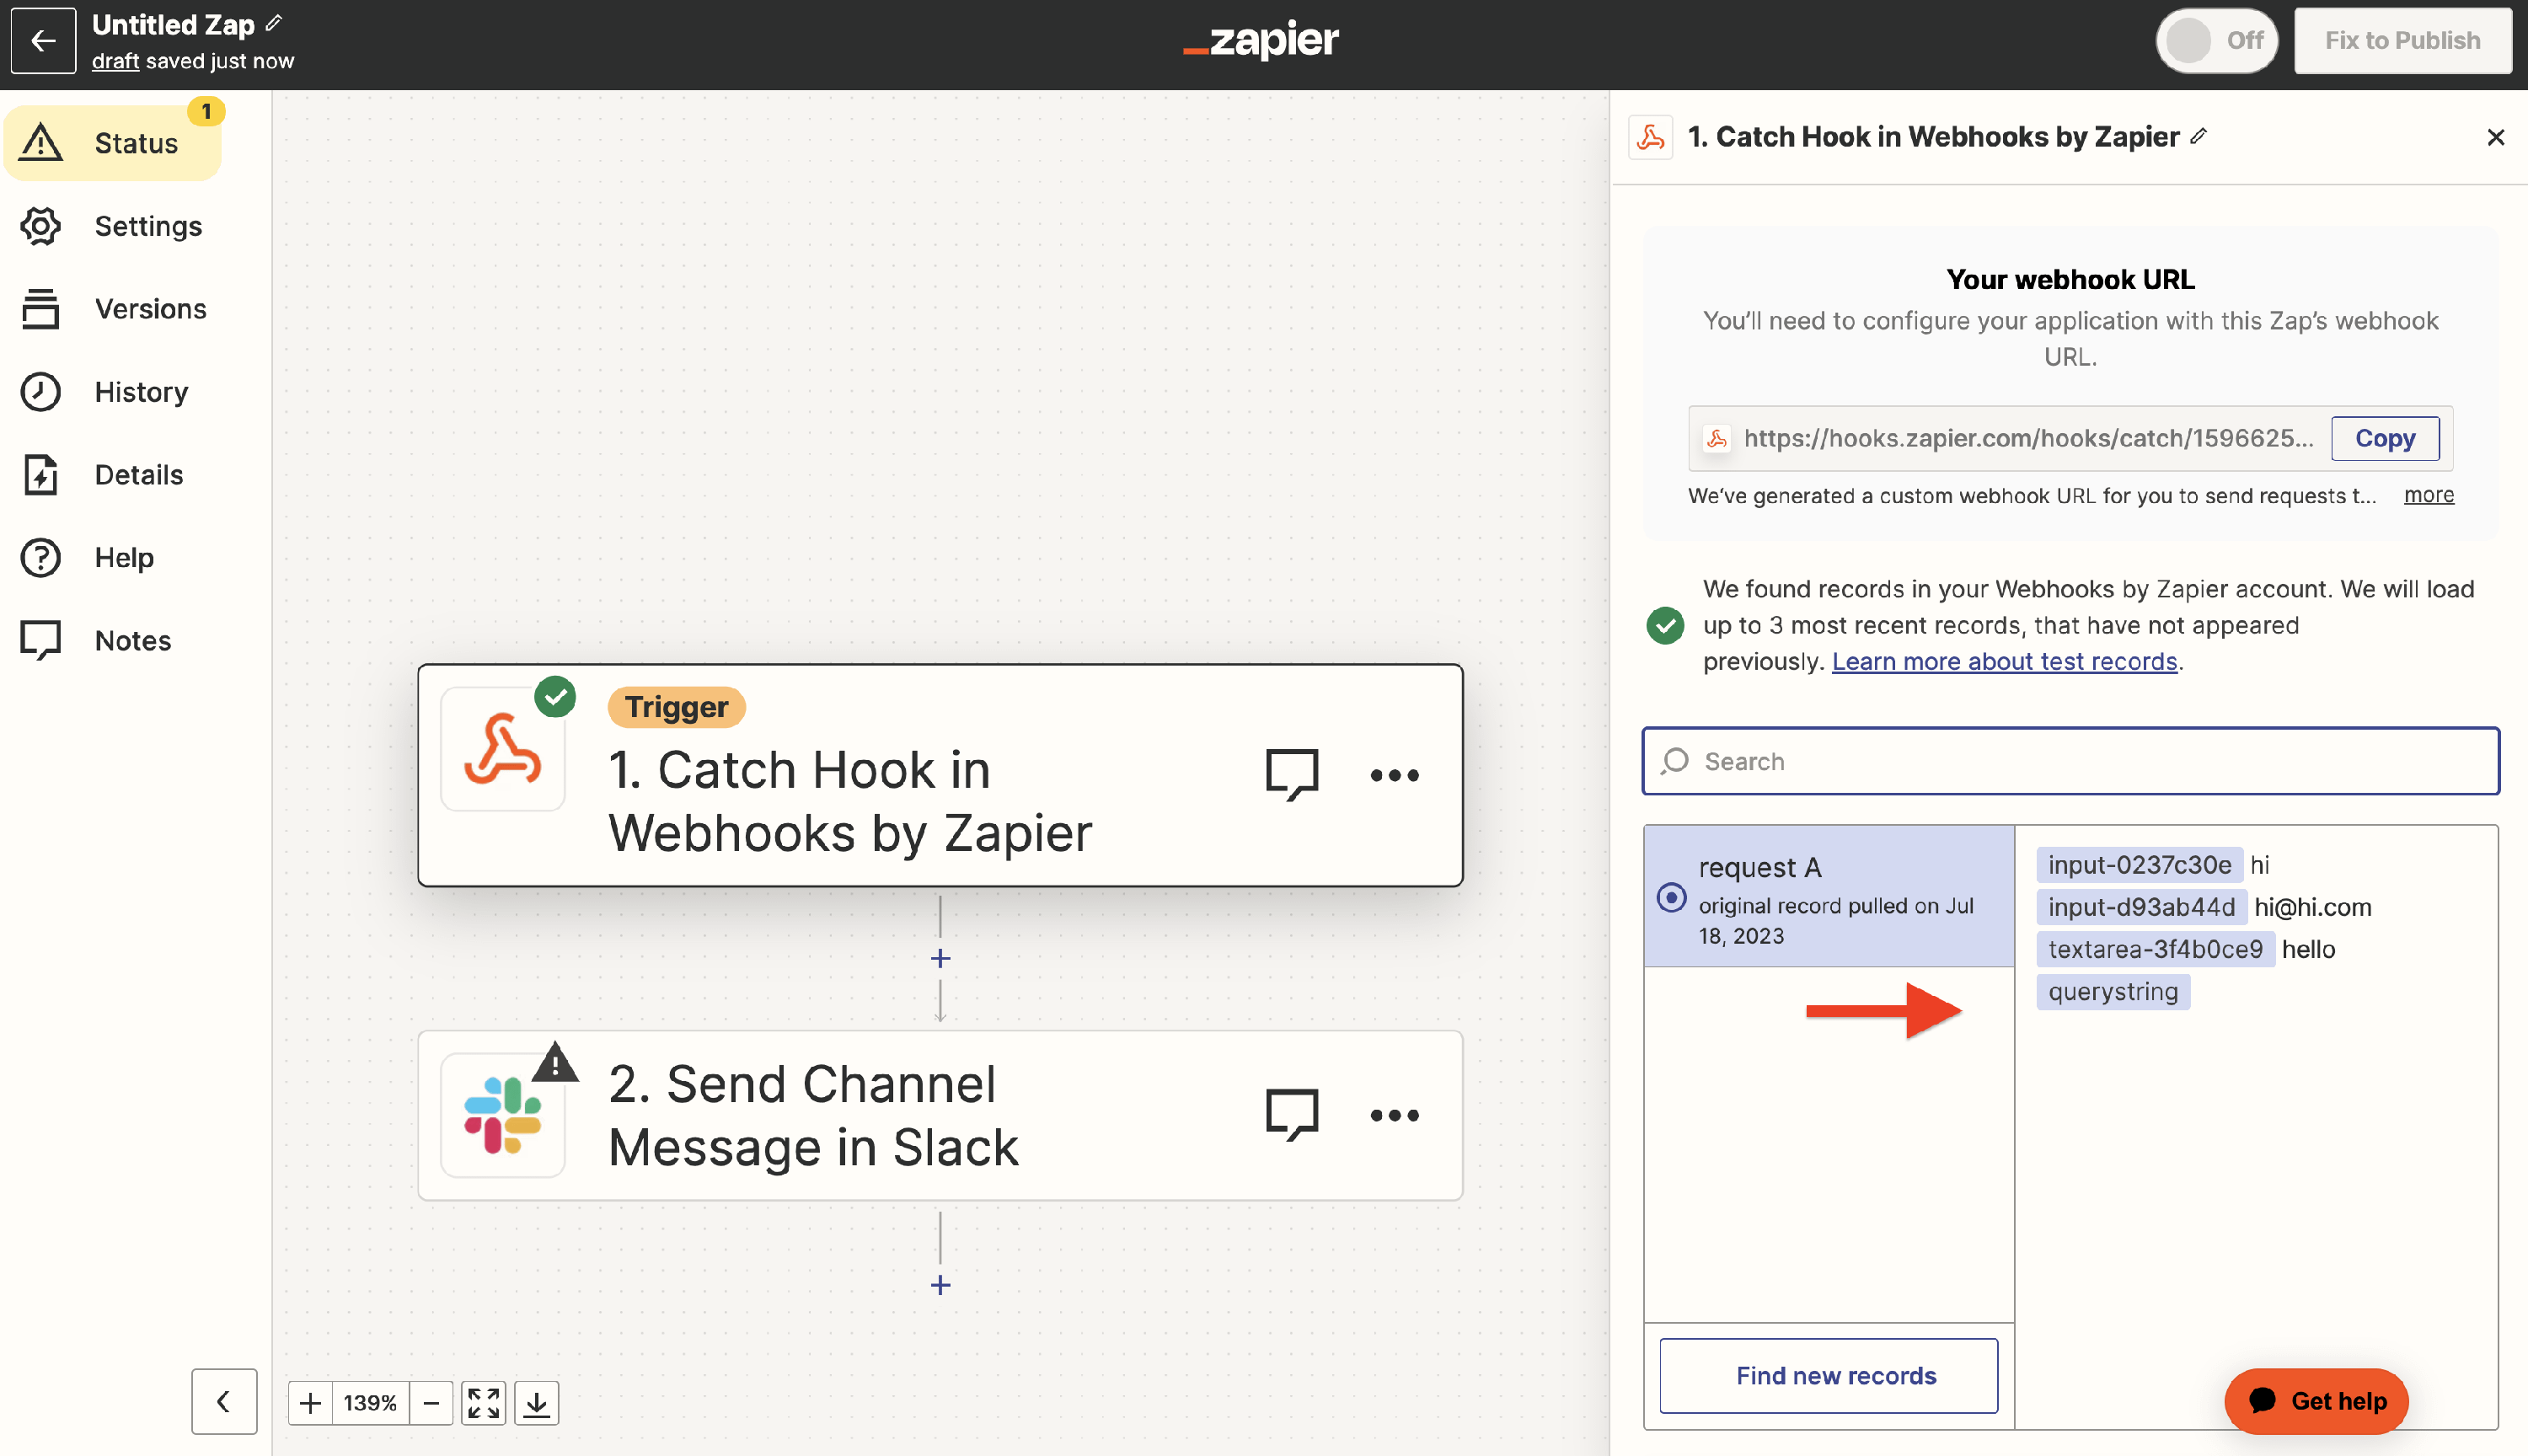
7. Expand the Test accordion, and you will see your webhook URL.

8. Click on the Copy button.
Now that you are connected to Zapier, it's time to attach it to Otter Forms. Go back to the page where you added the form and click on the Edit Webhooks button.
9. Insert a suitable name, then paste the copied URL from the above step.
10. Pick POST as the method and save the changes.

The last part is to test the connection. This can be done by submitting your answer to the form, then going back to the Zapier interface. From the accordion where you copied the URL, click on Test Trigger. Once a submission is made, you will do something similar:
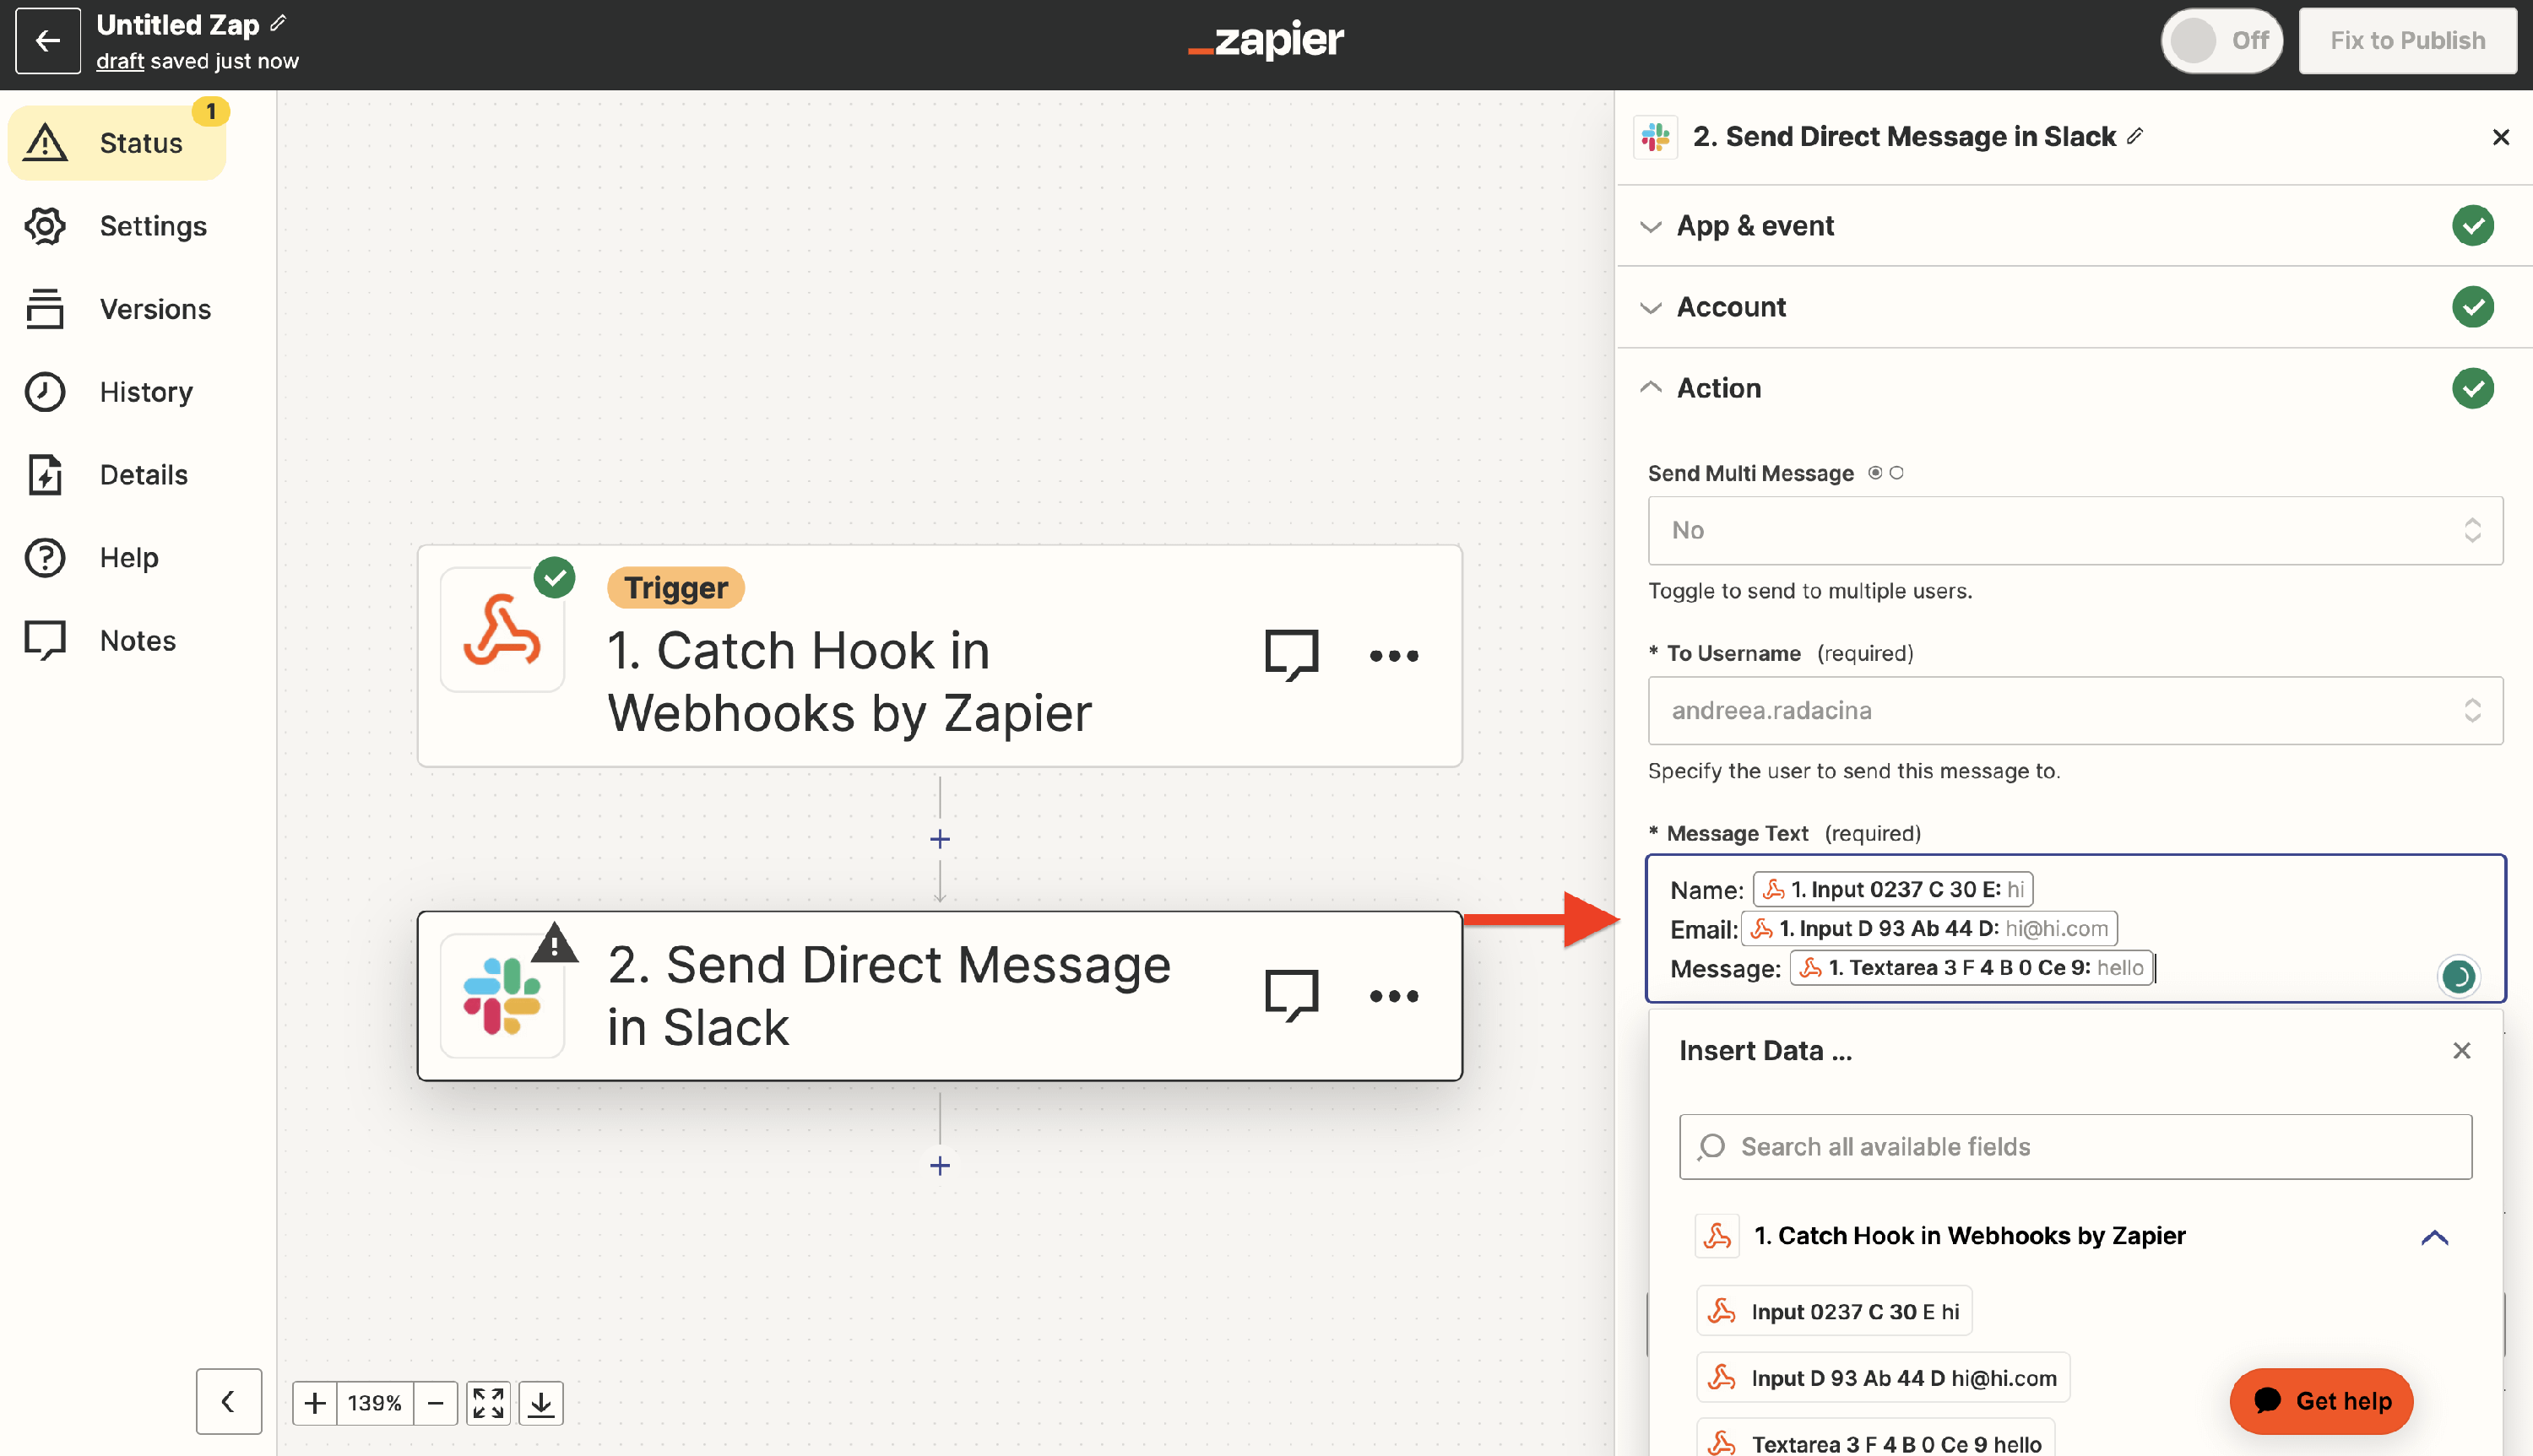
11. Then click on the action field to edit the action. You can select data from the form submission to be sent on the external app (Slack).
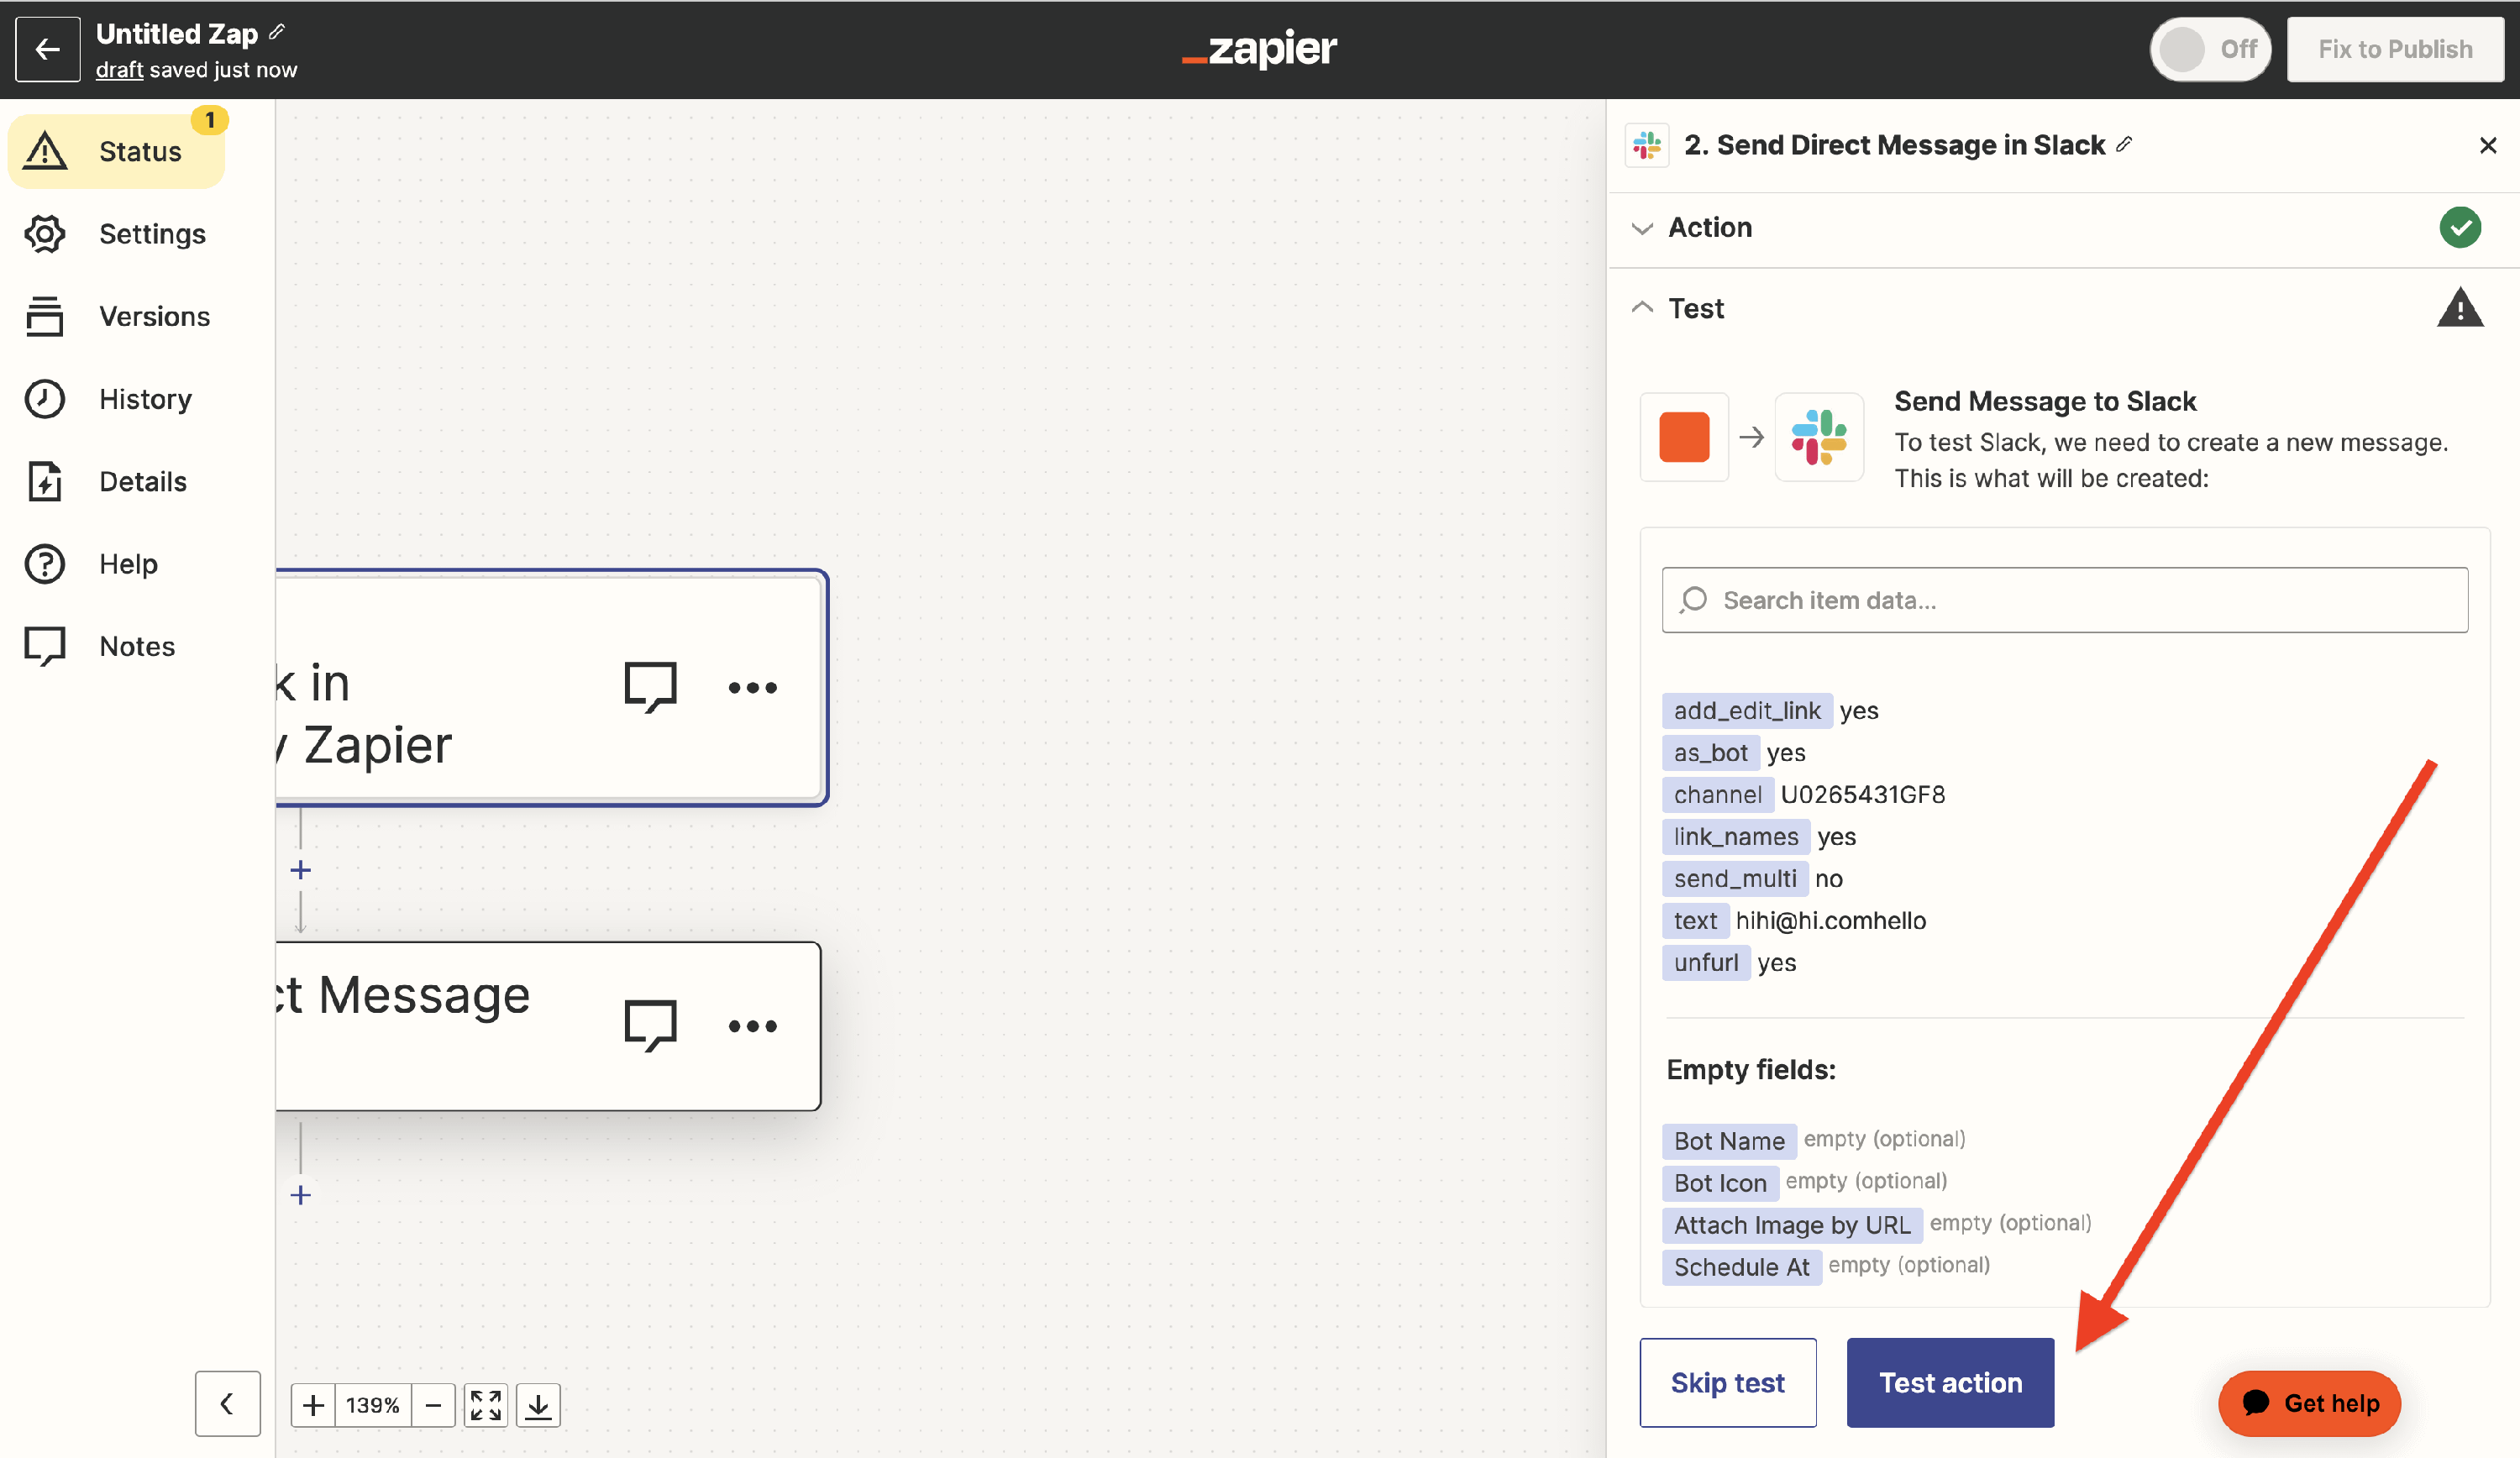
12. In the Test accordion, click on the Test action button.
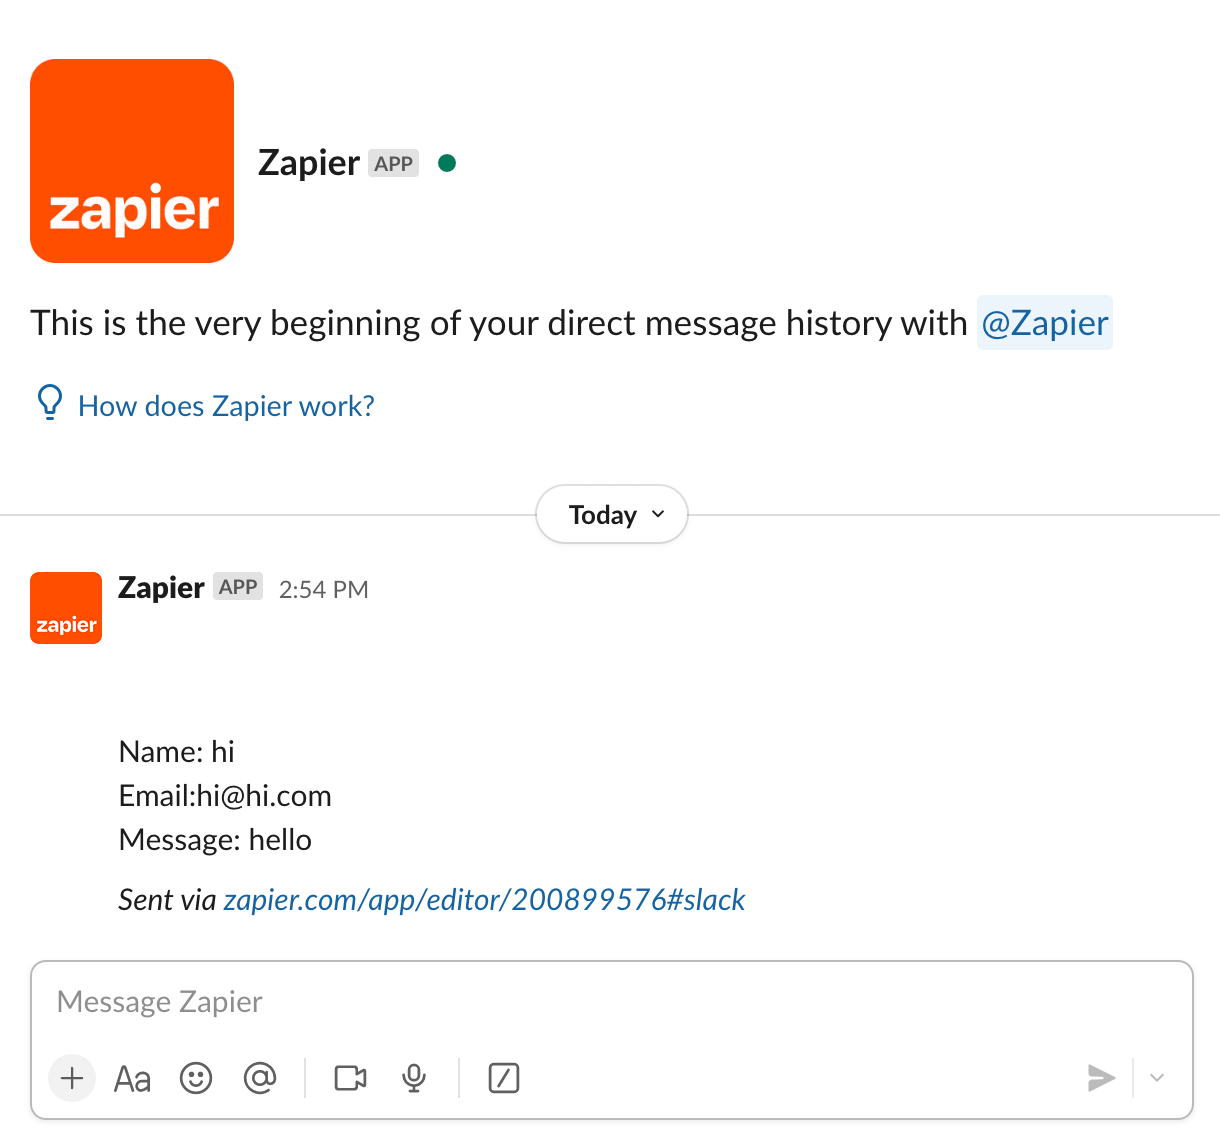
Result
Connect with IFTTT
Similar to the connection with Zapier, we will demonstrate a connection with IFTTT. In our case, every time the form is submitted, we will get an email on Gmail.
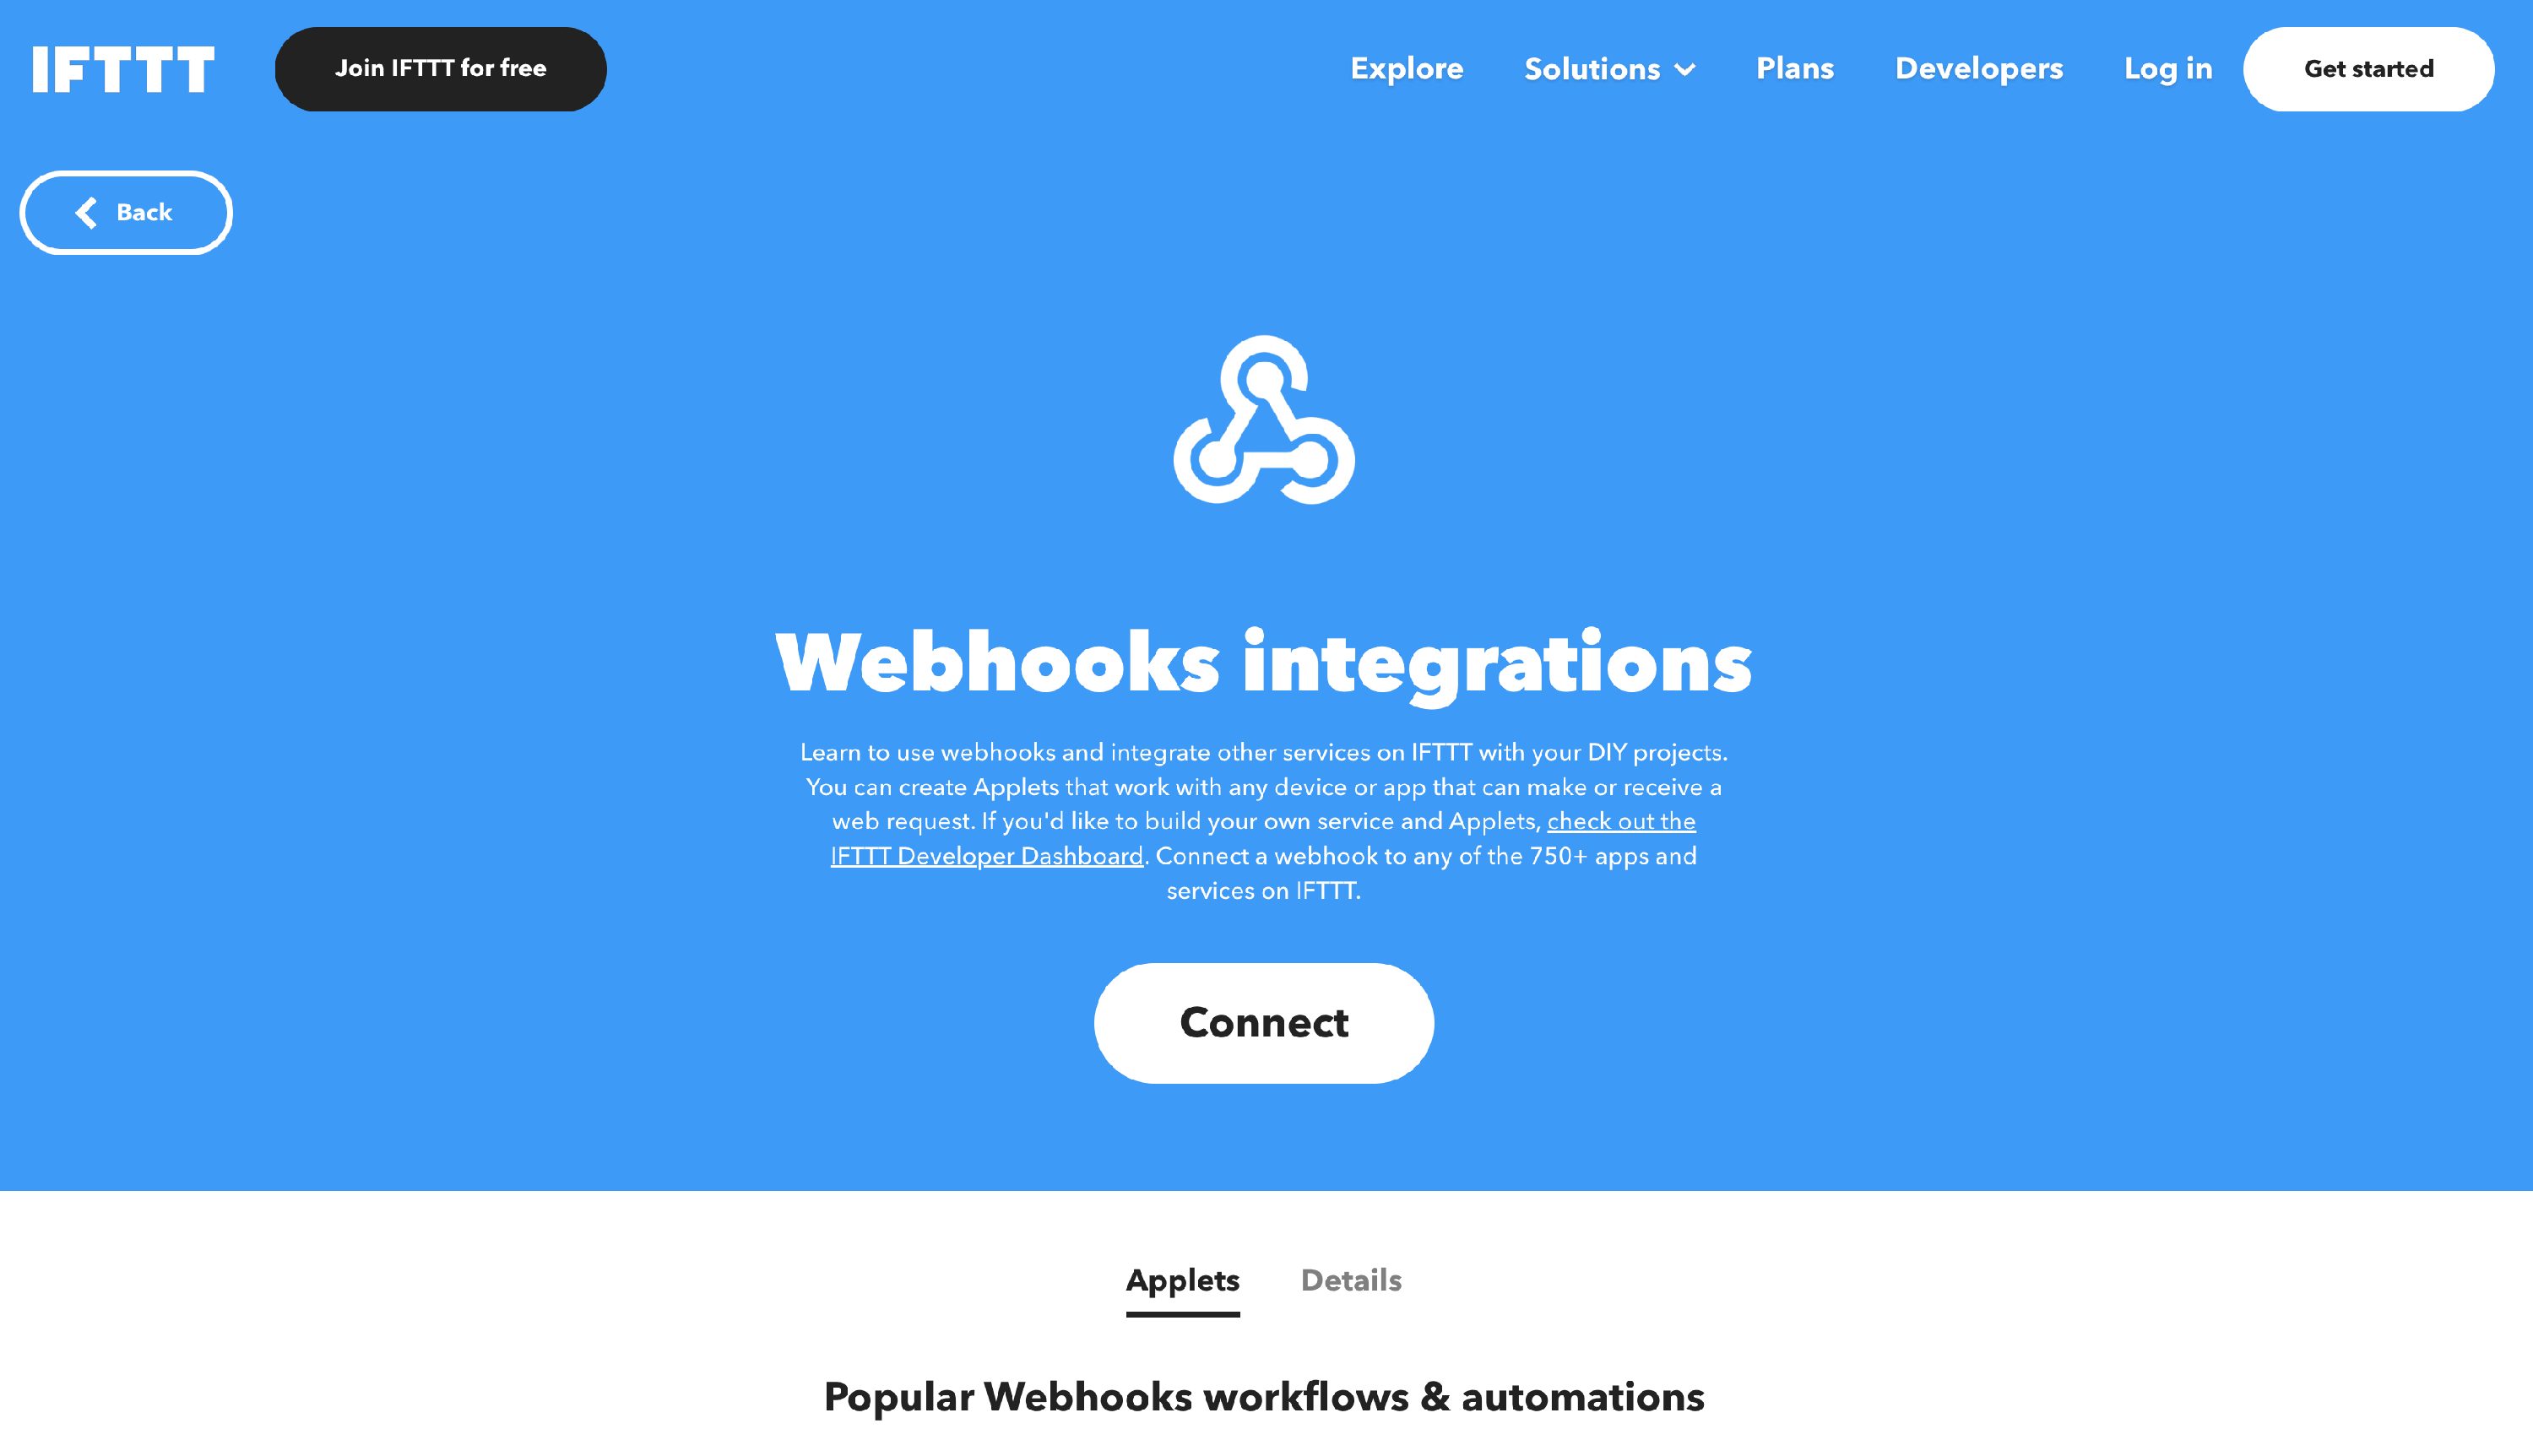
1. Once you get on the IFTTT page, click on the Connect button.
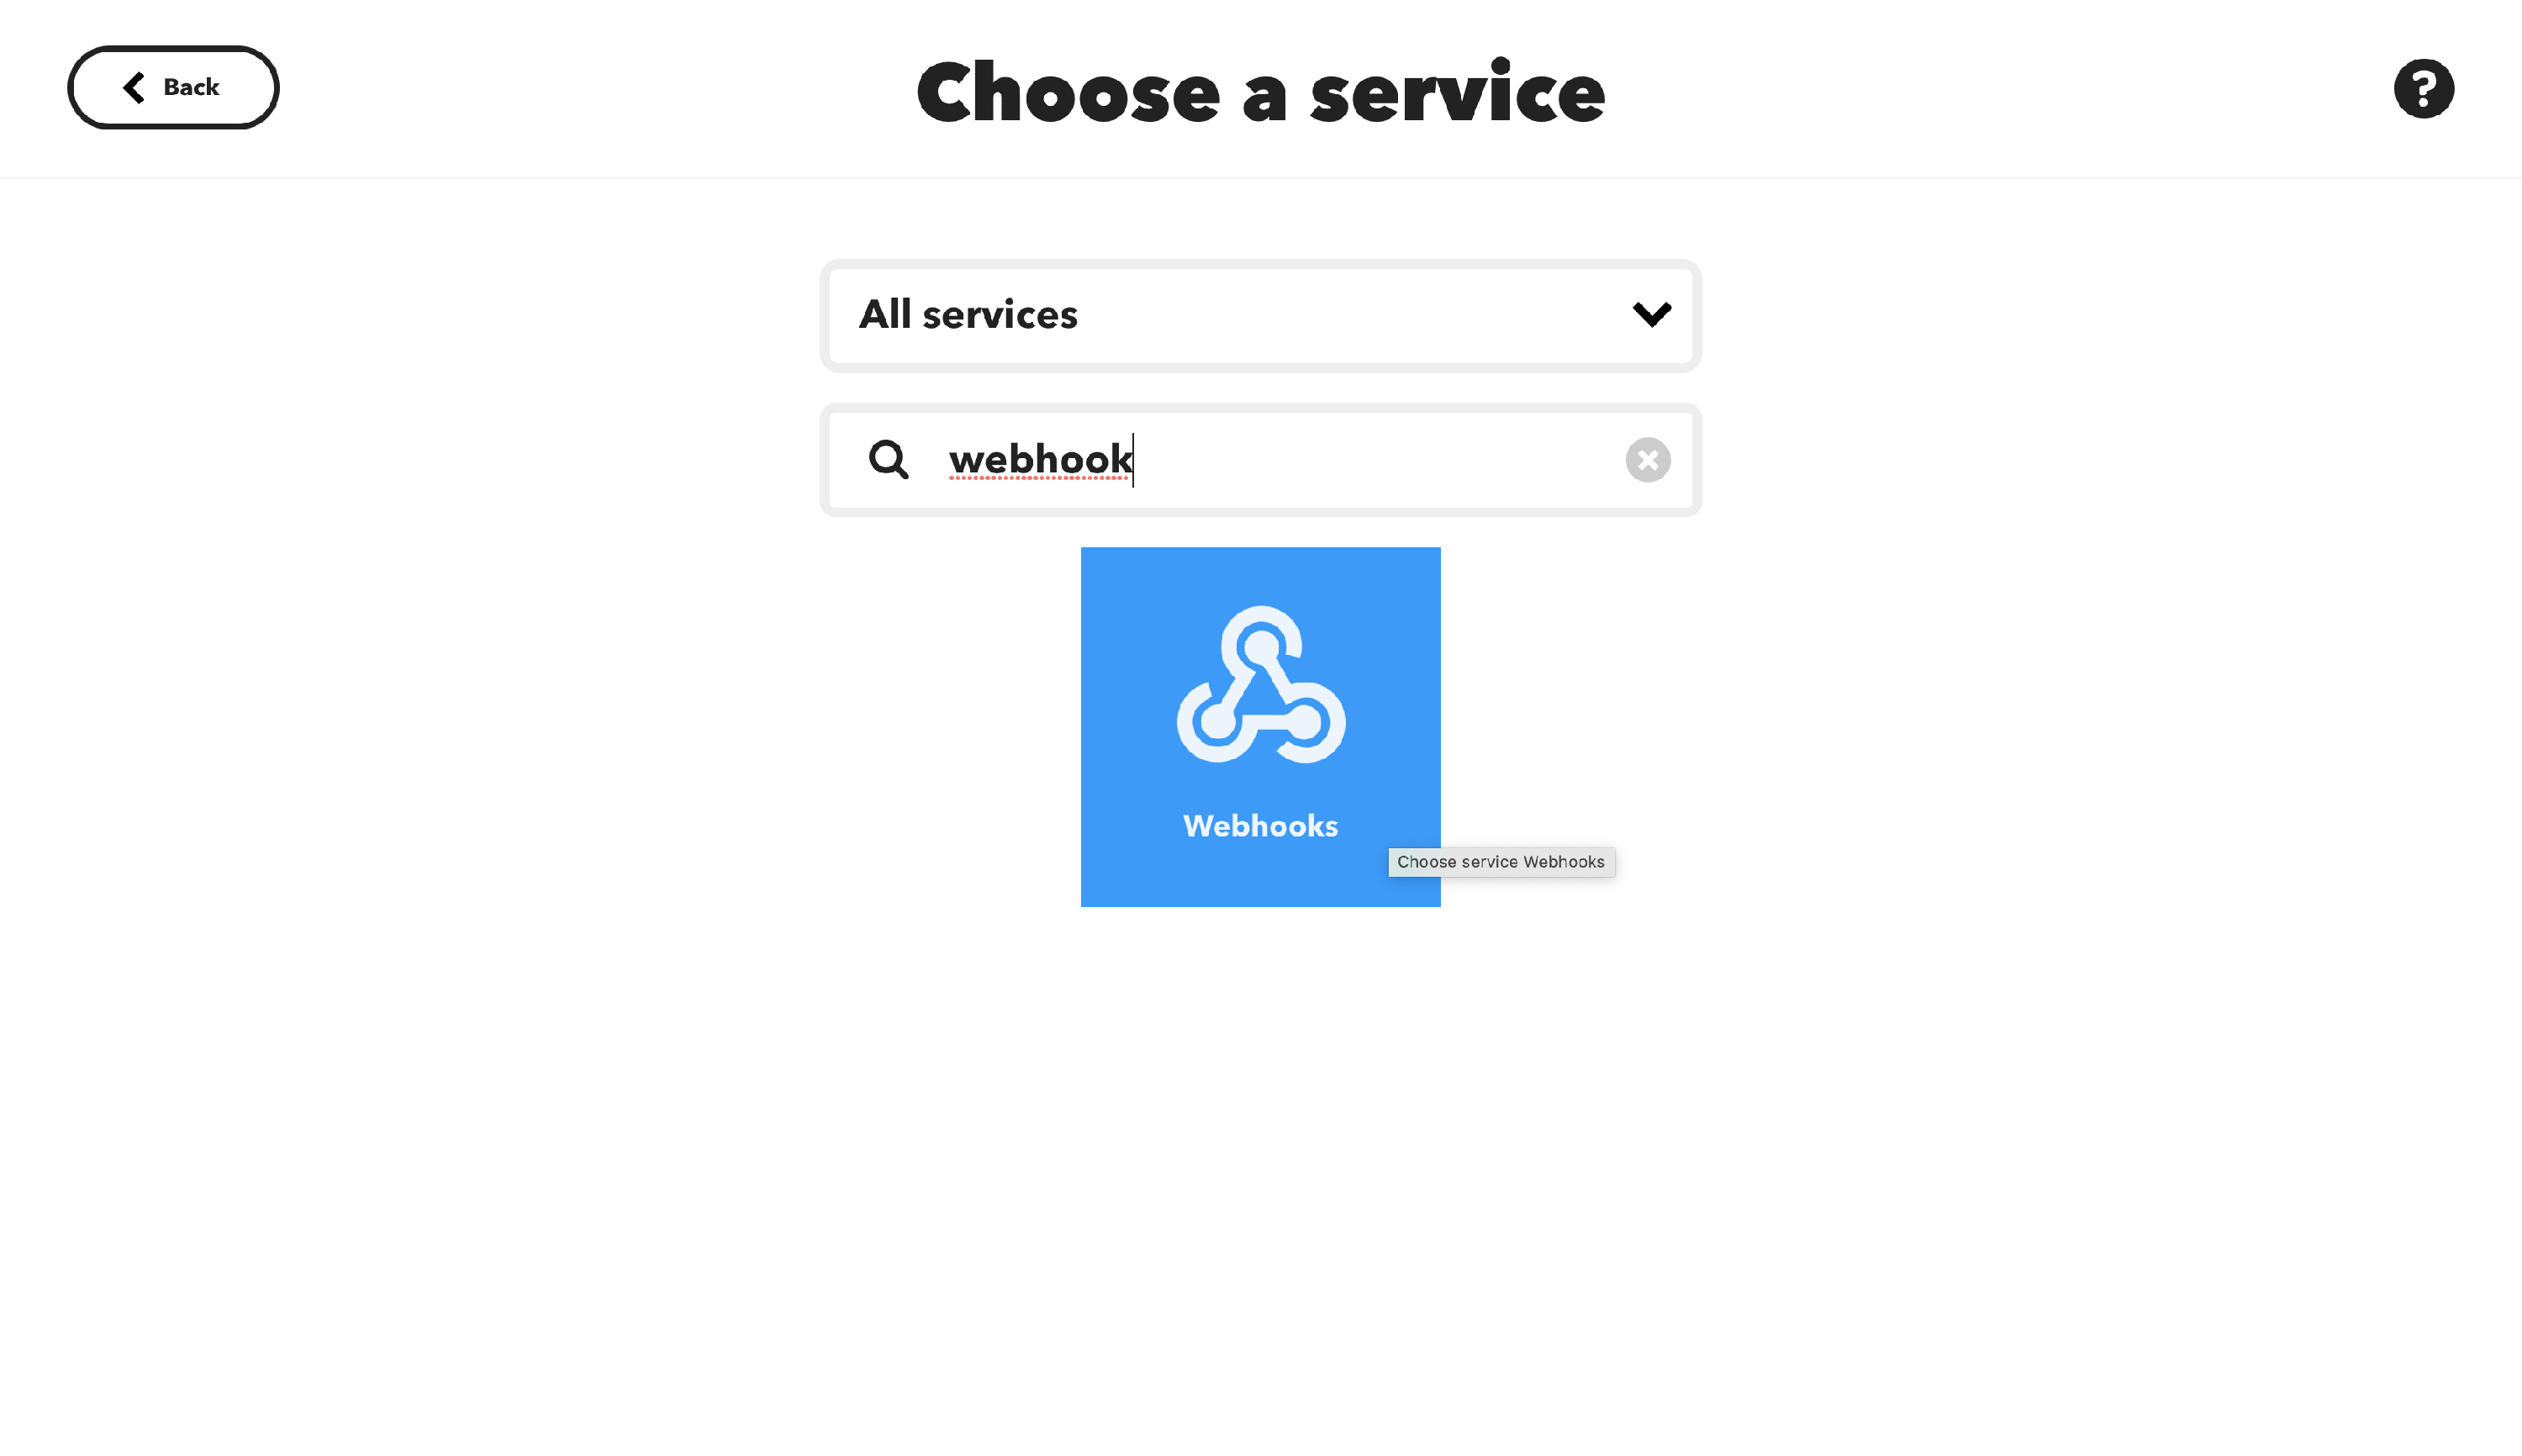
2. After you're redirected to the below window, click on the Add button next to If This.
3. In the search field, type Webhooks and select the appropriate service.
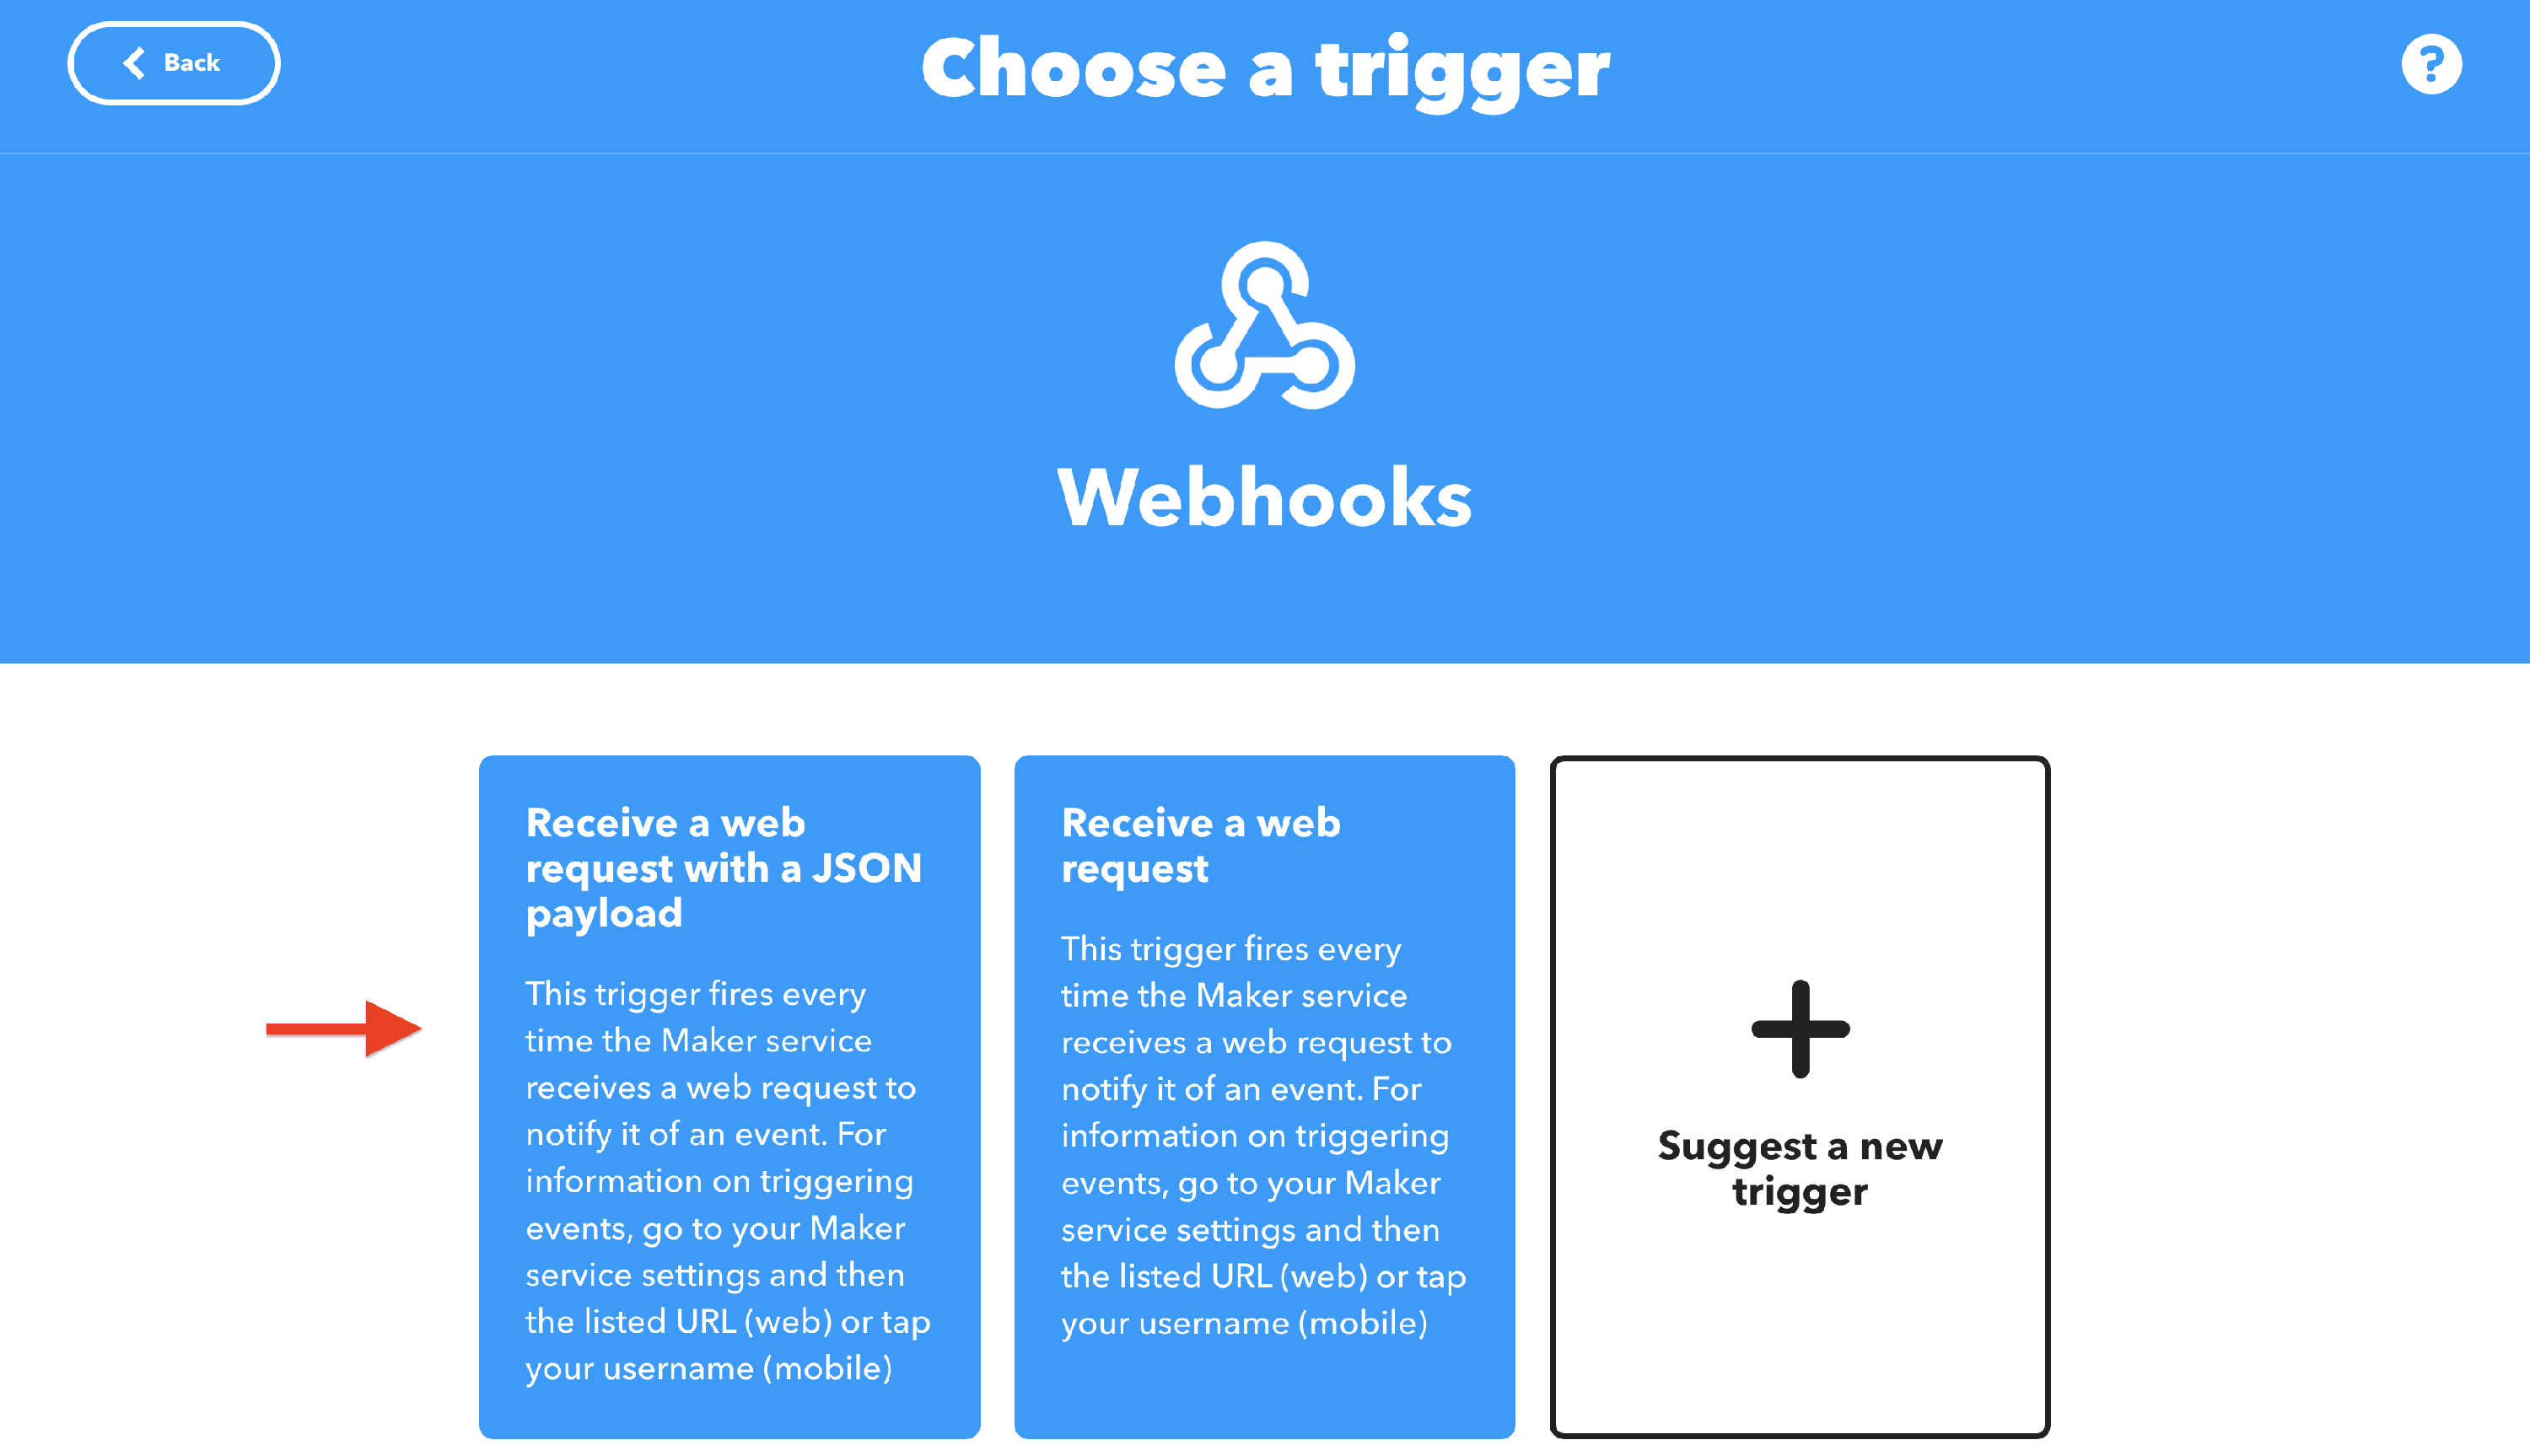
4. As a trigger, select Receive a web request with a JSON payload.
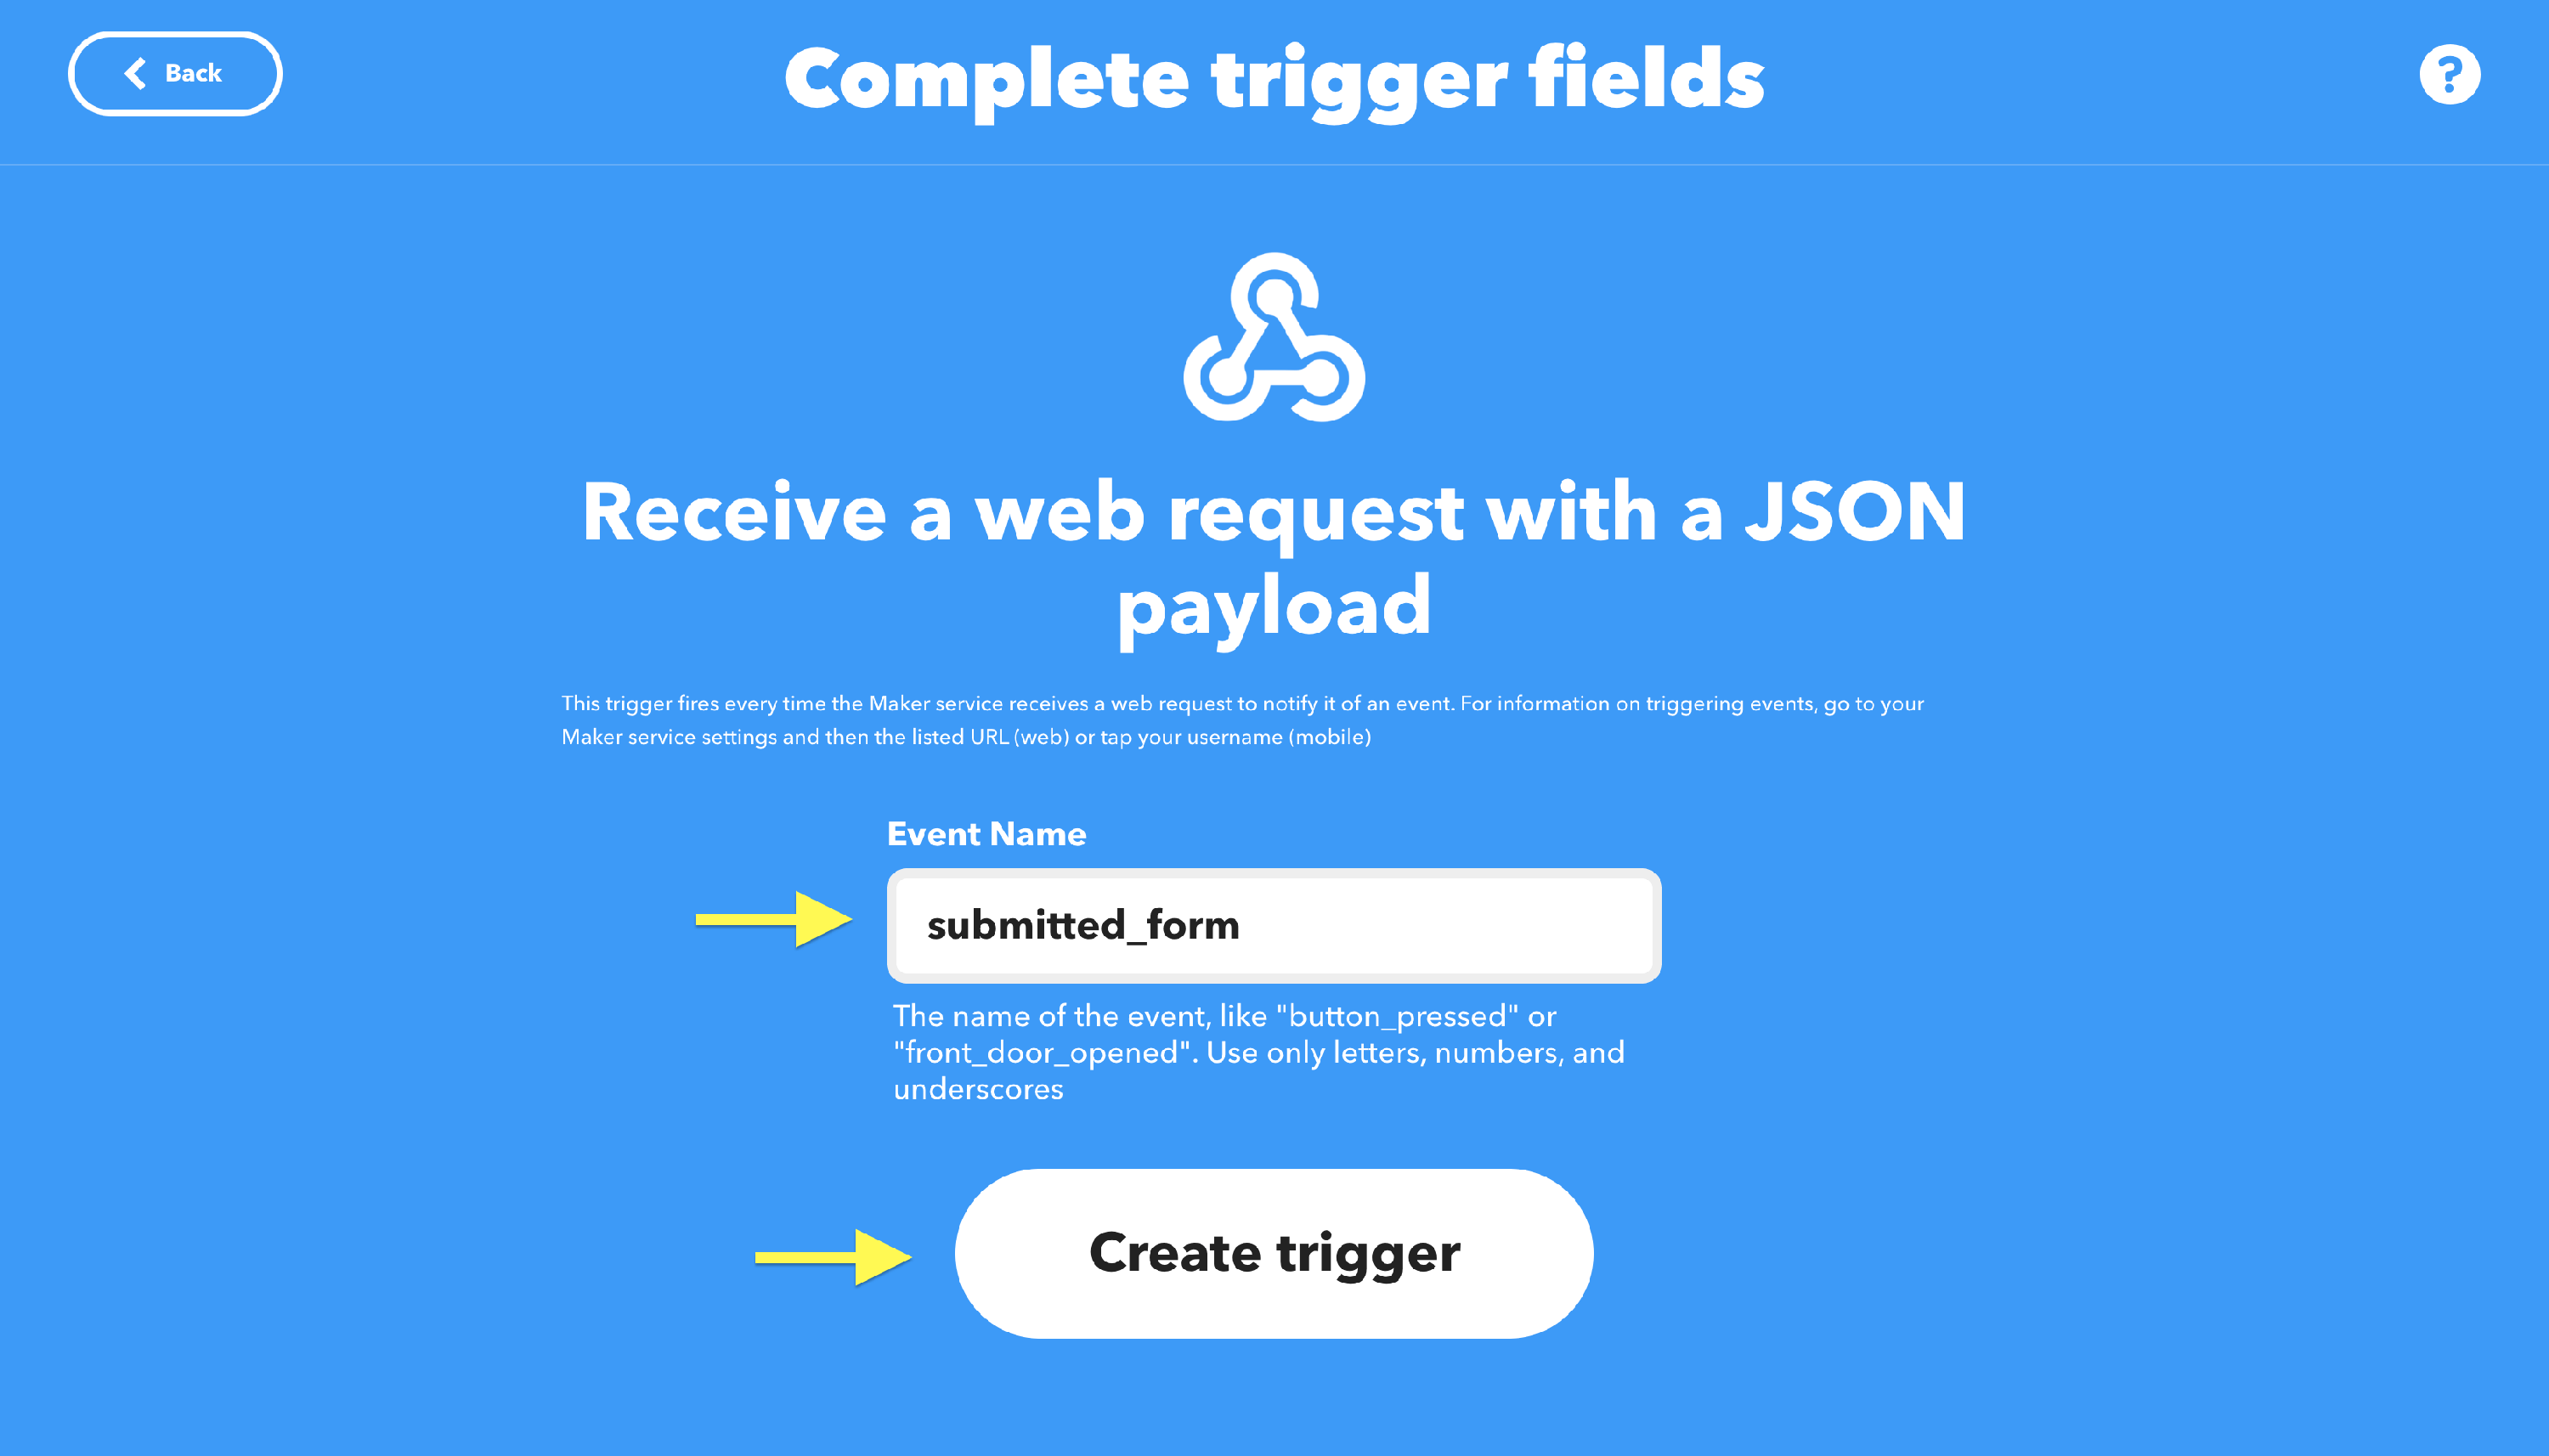
5. In the new window, set the event name and click on Create trigger.
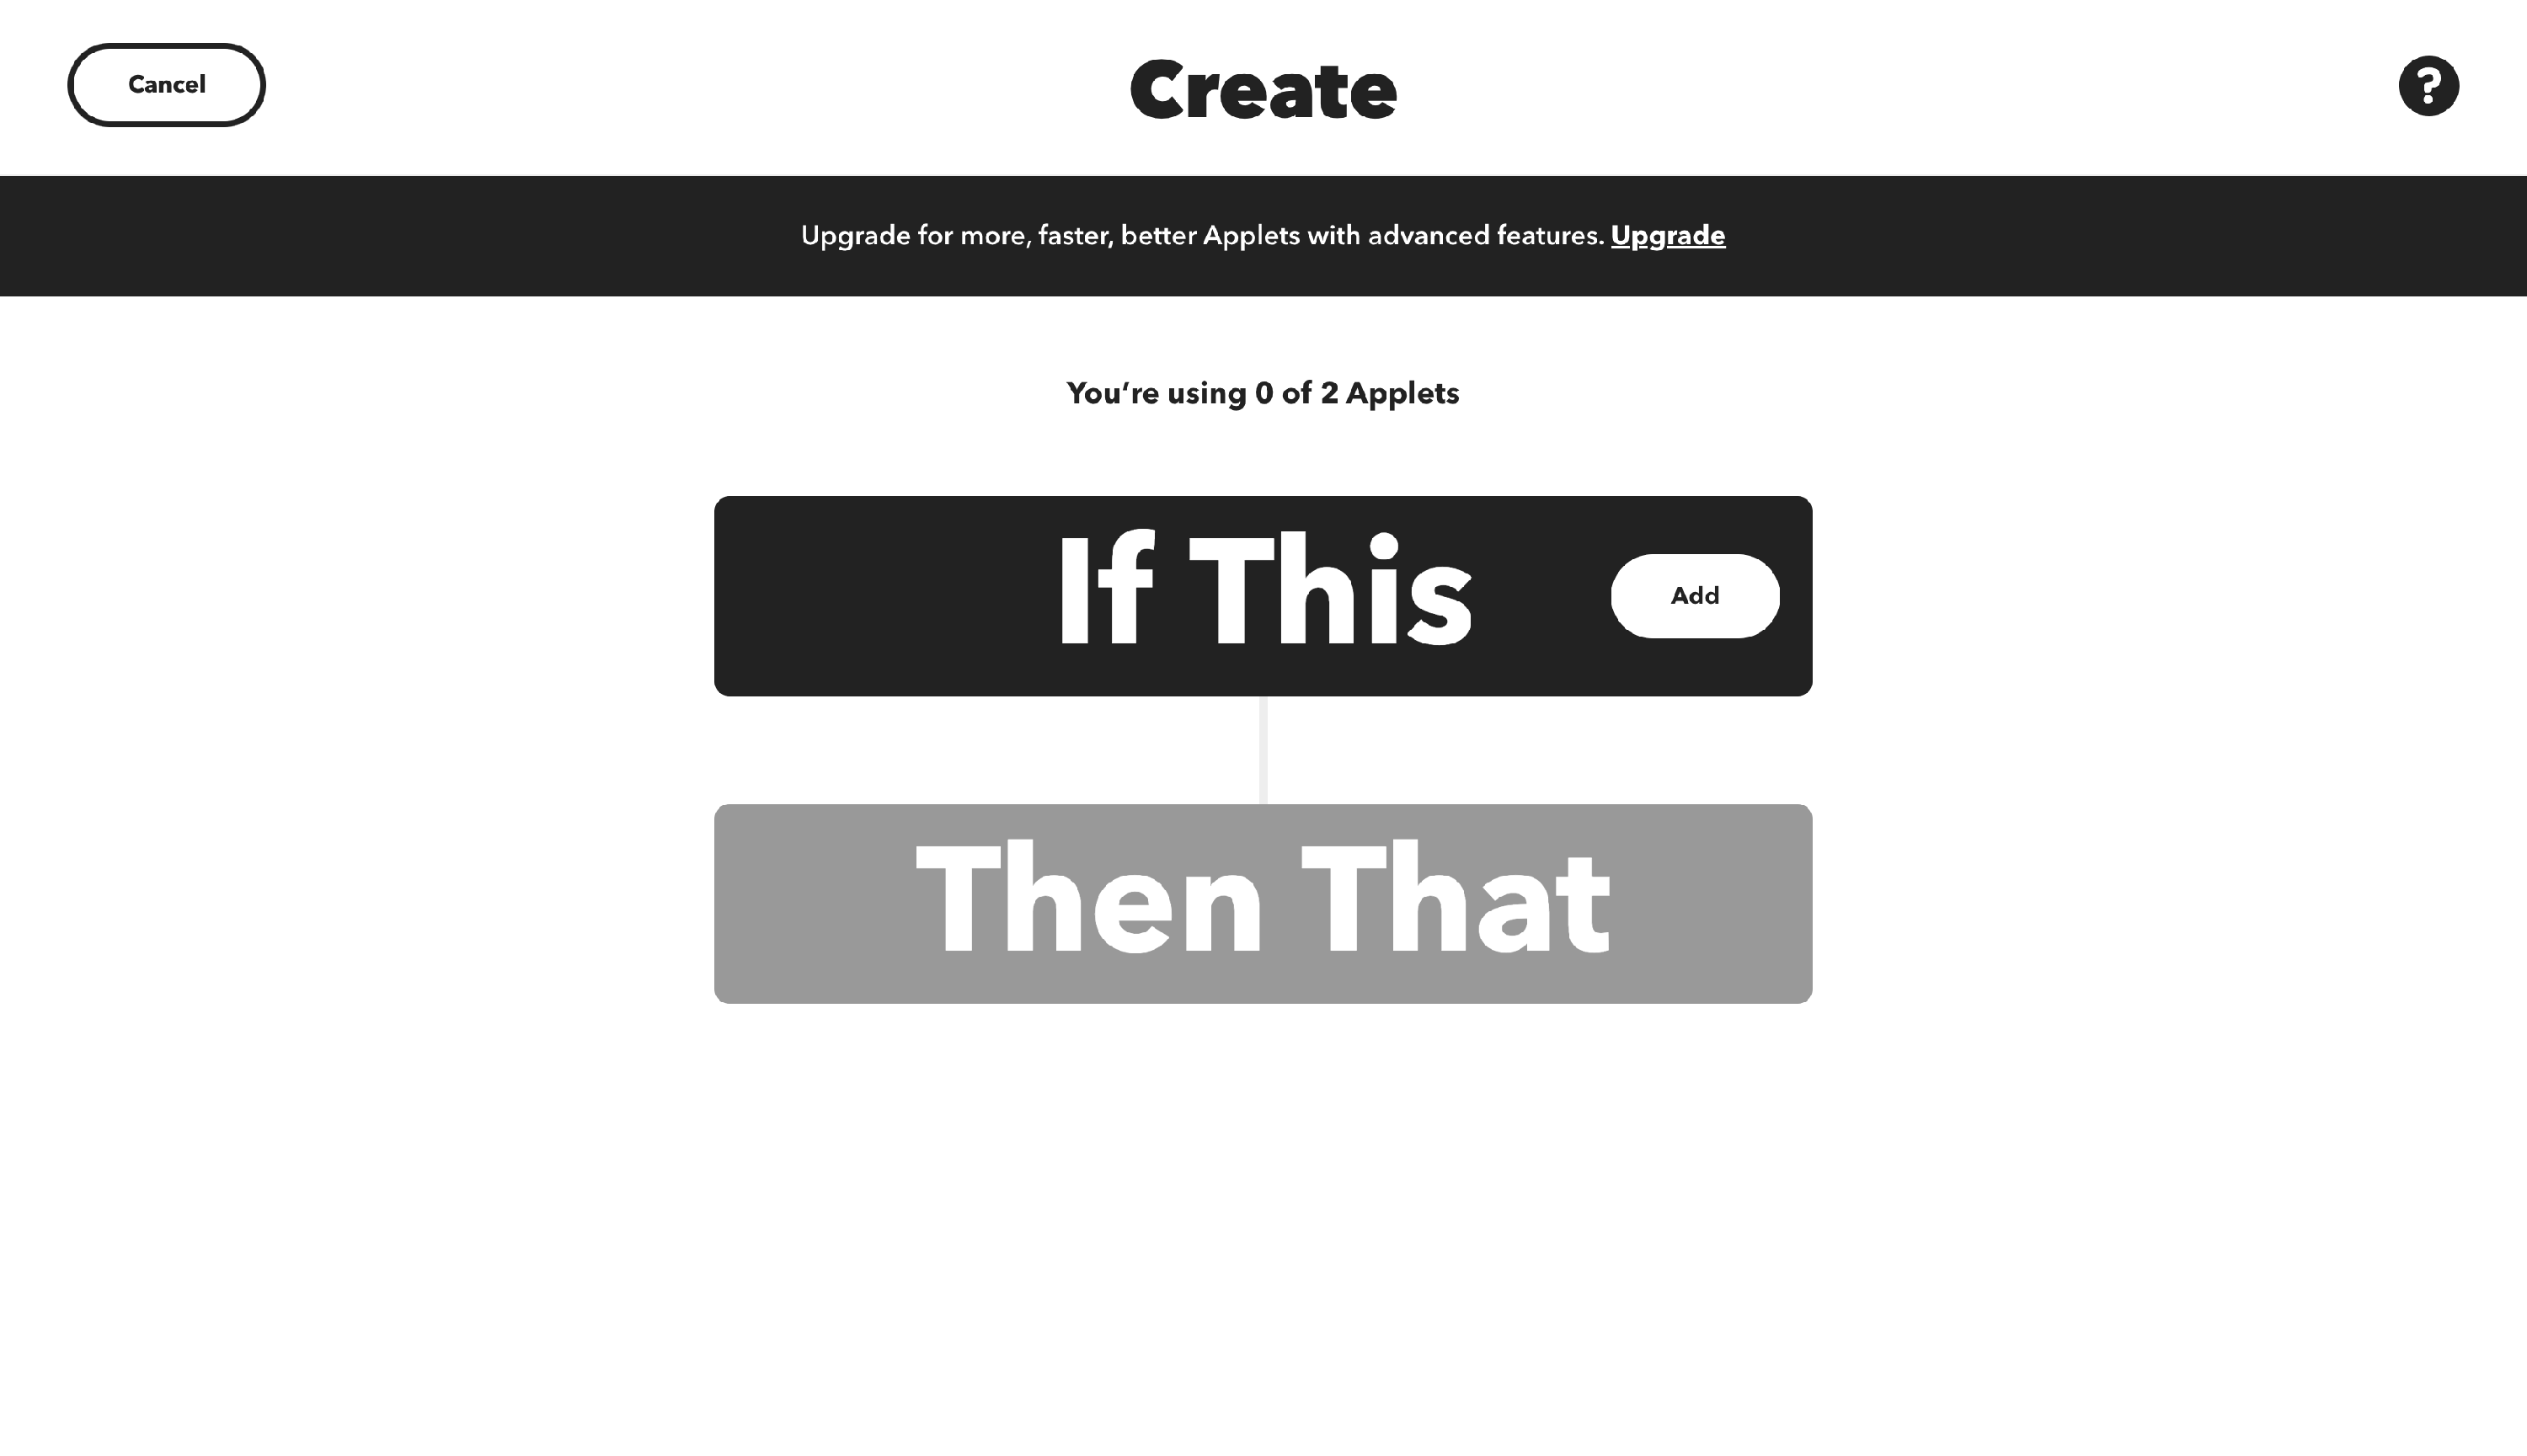
6. Save the changes and get back to the Create tab (from step 2).
7. Click on the Add button, next to the Then That field.
8. Search for the desired output service (e.g. Gmail).
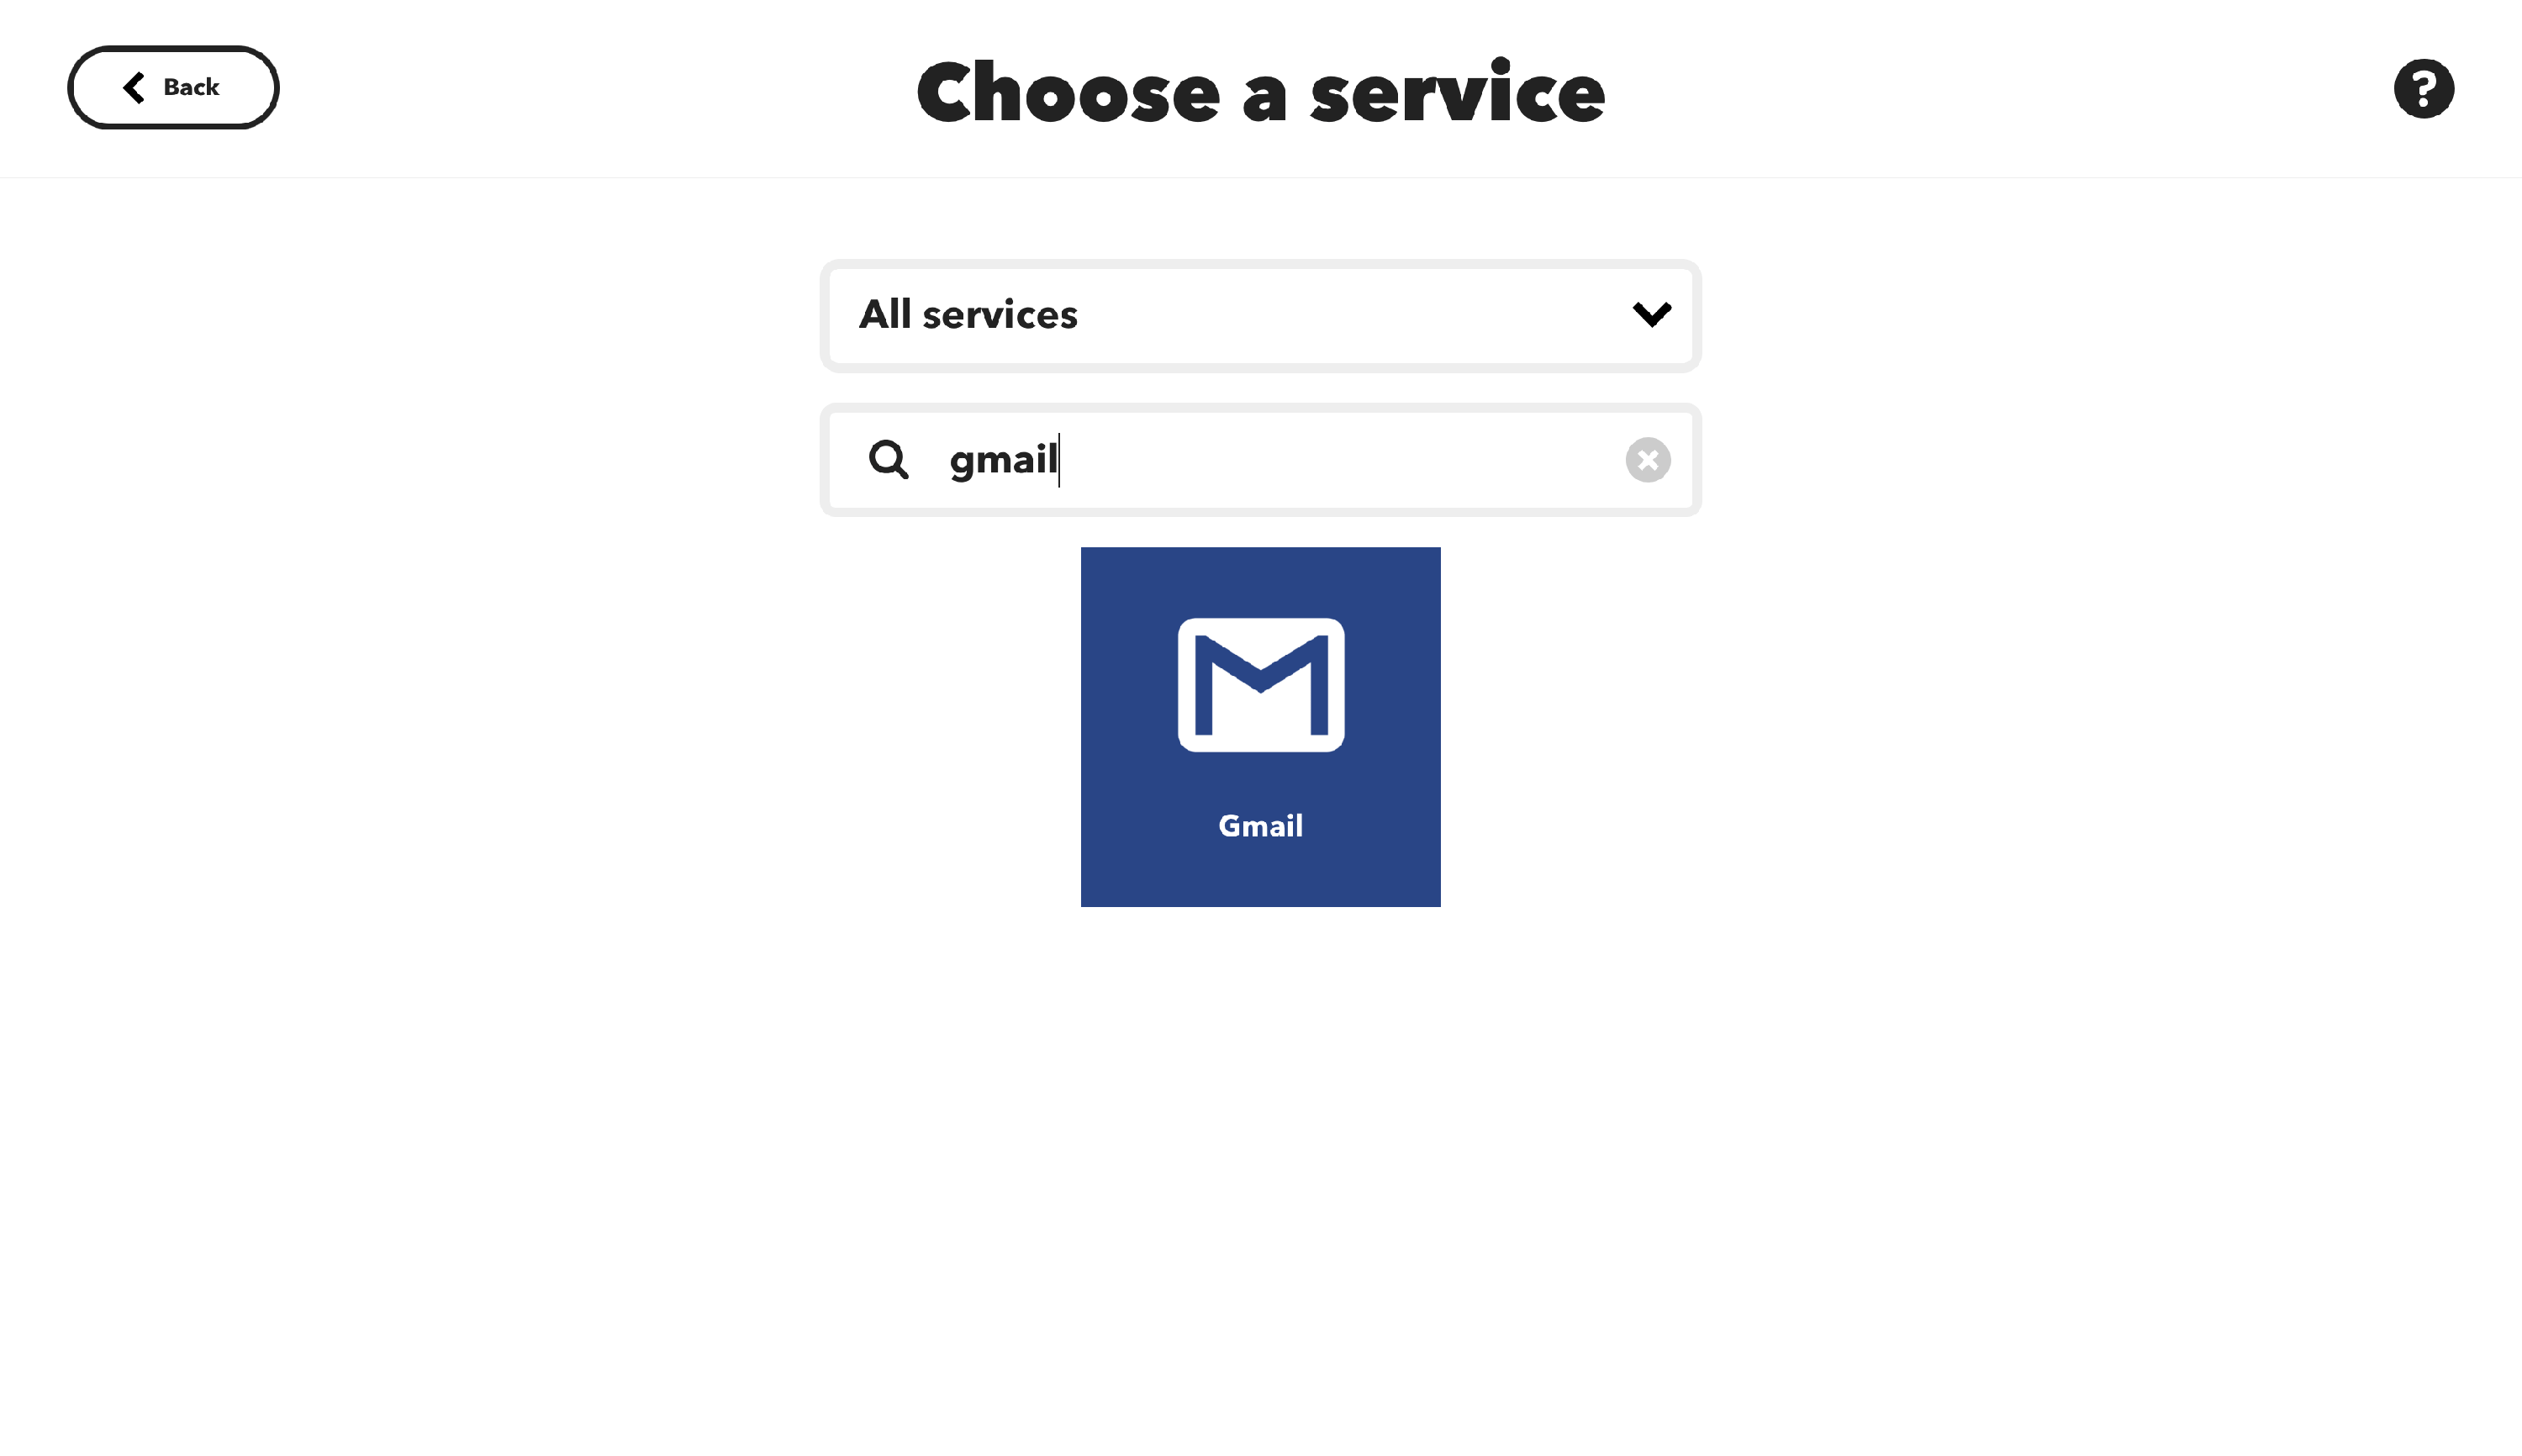
9. Choose the preferred action (e.g. Send yourself an email).

10. In the configuration modal, edit the subject and body of the email, to recognize it easier.
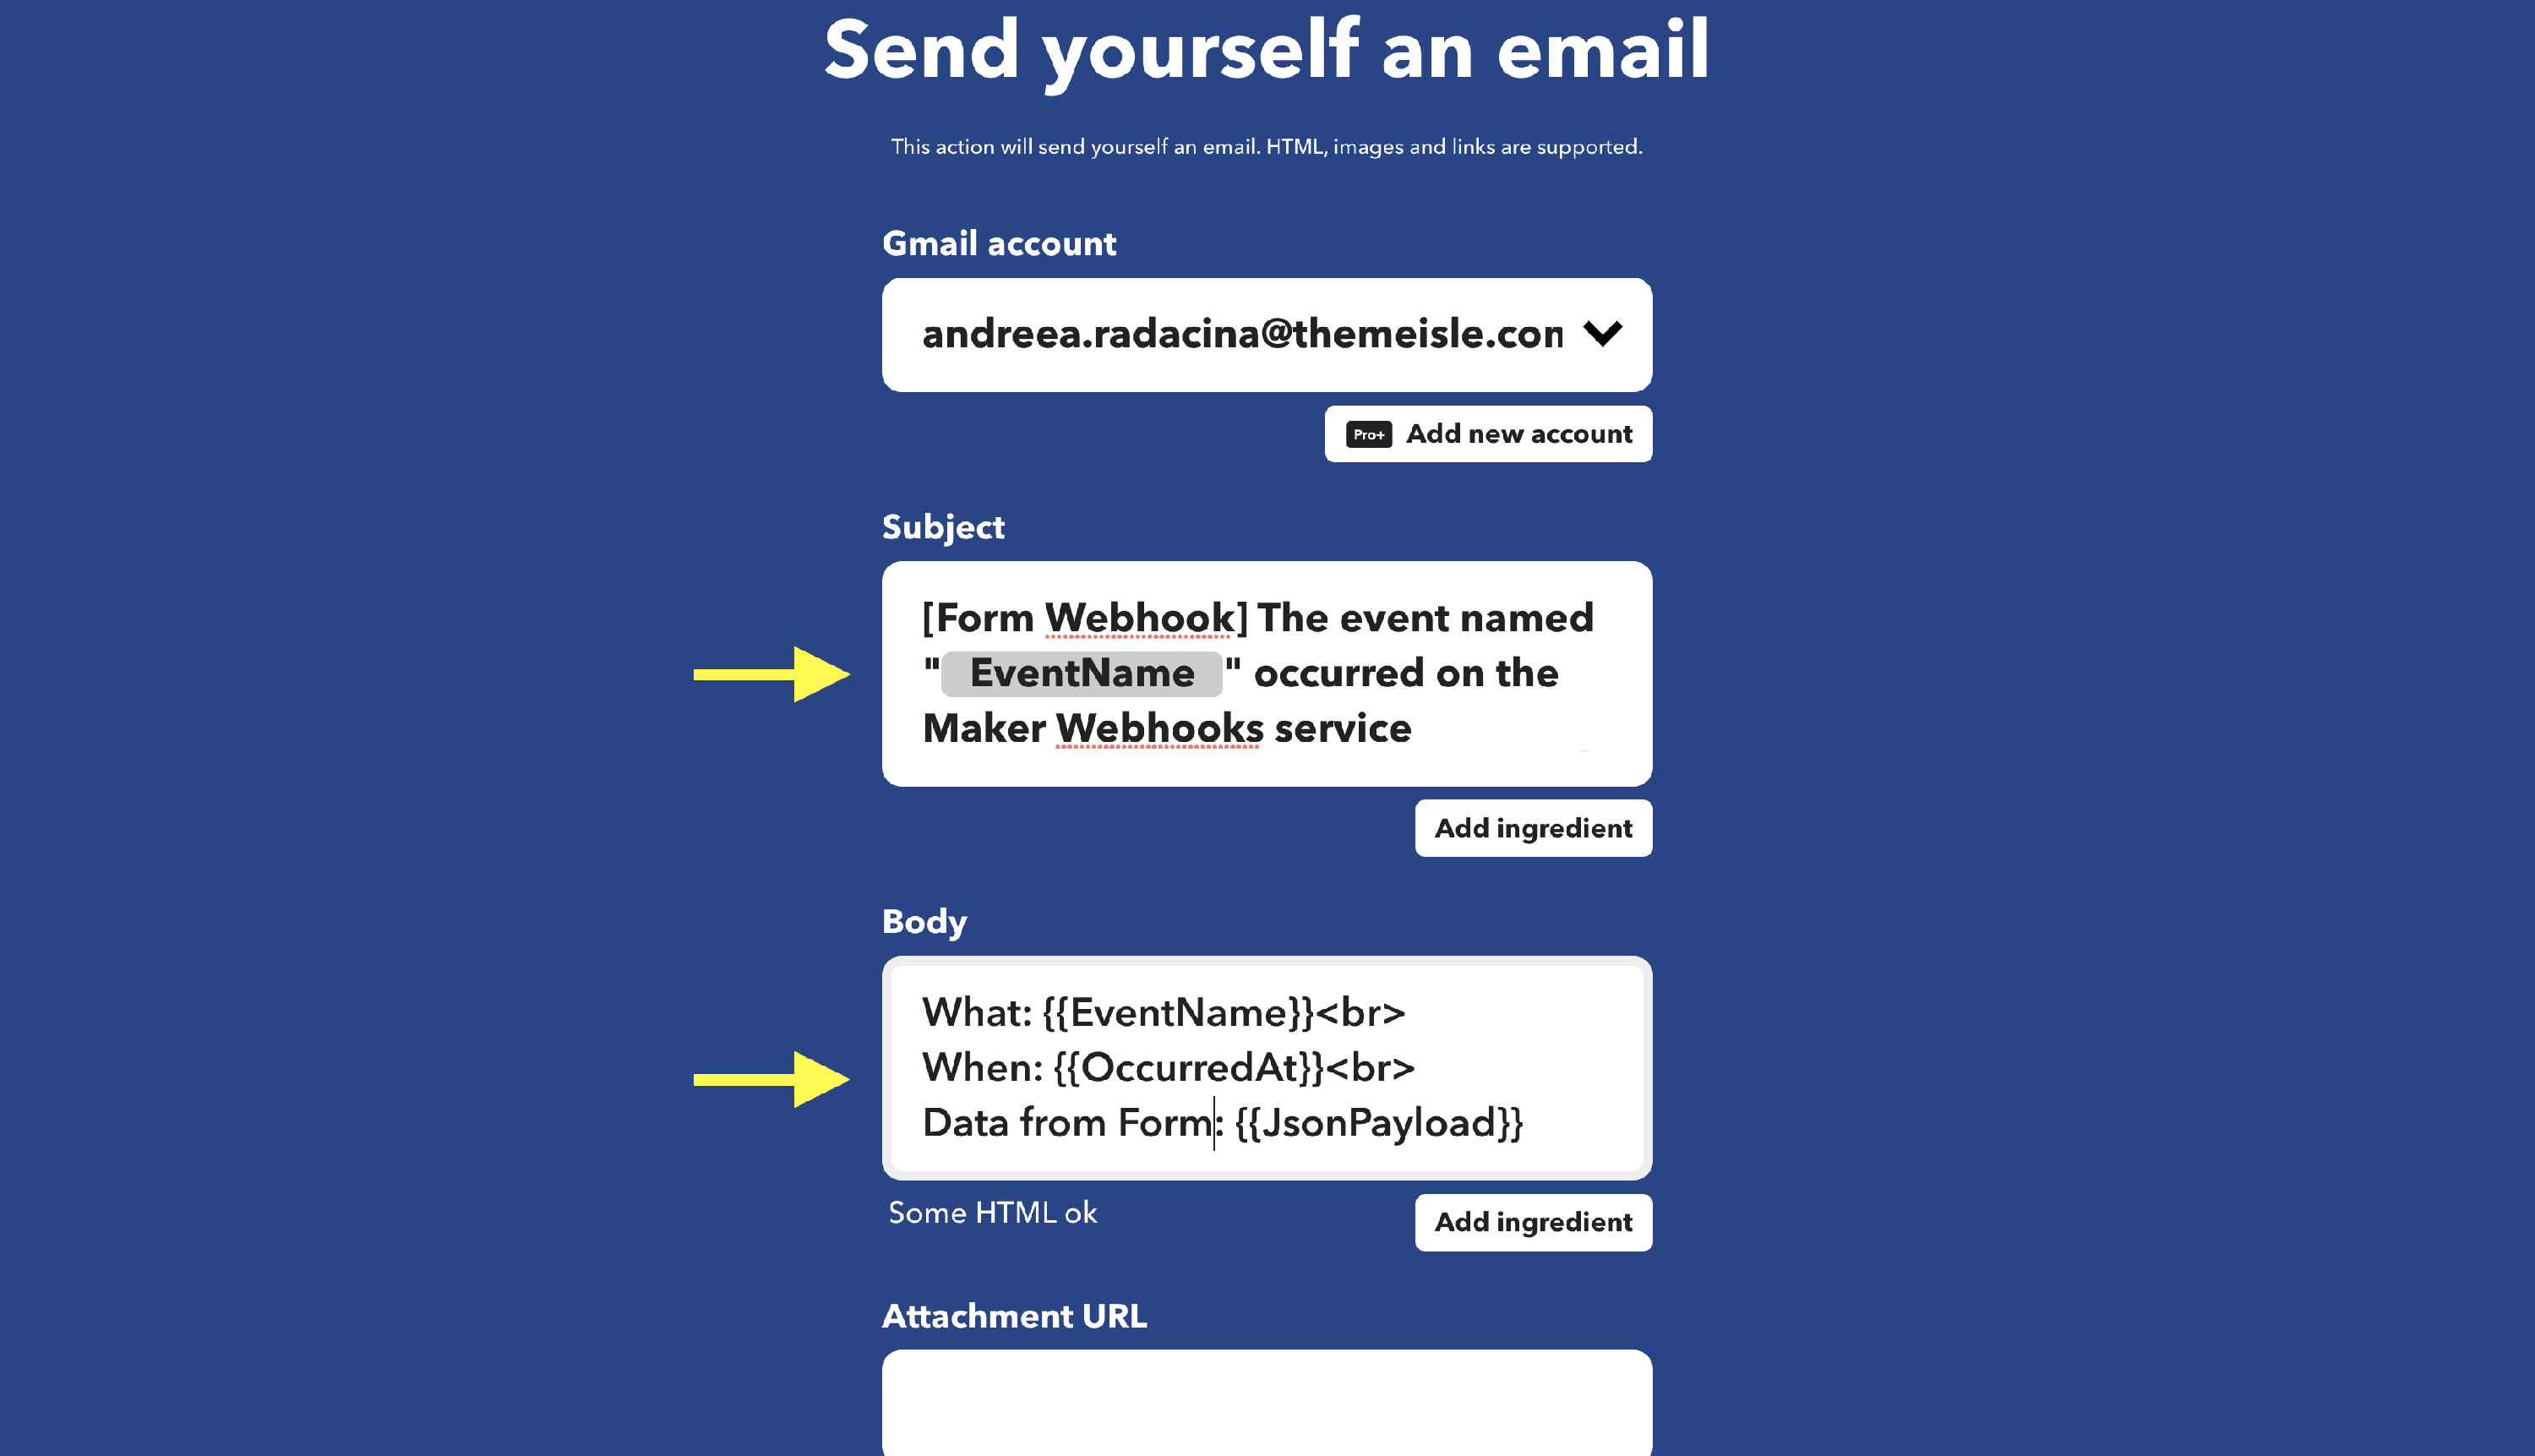
When everything is done, the editor should look like this:
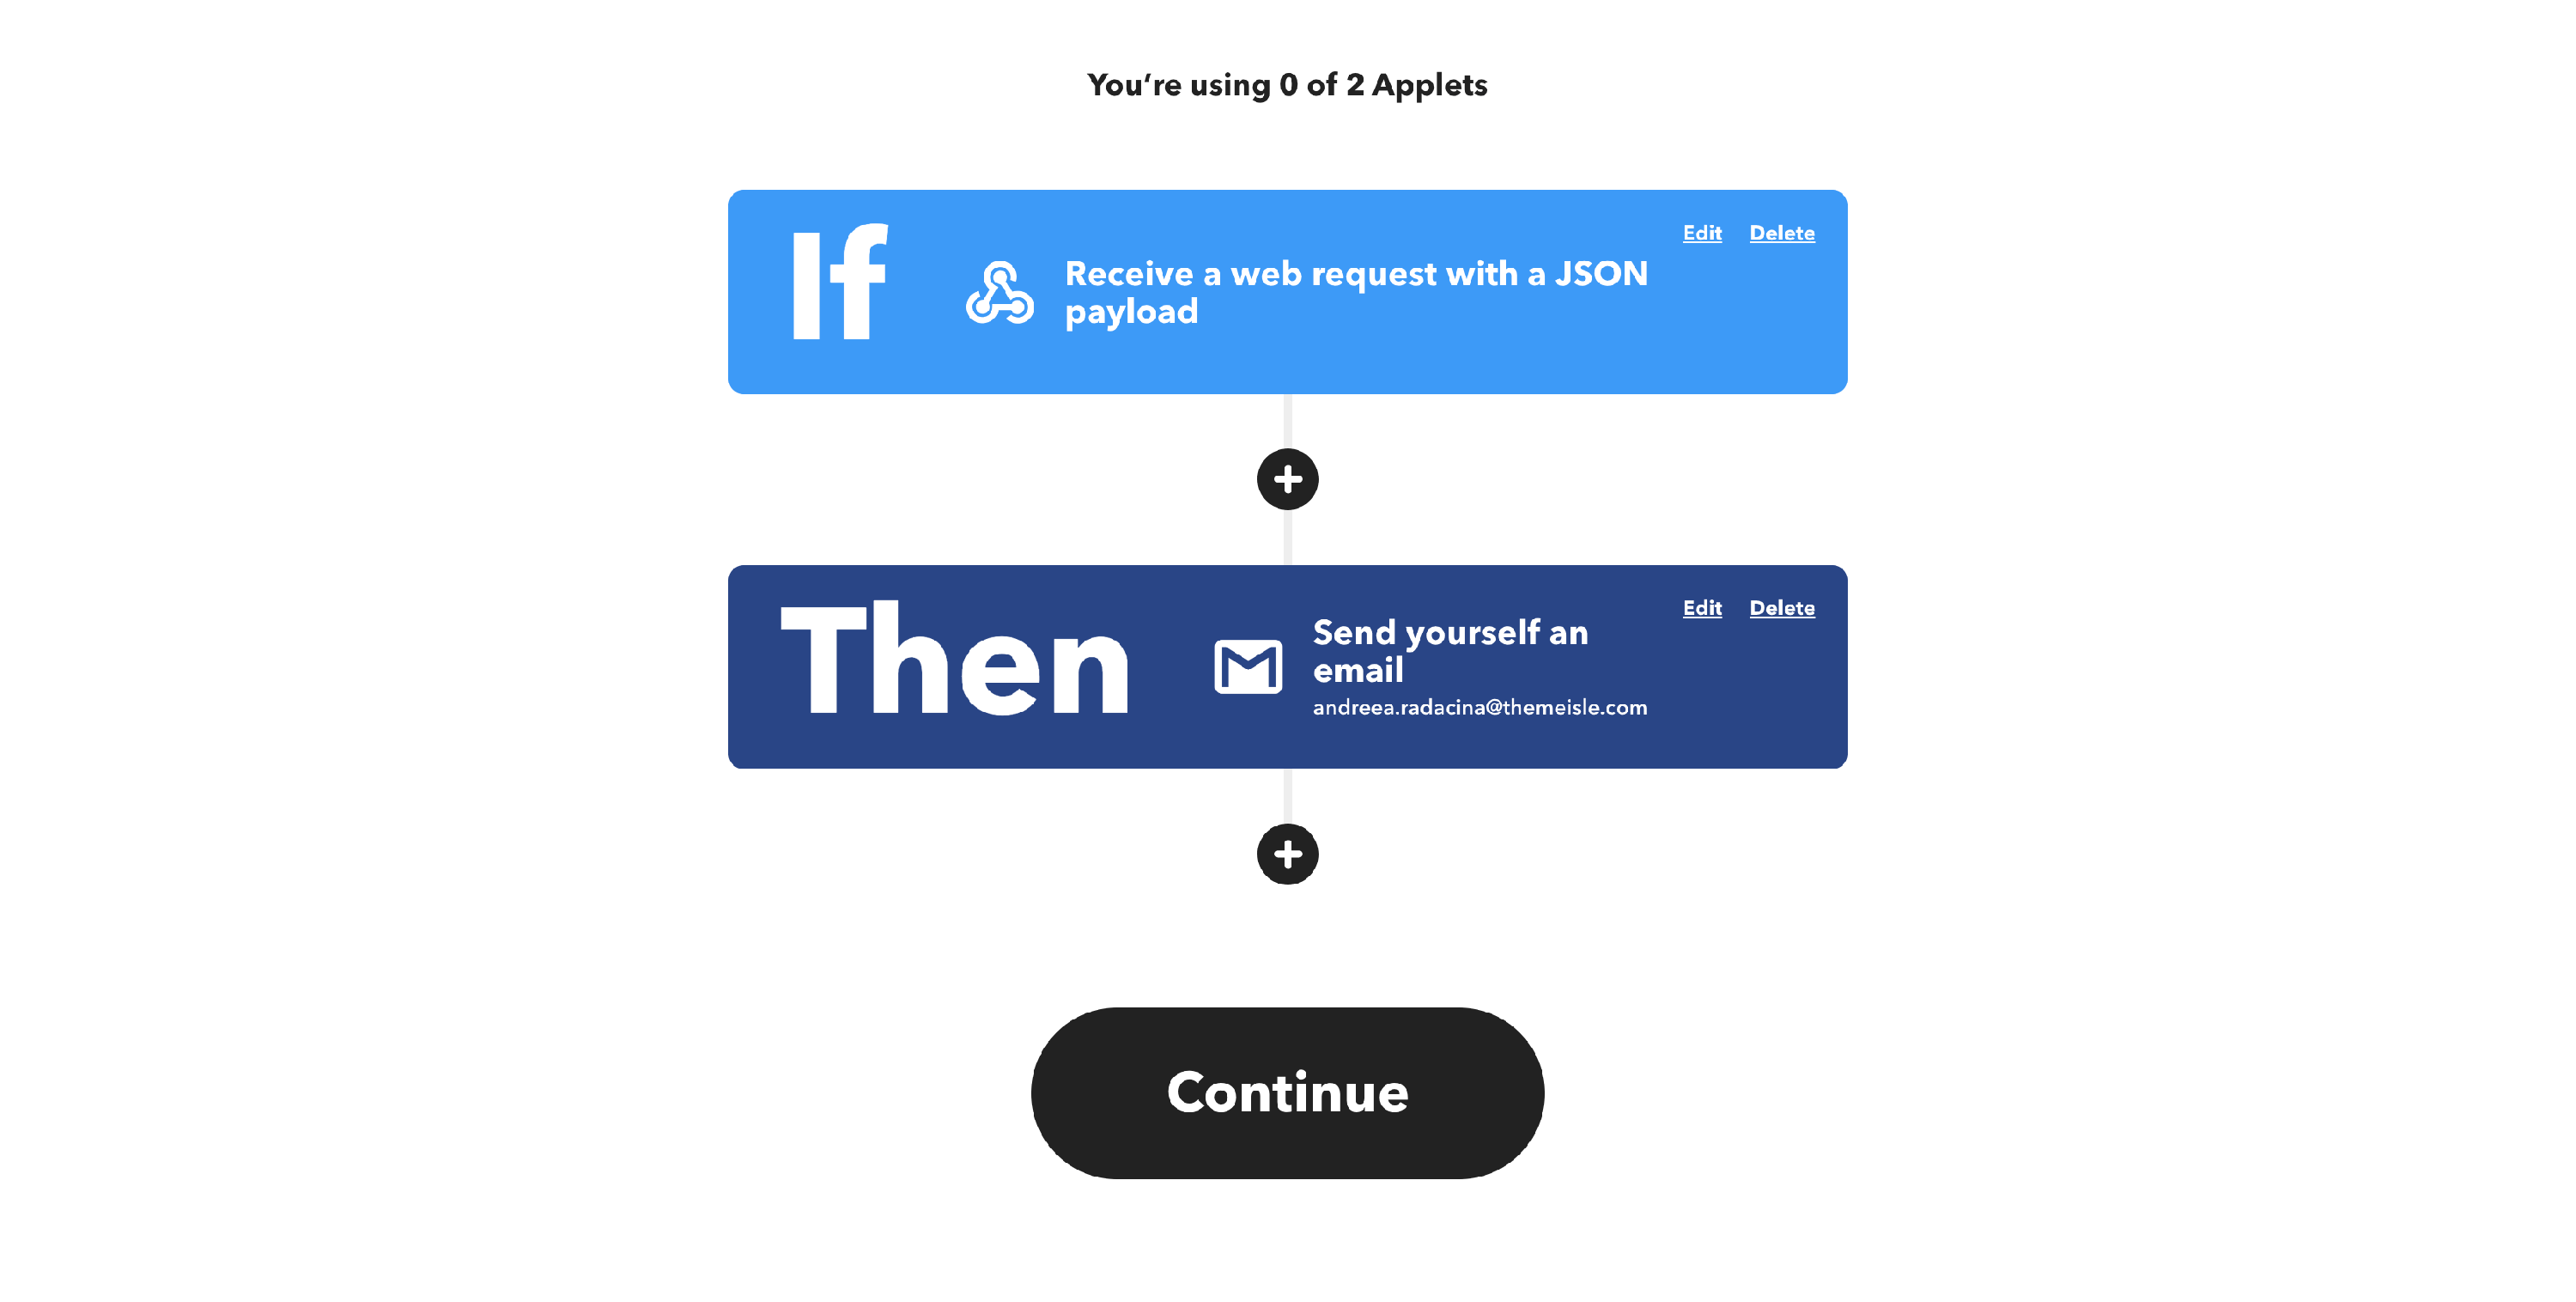
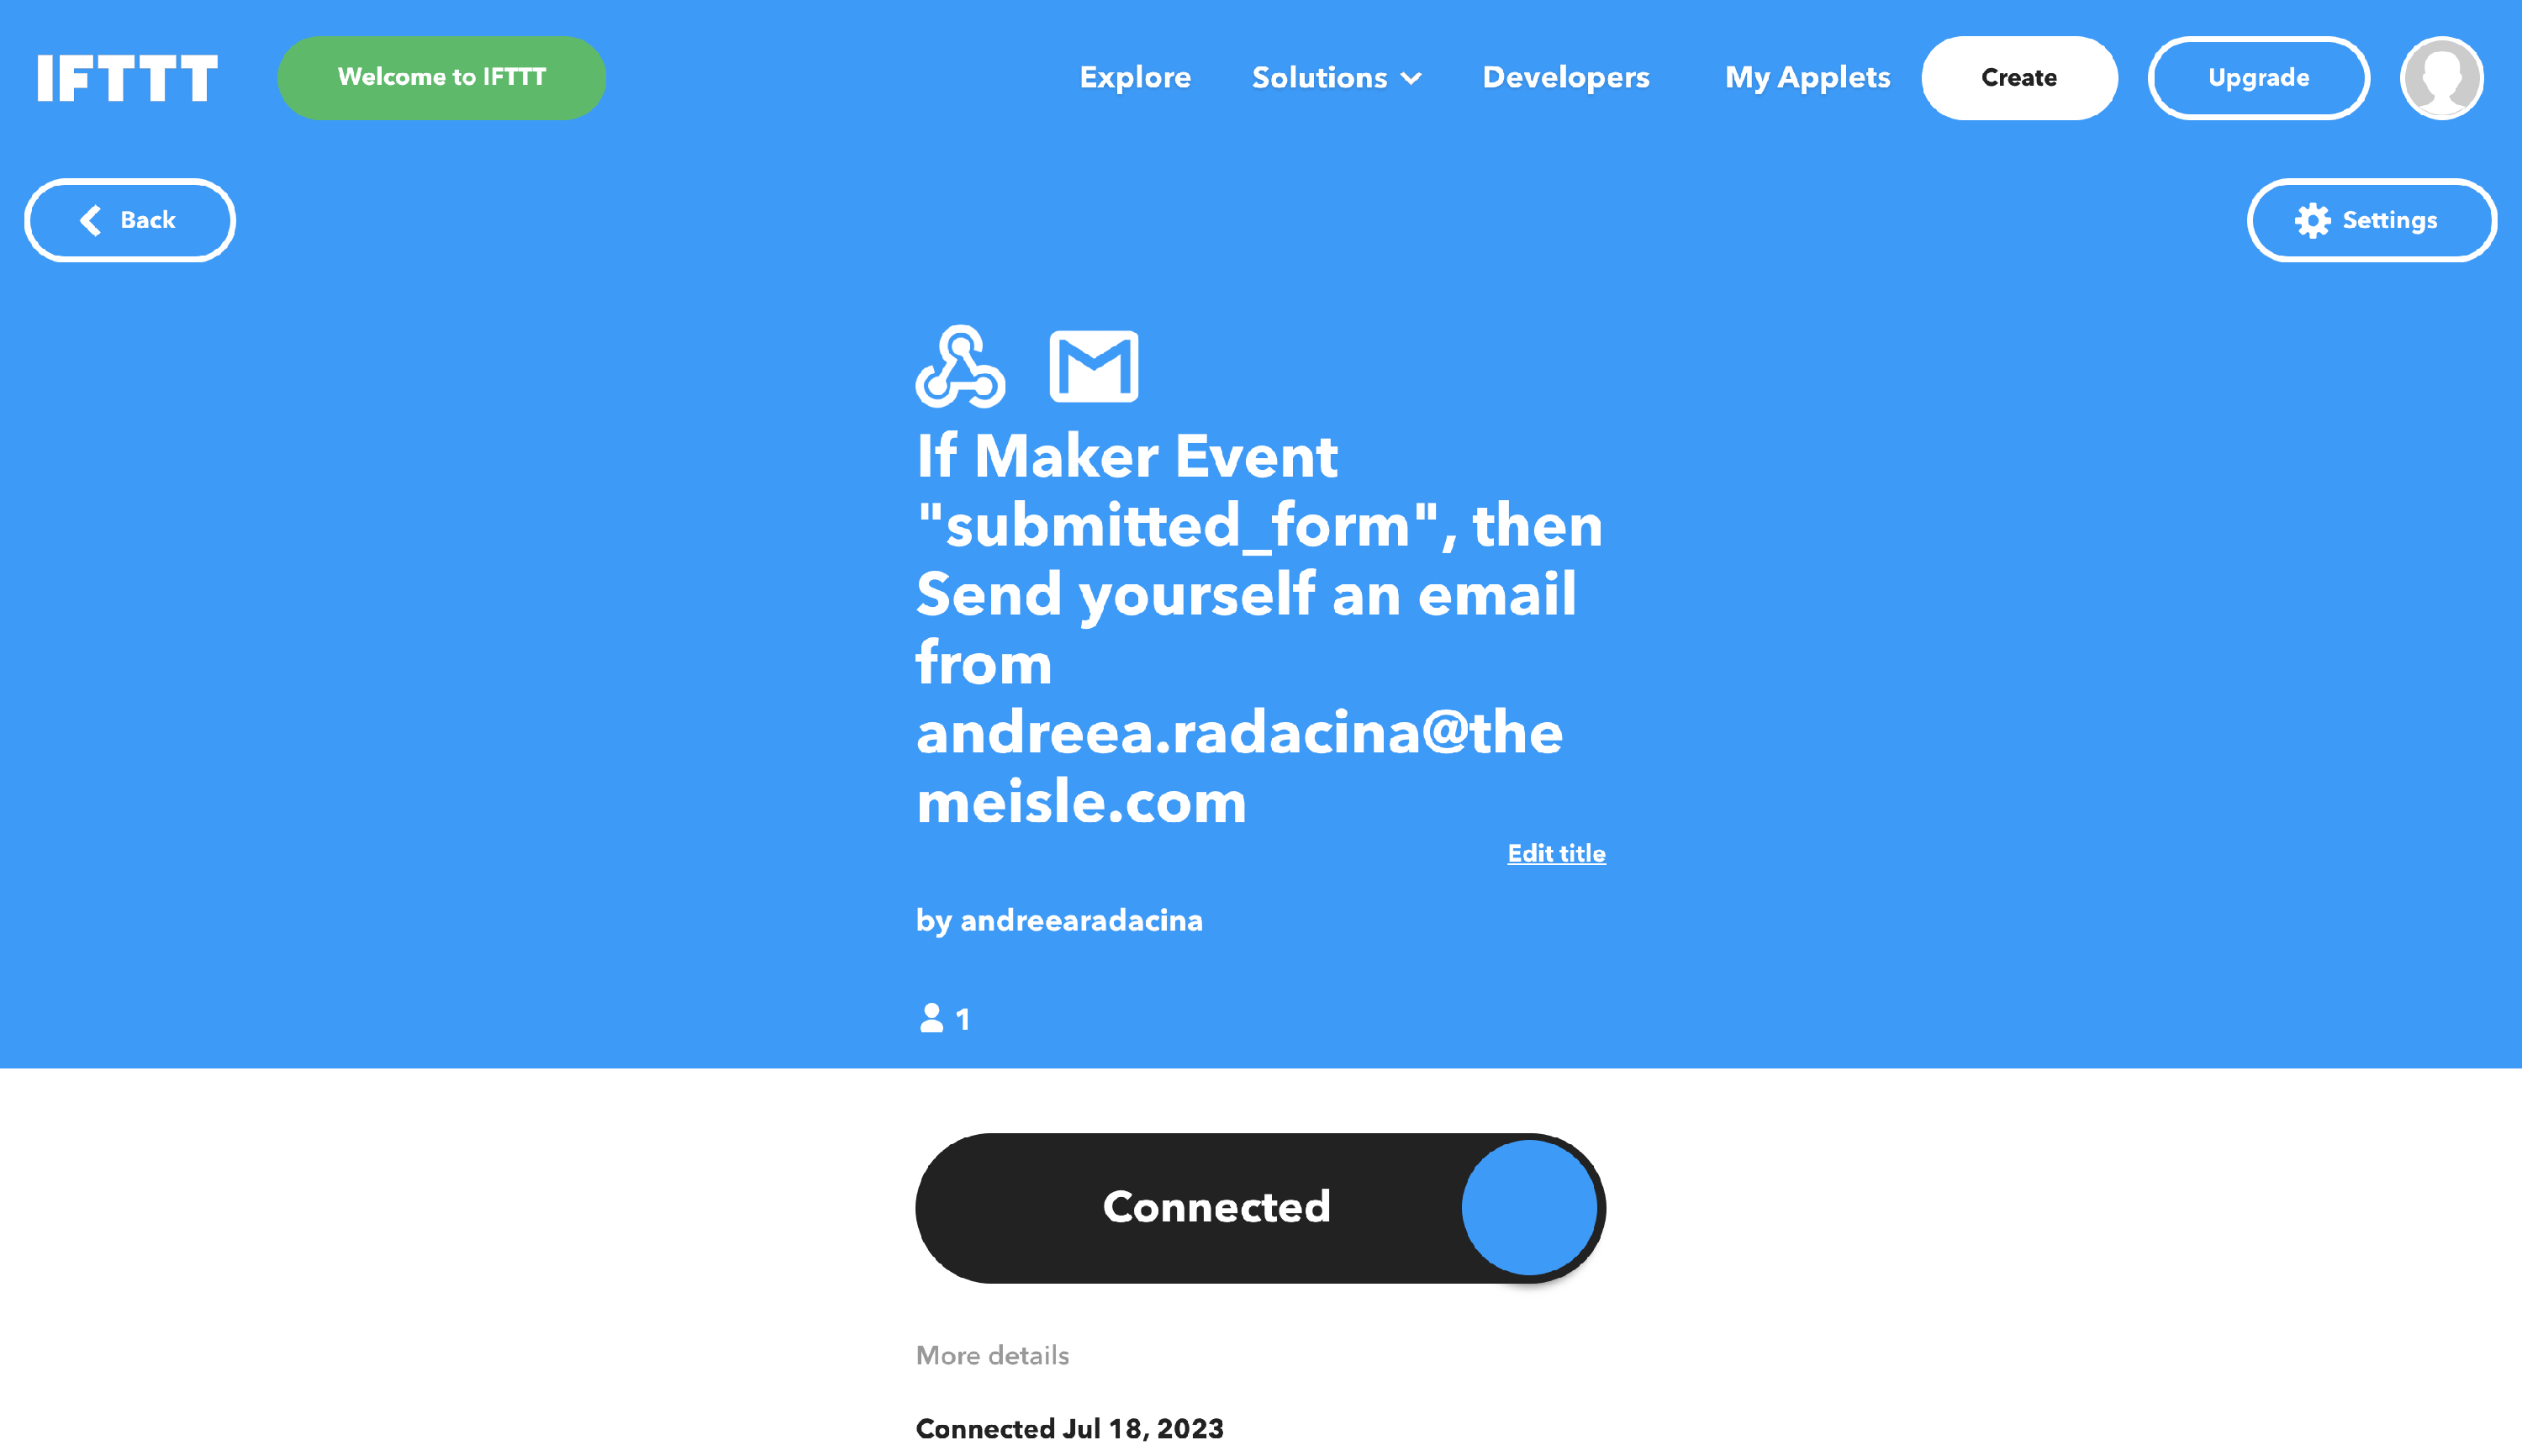
11. Click on the Continue button, and you will be redirected to the below window:
12. After this, navigate to this page and click on the Documentation button.
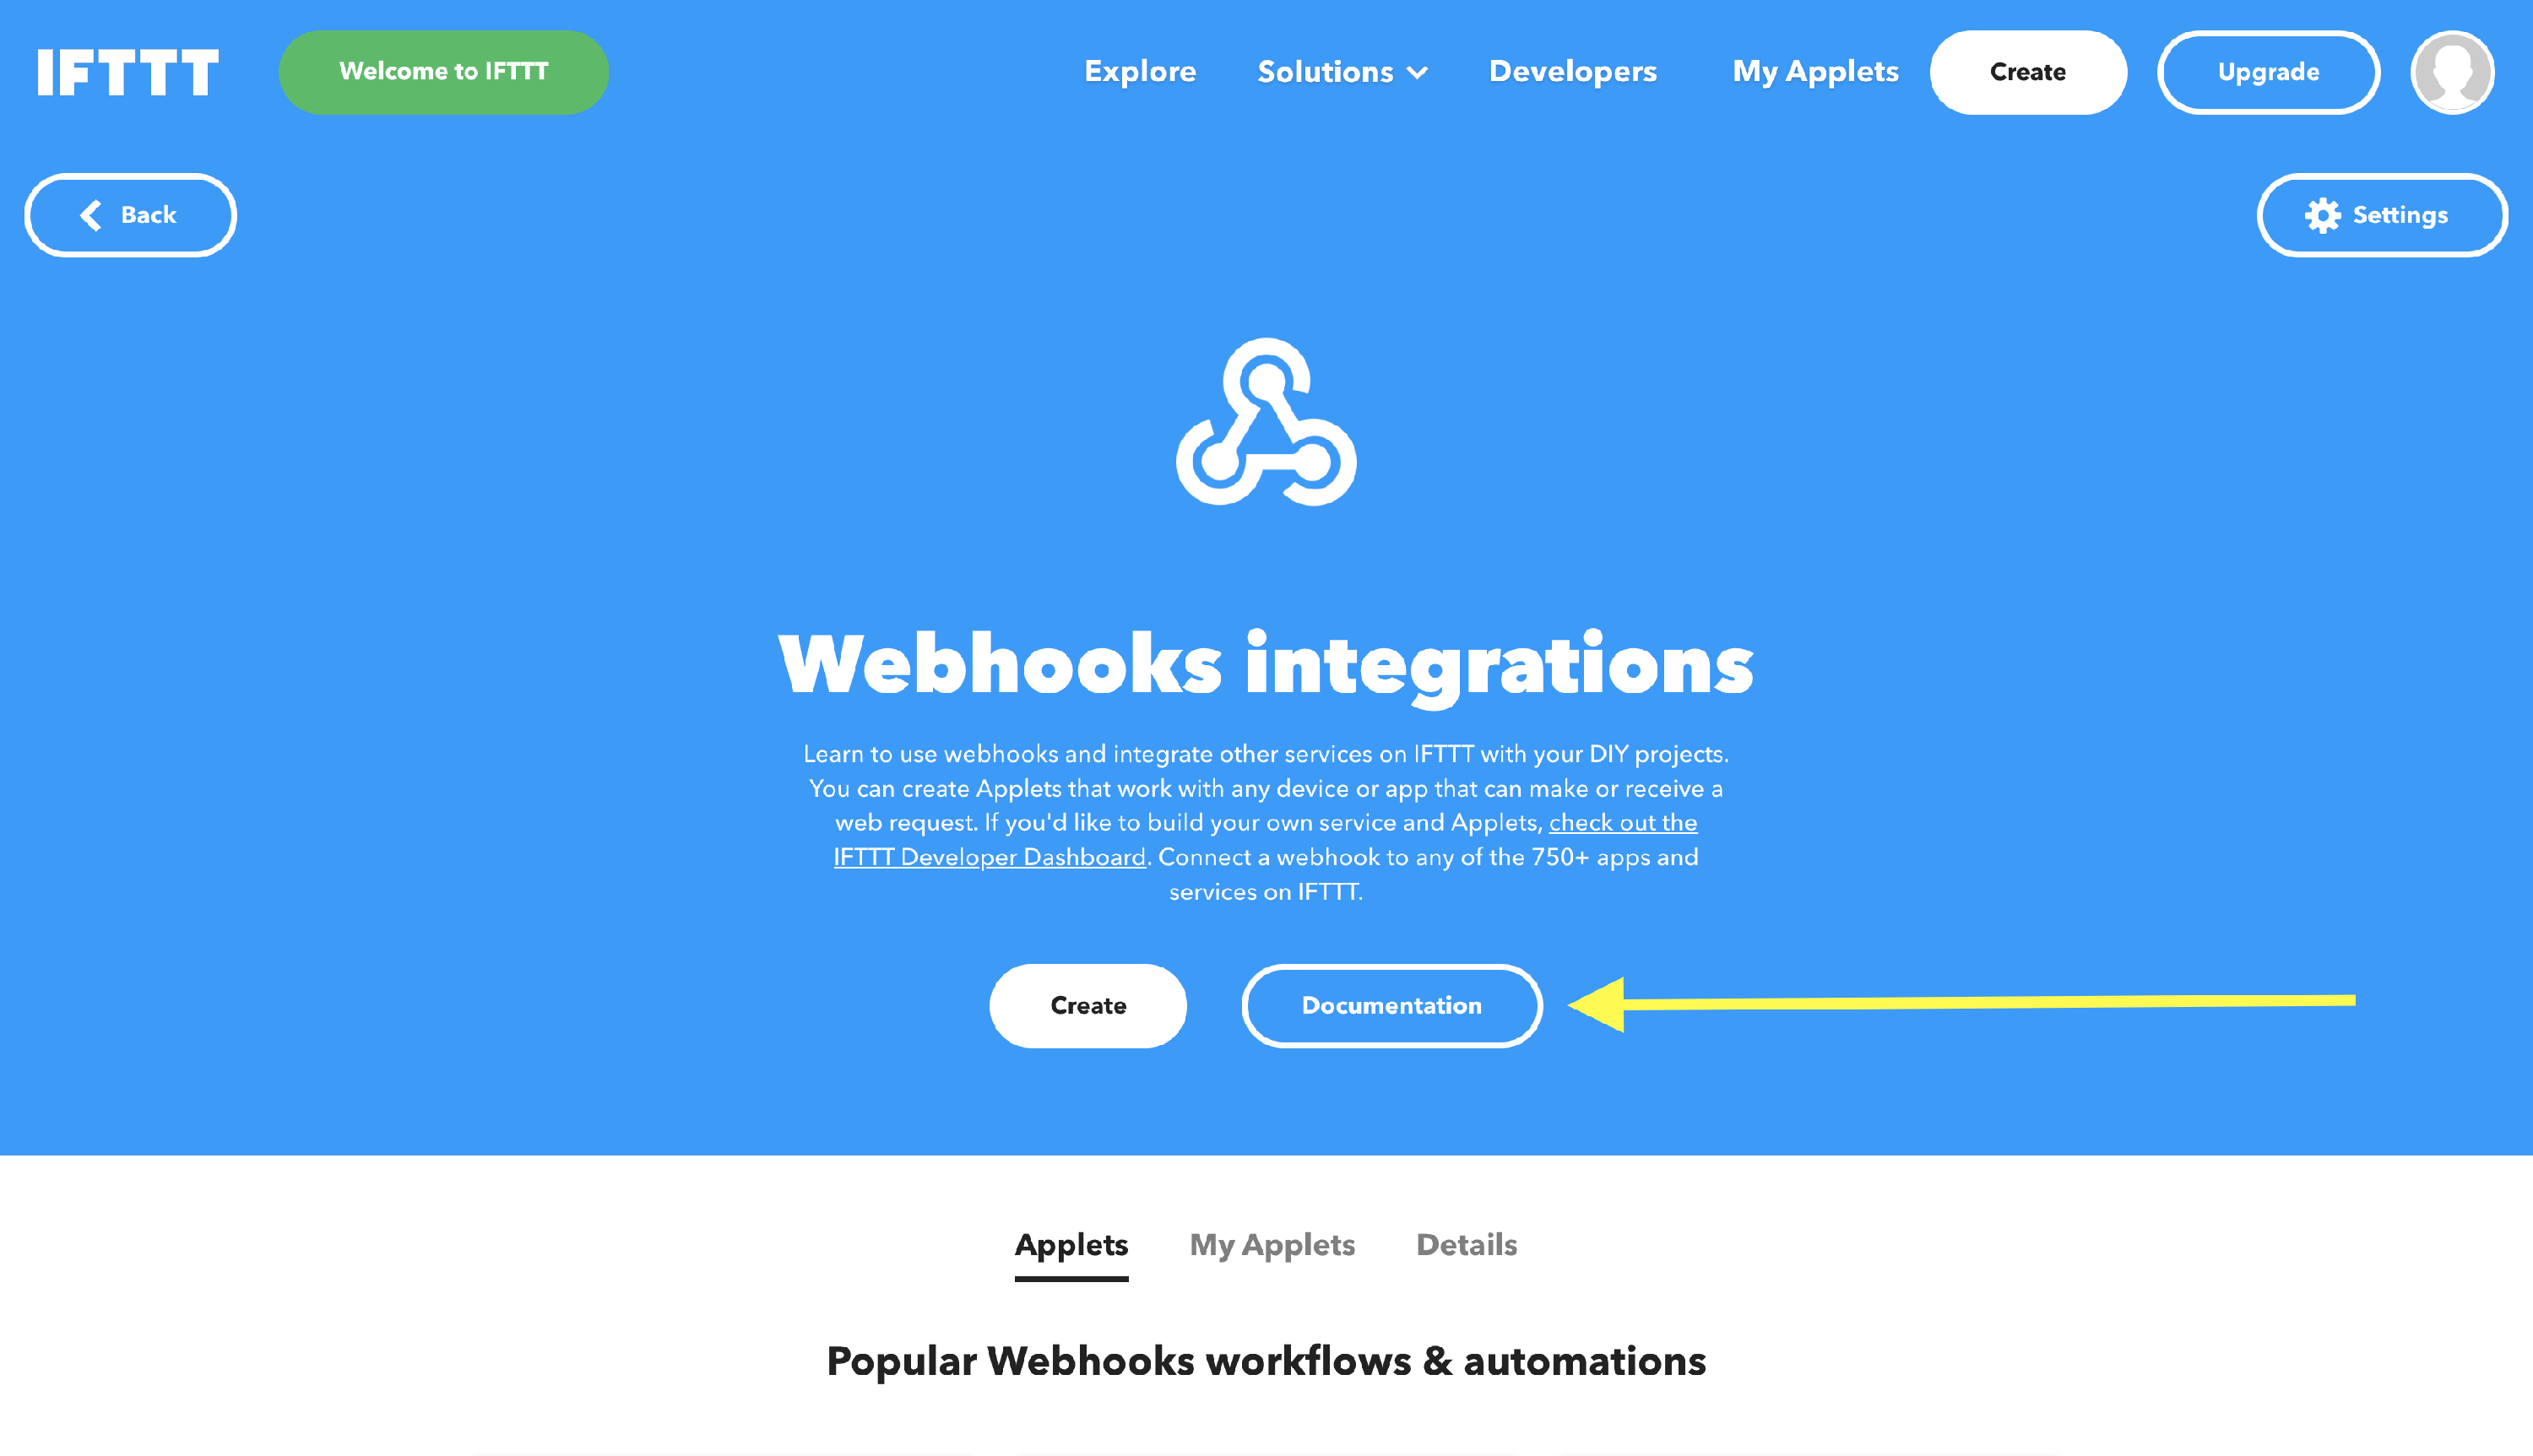
In the first code area, you will find an URL of this type:
https://maker.ifttt.com/trigger/{event}/json/with/key/AjdeTuqvKTHtbInv4xa8u3(...)13. Replace the {event} with your event's name (in our case: submitted_form).
https://maker.ifttt.com/trigger/submitted_form/json/with/key/AjdeTuqvKTHtbInv4xa8u3(...)14. Copy the code and navigate to the website page where you added the Form block.
15. Open the Webhook editor and create a new one.
16. Insert a suitable name, then paste the URL and select POST as a method.
17. Save the changes and submit an answer as a test.
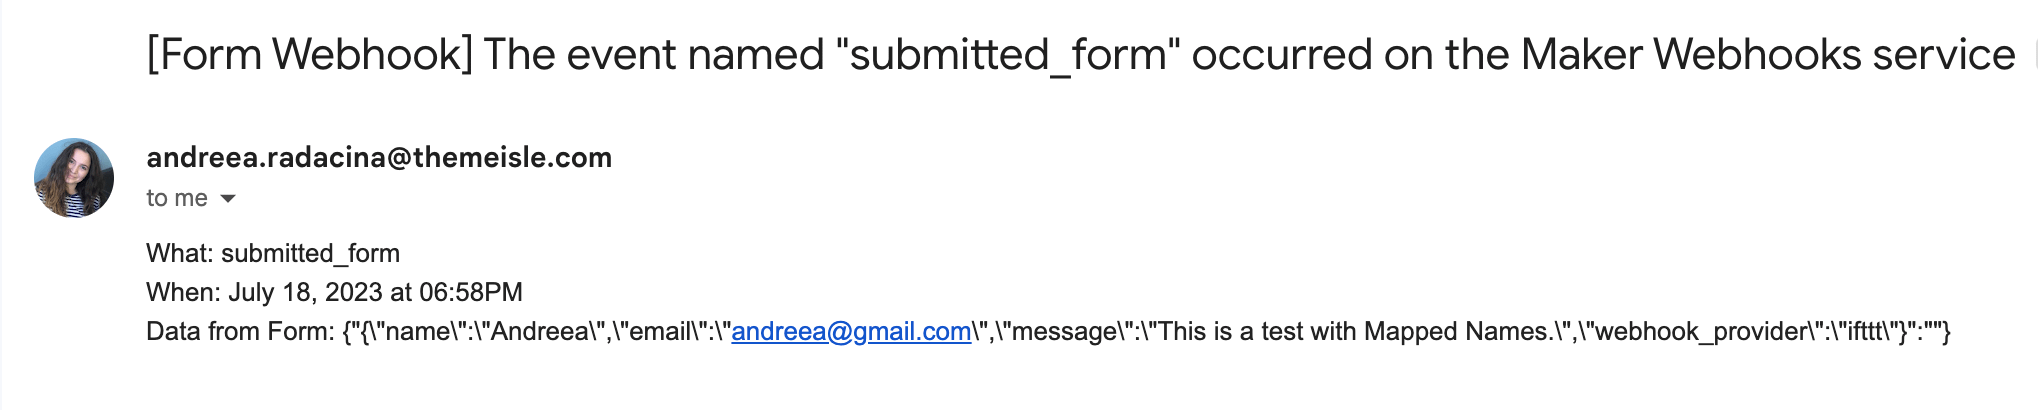
Result
Mapped Name
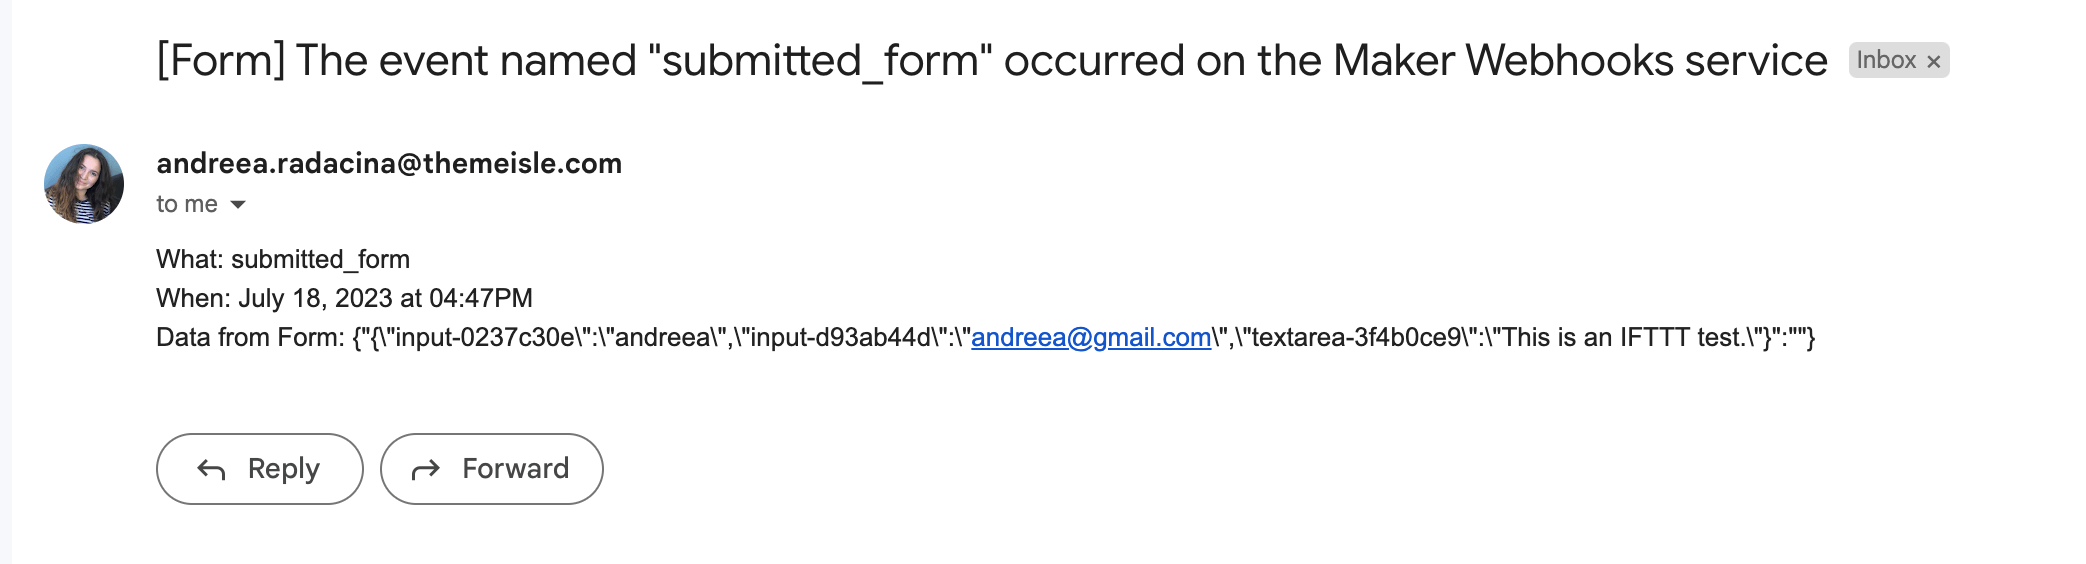
Mapped Name in Email
As you can see above, the data might not necessarily look very friendly:

This is because the data is prepared in a payload, having the structure key: value. The value represents the data collected from the form (e.g. andreea). and the key represents the label of the form field. To make things clearer, each field has a Mapped Name, which will replace the key in the payload.
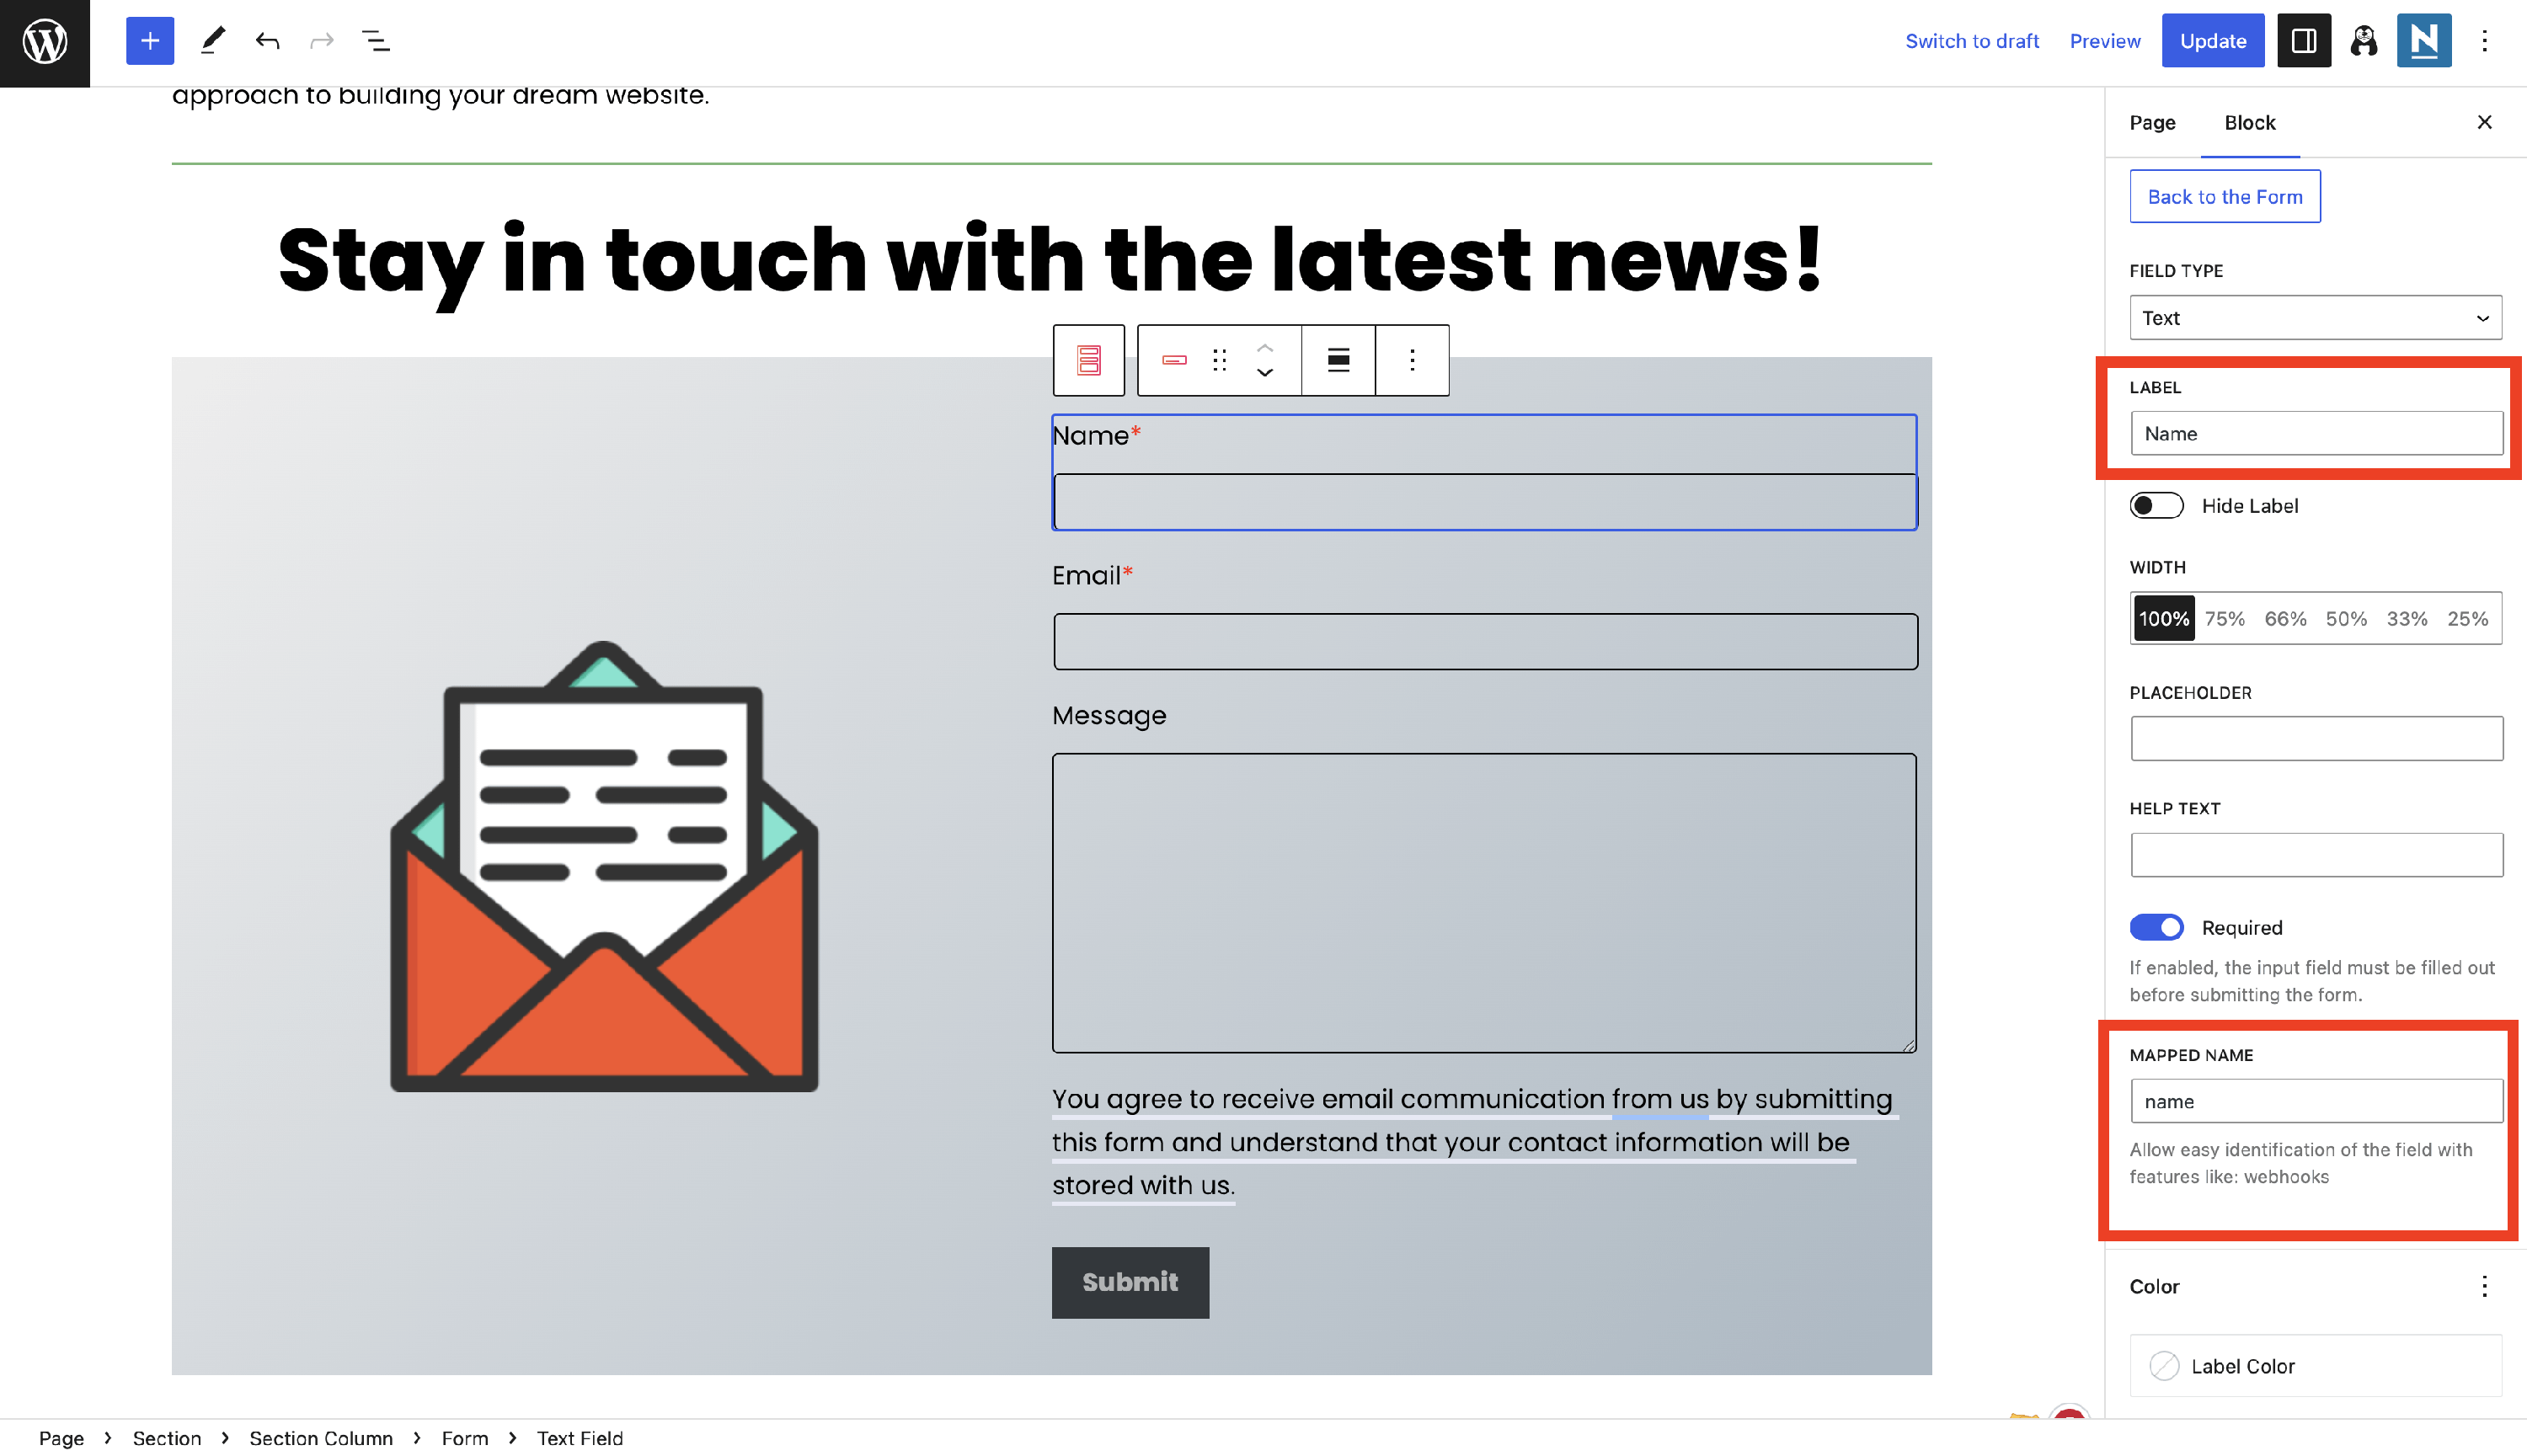
Mapped Name in the Editor
Mapped Names in the Email
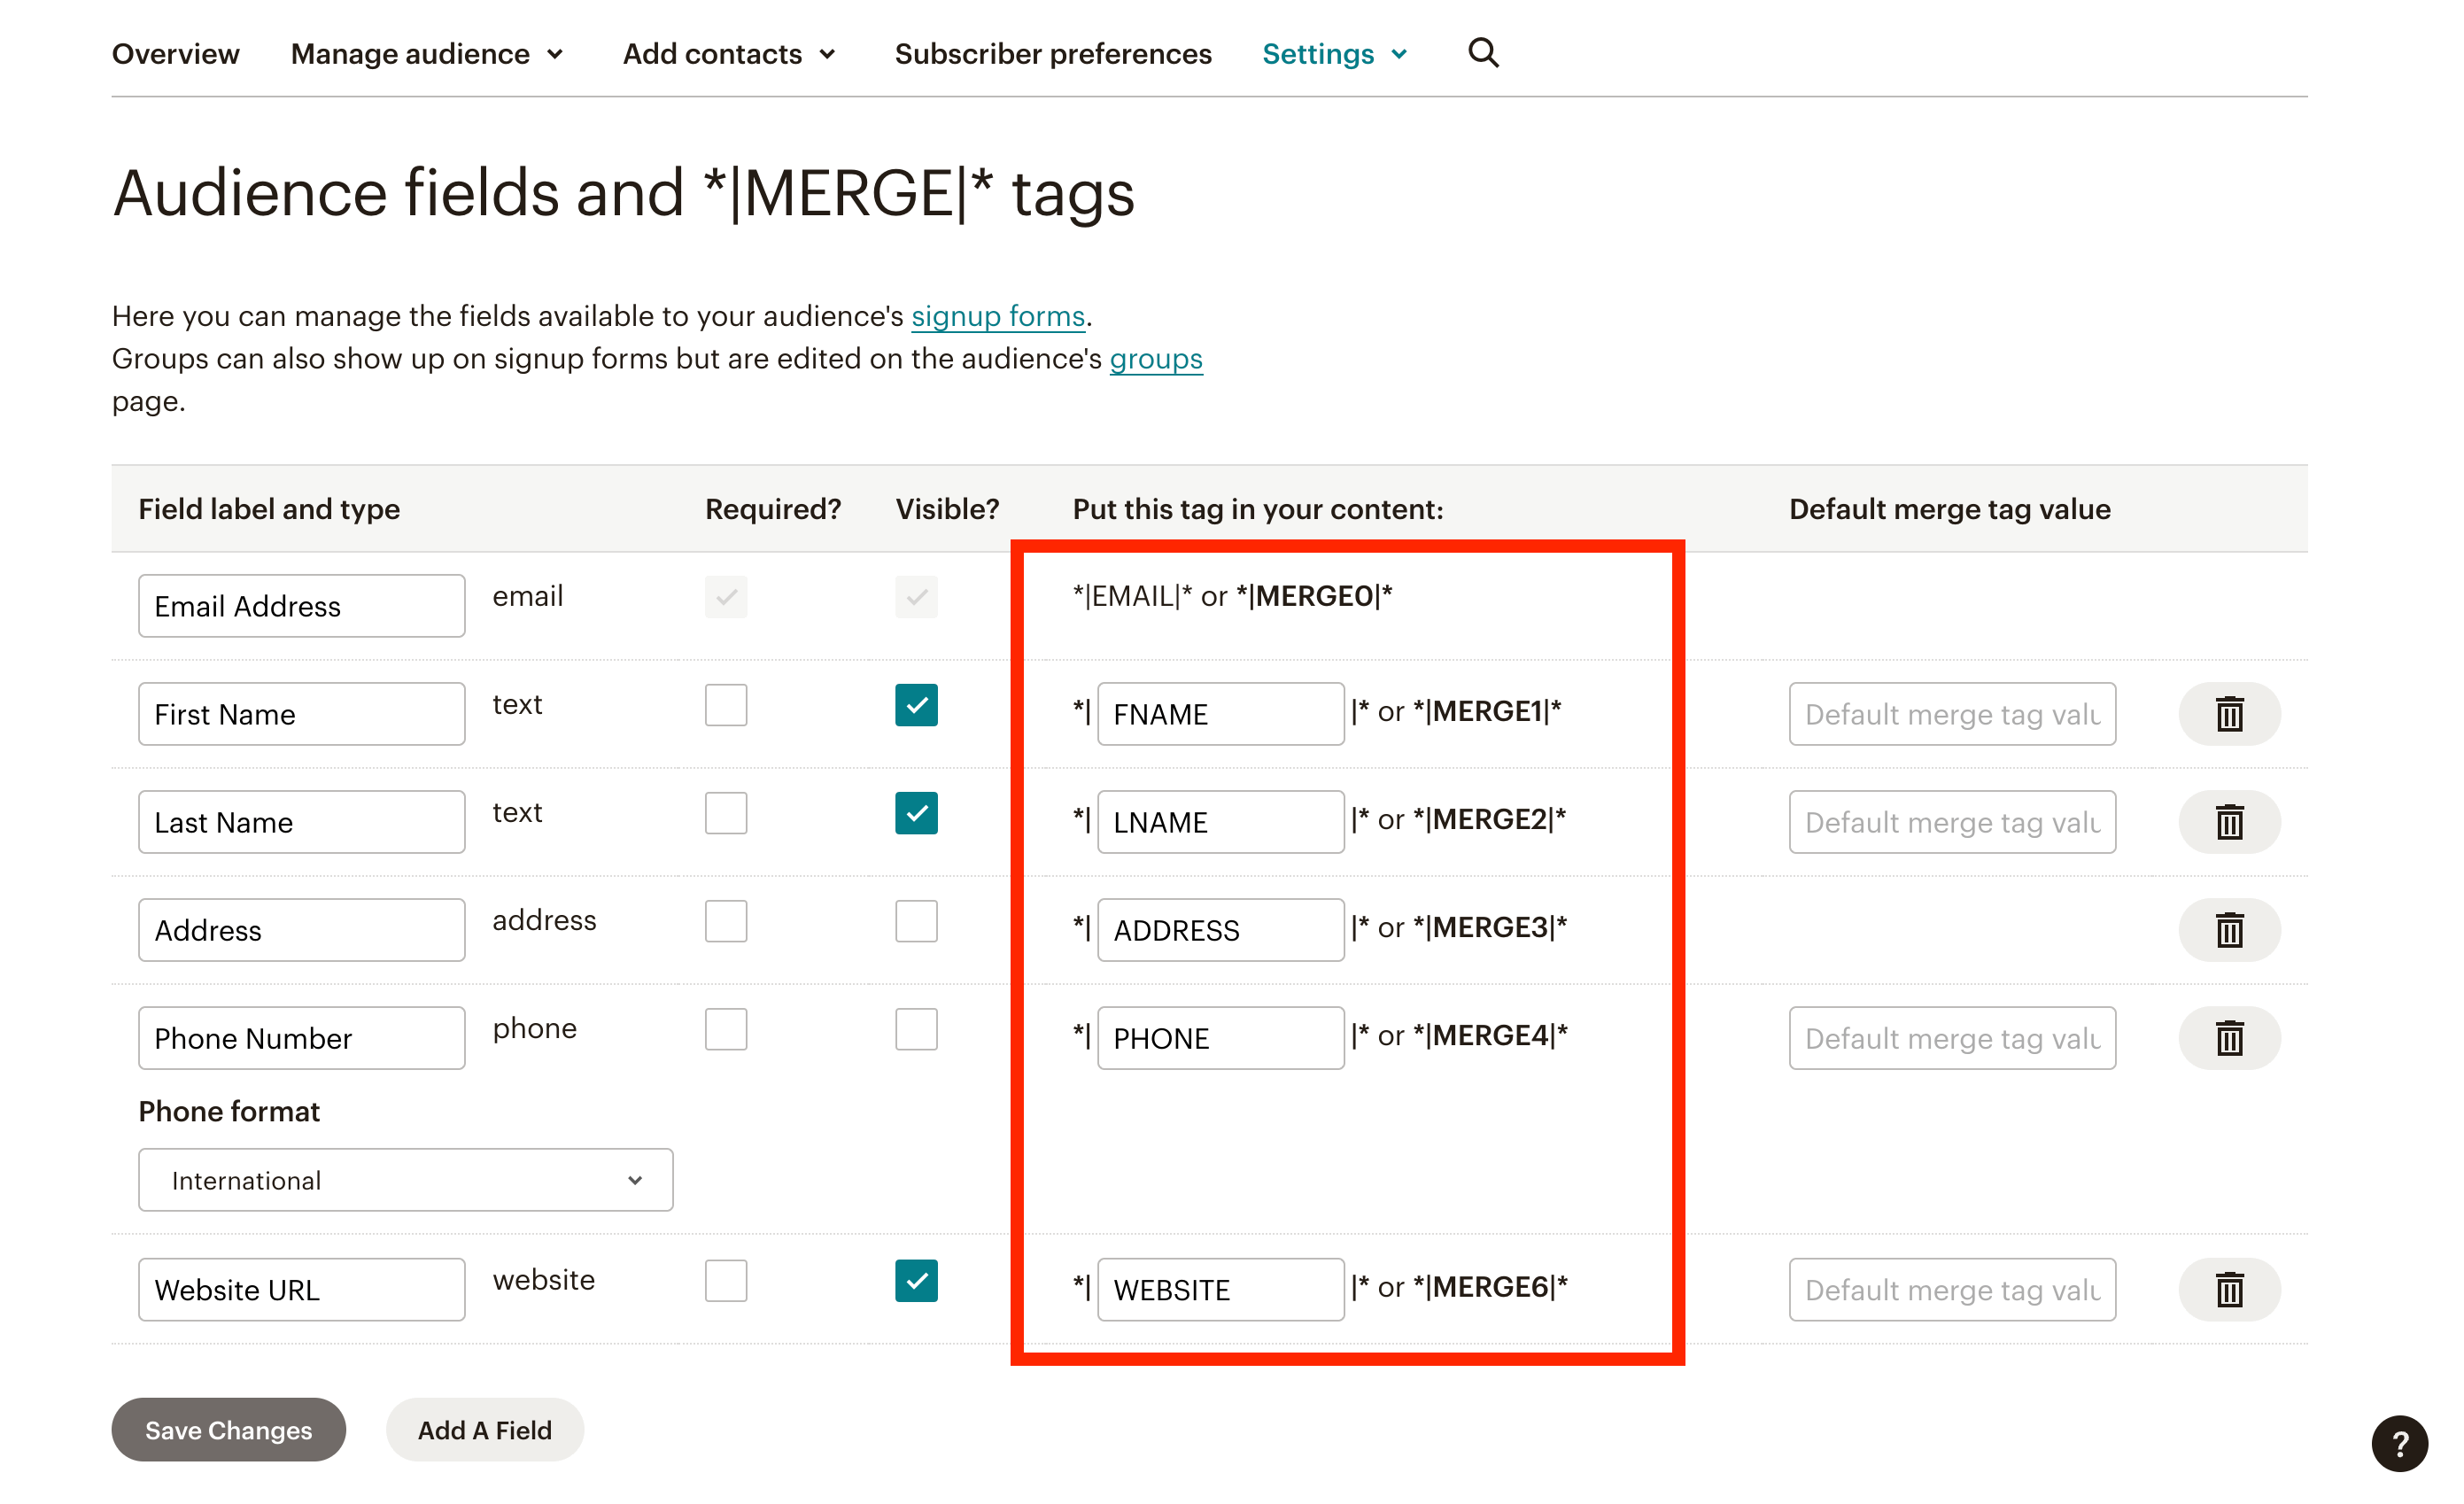
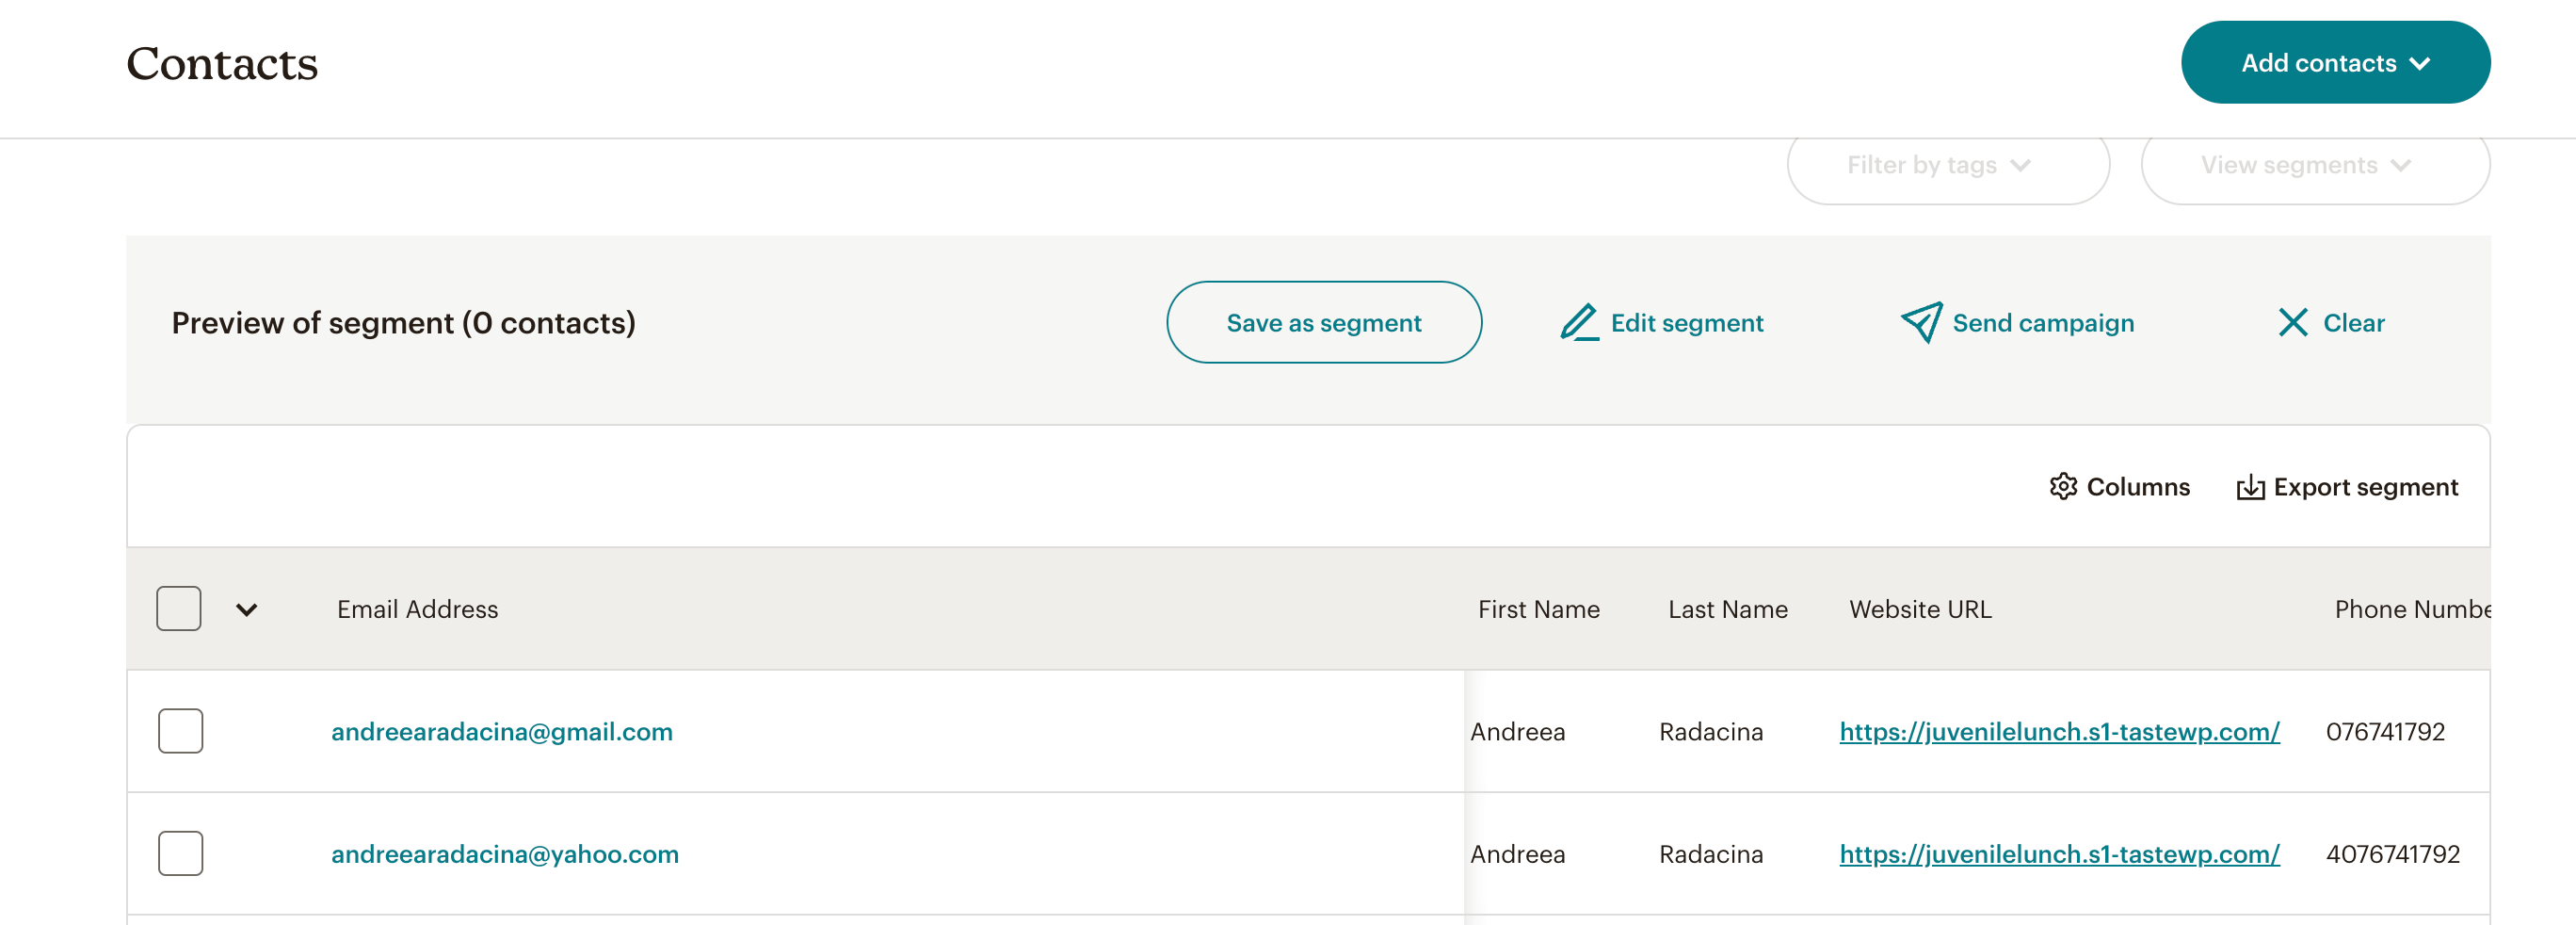
Mapped Name in Mailchimp
Additionally, the mapped name can be used to retrieve data from the form to your Mailchimp dashboard. Using Otter Blocks' integration, the fields set in Mailchimp can be filled in with form values, as described below.
1. Navigate to your Mailchimp Dashboard > Audience > All Contacts > Settings > Audience fields and *|MERGE|* tags.
2. Copy the tag names available in the Put this tag in your content: column.
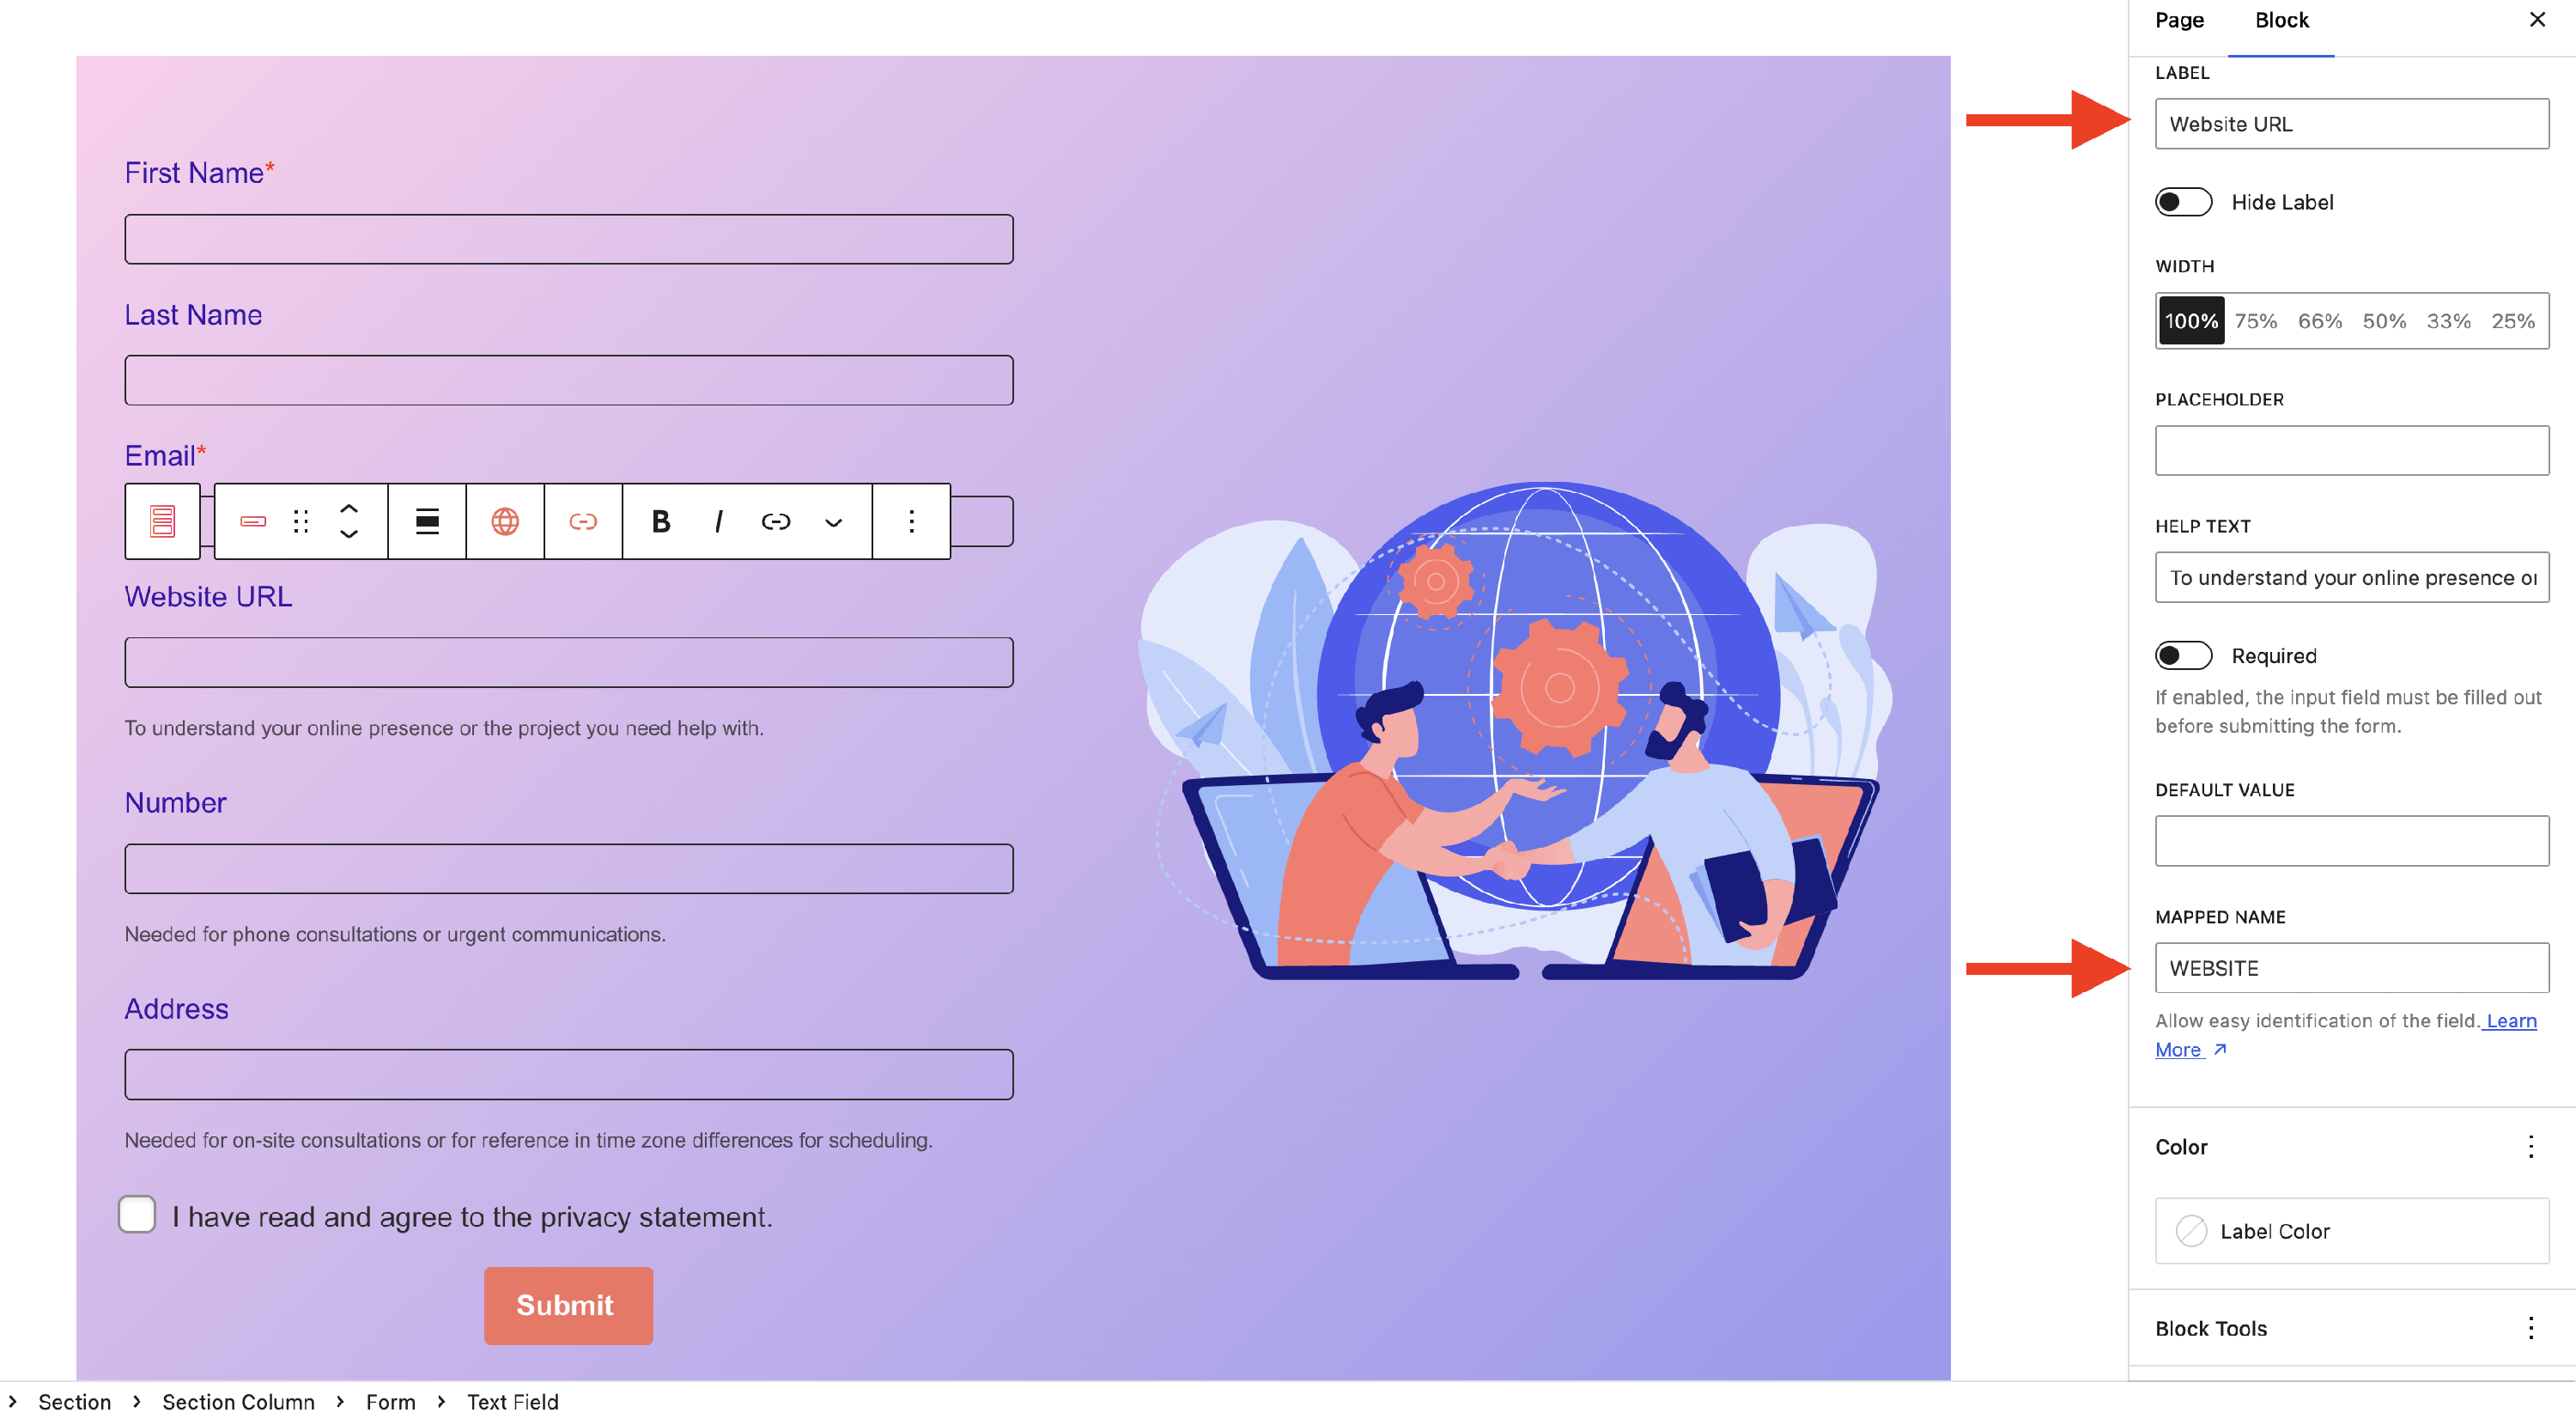
3. Go to the previously create form and open its settings.
4. Click on each form item and add the corresponding Mapped Name, according to the Mailchimp Tags: First Name - Mapped Value = FNAME; Last Name - Mapped Value = LNAME; Website URL - Mapped Value = WEBSITE, etc.
5. Save the settings and go to fill in the form in an Incognito window to test how it works:
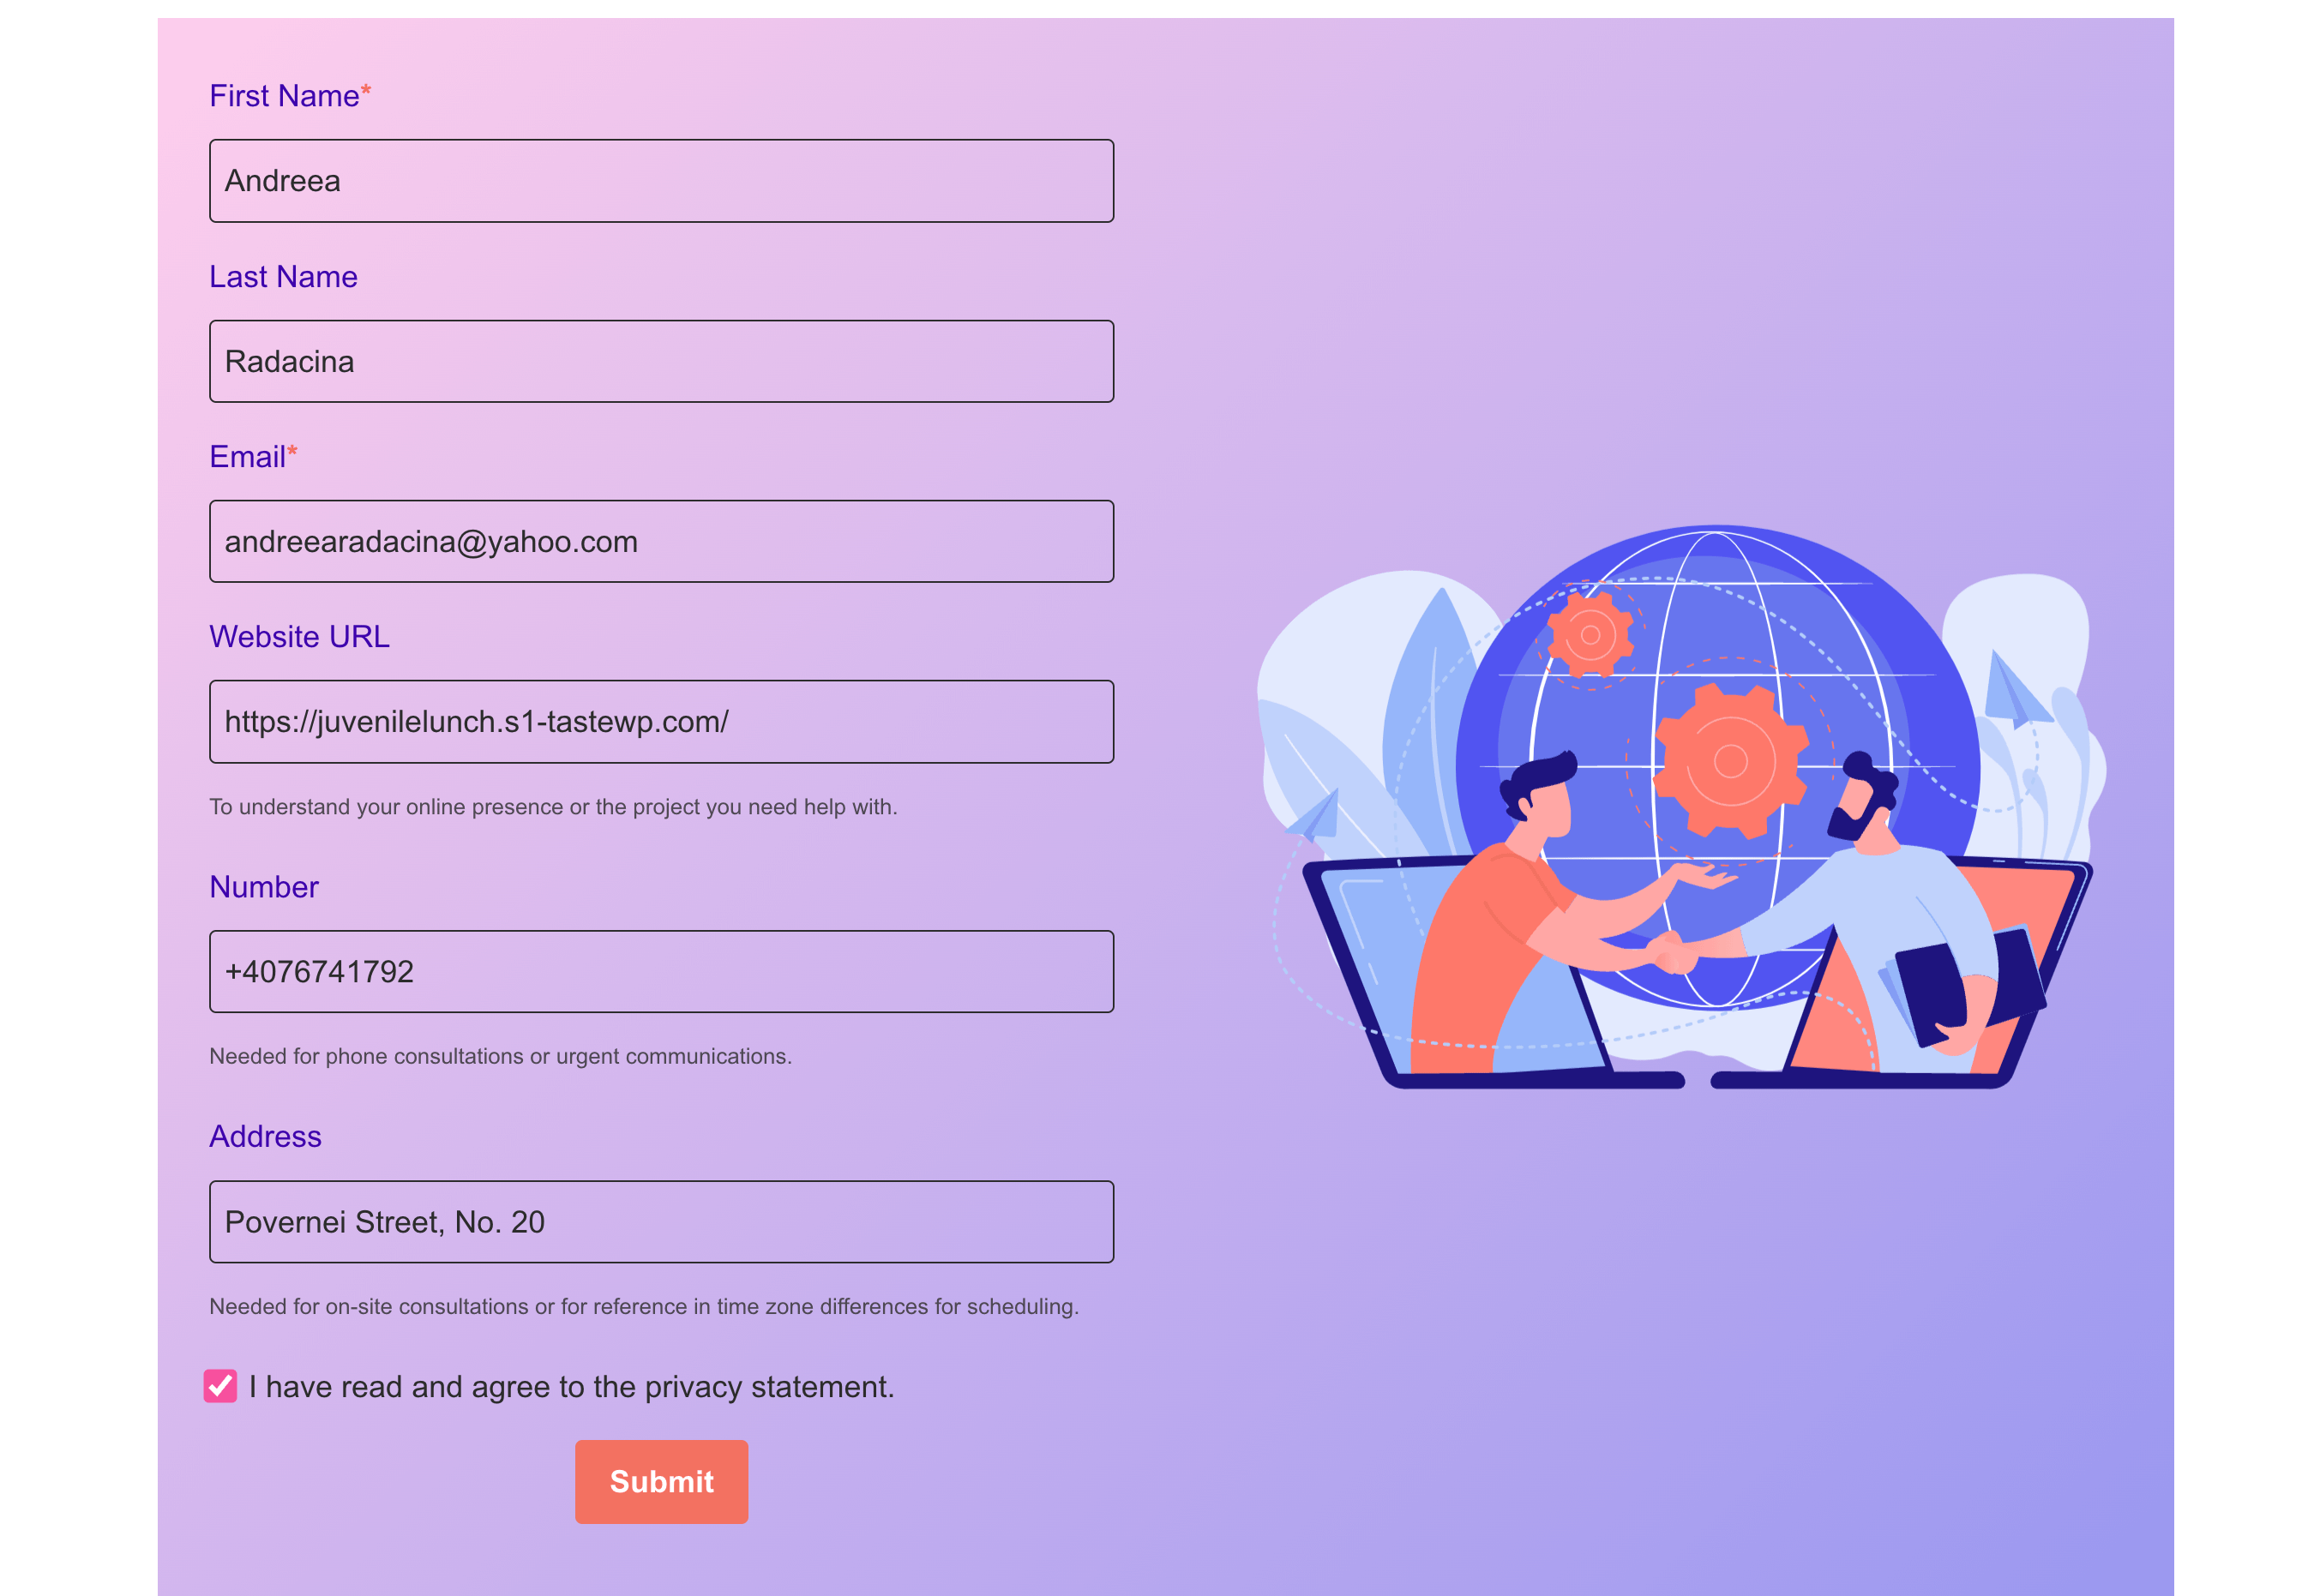
6. Once the responses are submitted, go to Mailchimp > Audience > Contacts to see the values.
📝Note: We highly recommend using the TEXT type for linked fields. For instance, fields such as "file" don't retrieve data accurately - when users upload a file, only the file name appears in Mailchimp.
Change payload data with PHP Hooks
PHP enables users to modify the payload data that will be sent to the webhook.
1. To do this, copy the code below.
/**
	 * Add extra data to the payload that marks the IFTTT webhook provider.
	 *
	 * @param mixed $payload The payload.
	 * @param Form_Data_Request $form_data The form data.
	 * @param mixed $webhook The webhook.
	 * @return mixed
	 */
	function mark_ifttt_provider( $payload, $form_data, $webhook ) {
		if ( str_contains( $webhook['url'], 'maker.ifttt.com' ) ) {
			$payload['webhook_provider'] = 'ifttt';
		}

		return $payload;
	}

        add_filter( 'otter_form_webhook_payload', 'mark_ifttt_provider', 10, 3 );
2. Make the desired changes and paste the code into the currently active theme functions.php file or using Code Snippets.
📝 Note: If you paste the code snippet into the plugin's source file, the changes will be lost when you update the plugin. The same thing may happen when you update the theme, this is why we recommend using a child theme.
