How to Configure the Conditional Images Input in PPOM?
📝 Note: This is part of PPOM pro, which you can get from here.
The Conditional Images input allows you to display different meta fields according to the chosen option. This way, the user can insert particular customizations for each variantion.
🧰 Configuring the Input
1. Navigate to WooCommerce > PPOM Fields, and add a new field group.
2. Insert the Conditional Images input and configure its name.
3. Switch to the Add Images tab and insert image variations for the product.
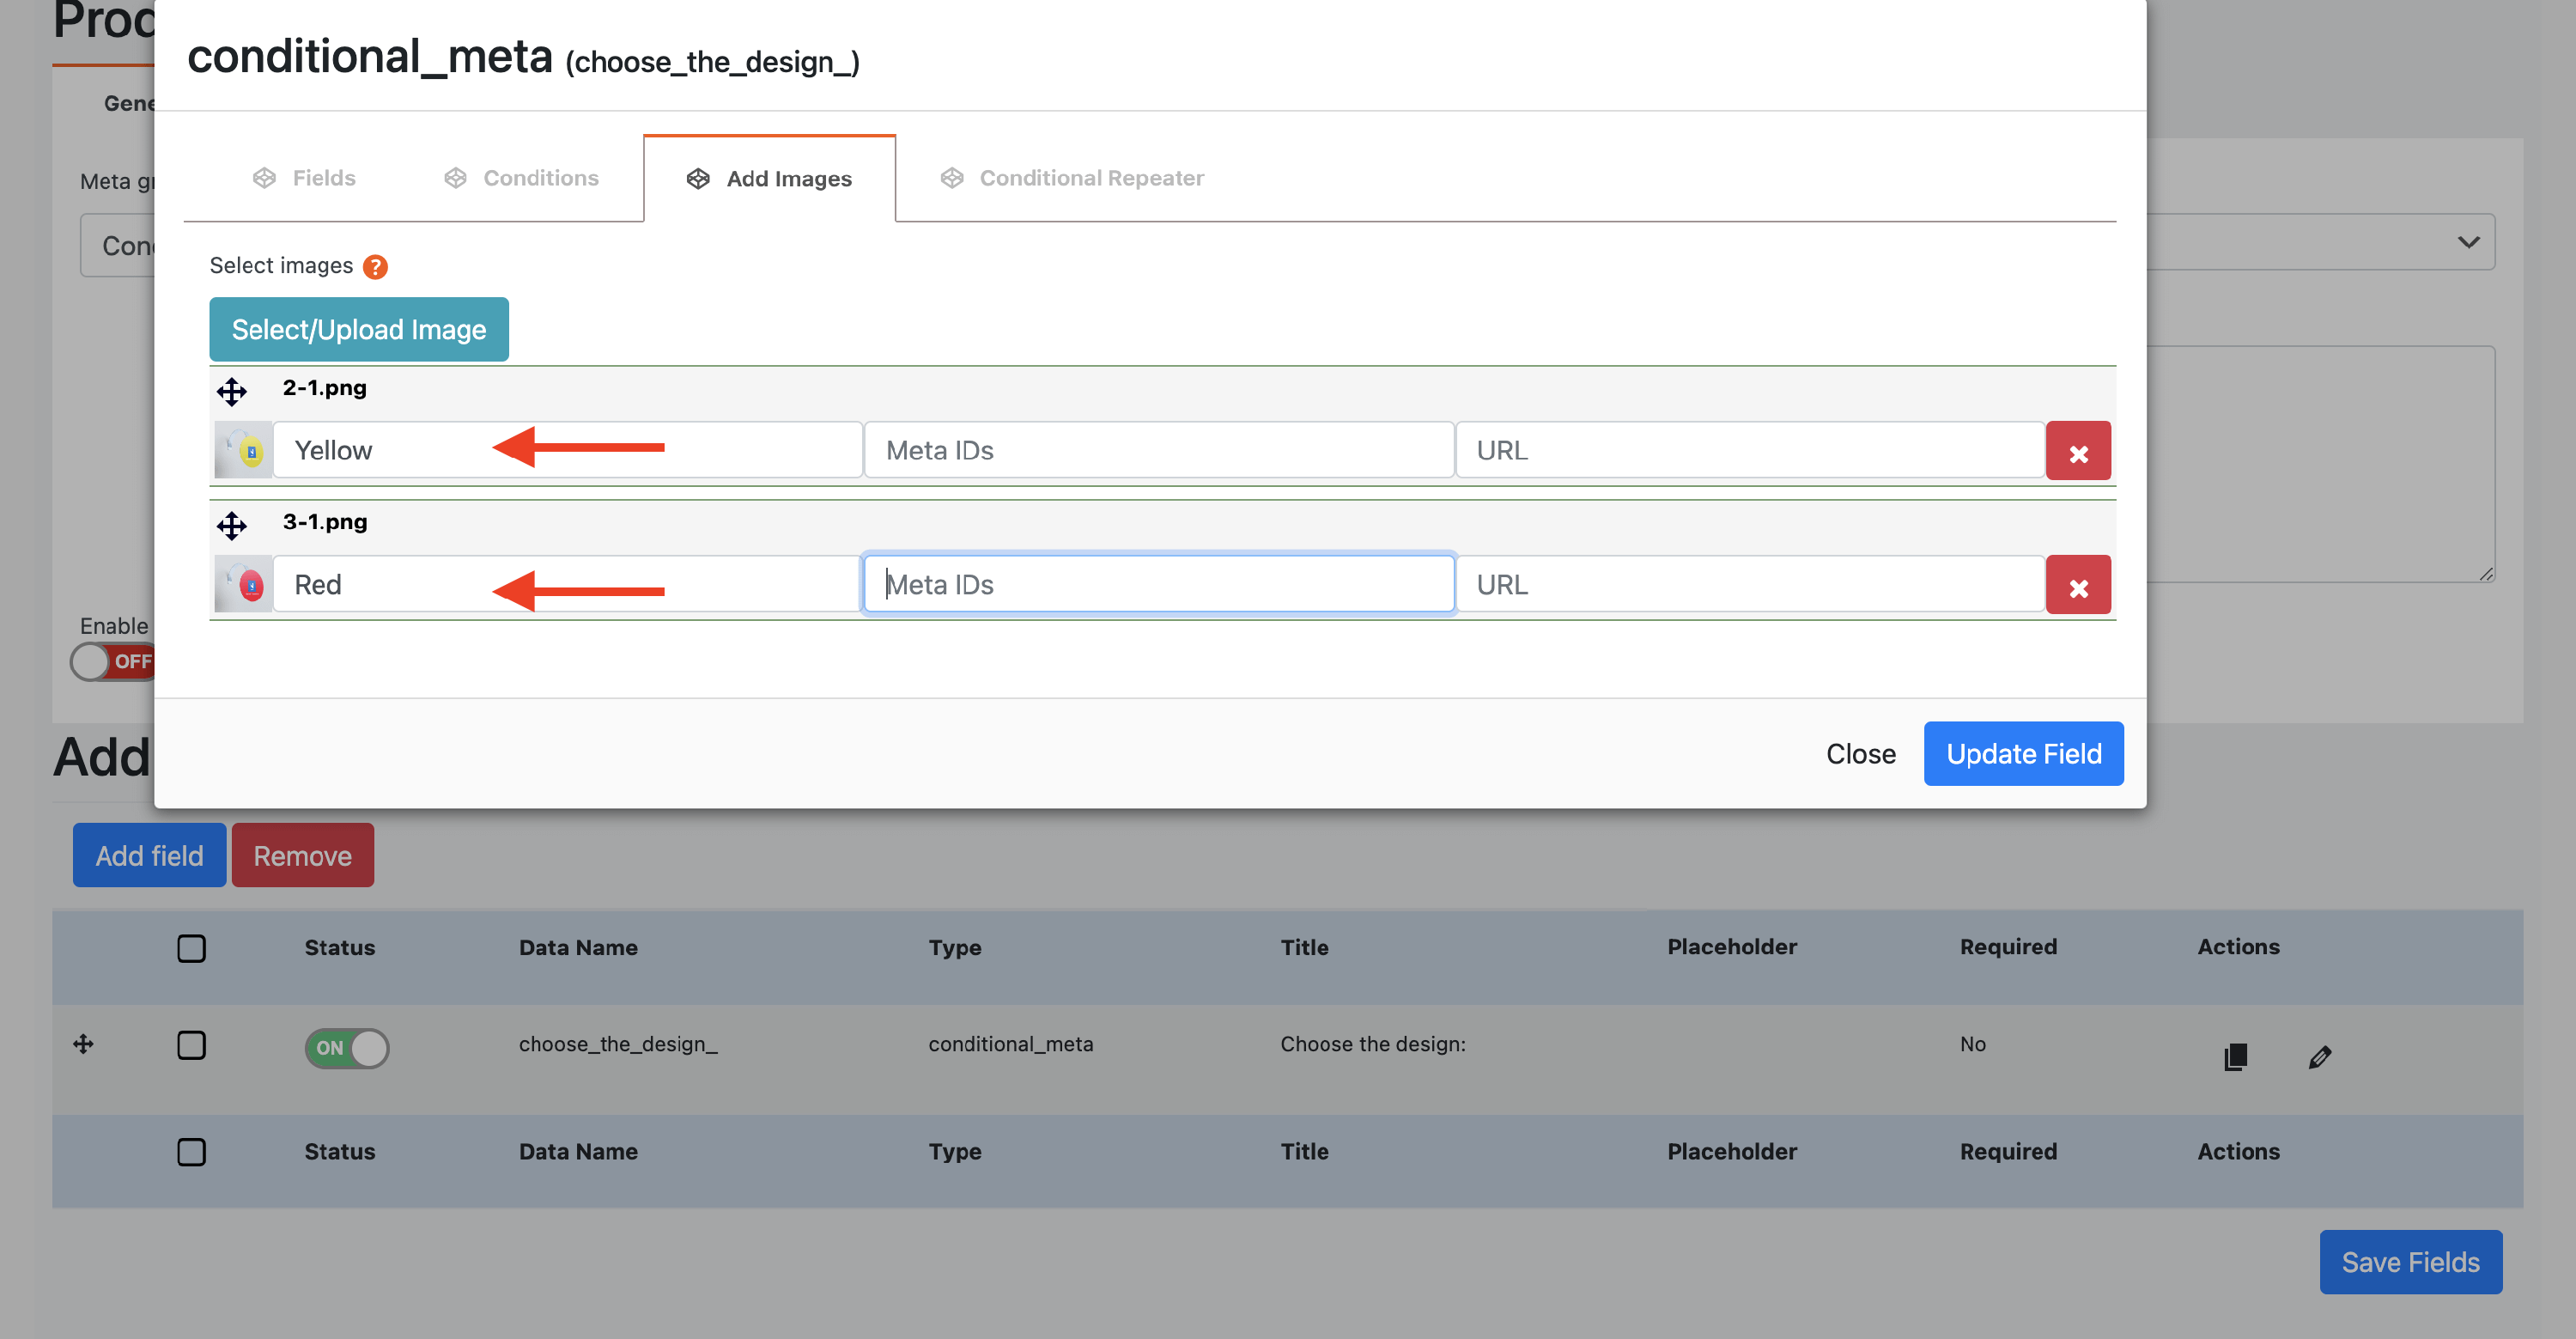
Now, some other details there need to be filled in. To do this, you must create other meta fields corresponding to each variation. Check the chapter below for details.
⚙️ Creating Different Meta Fields
1. Go back to the PPOM Field Groups page.
2. Add a new group and name it suggestively to correspond to one of the variations.
3. Insert in the new group the meta fields that you want to be available only for one of the variations.
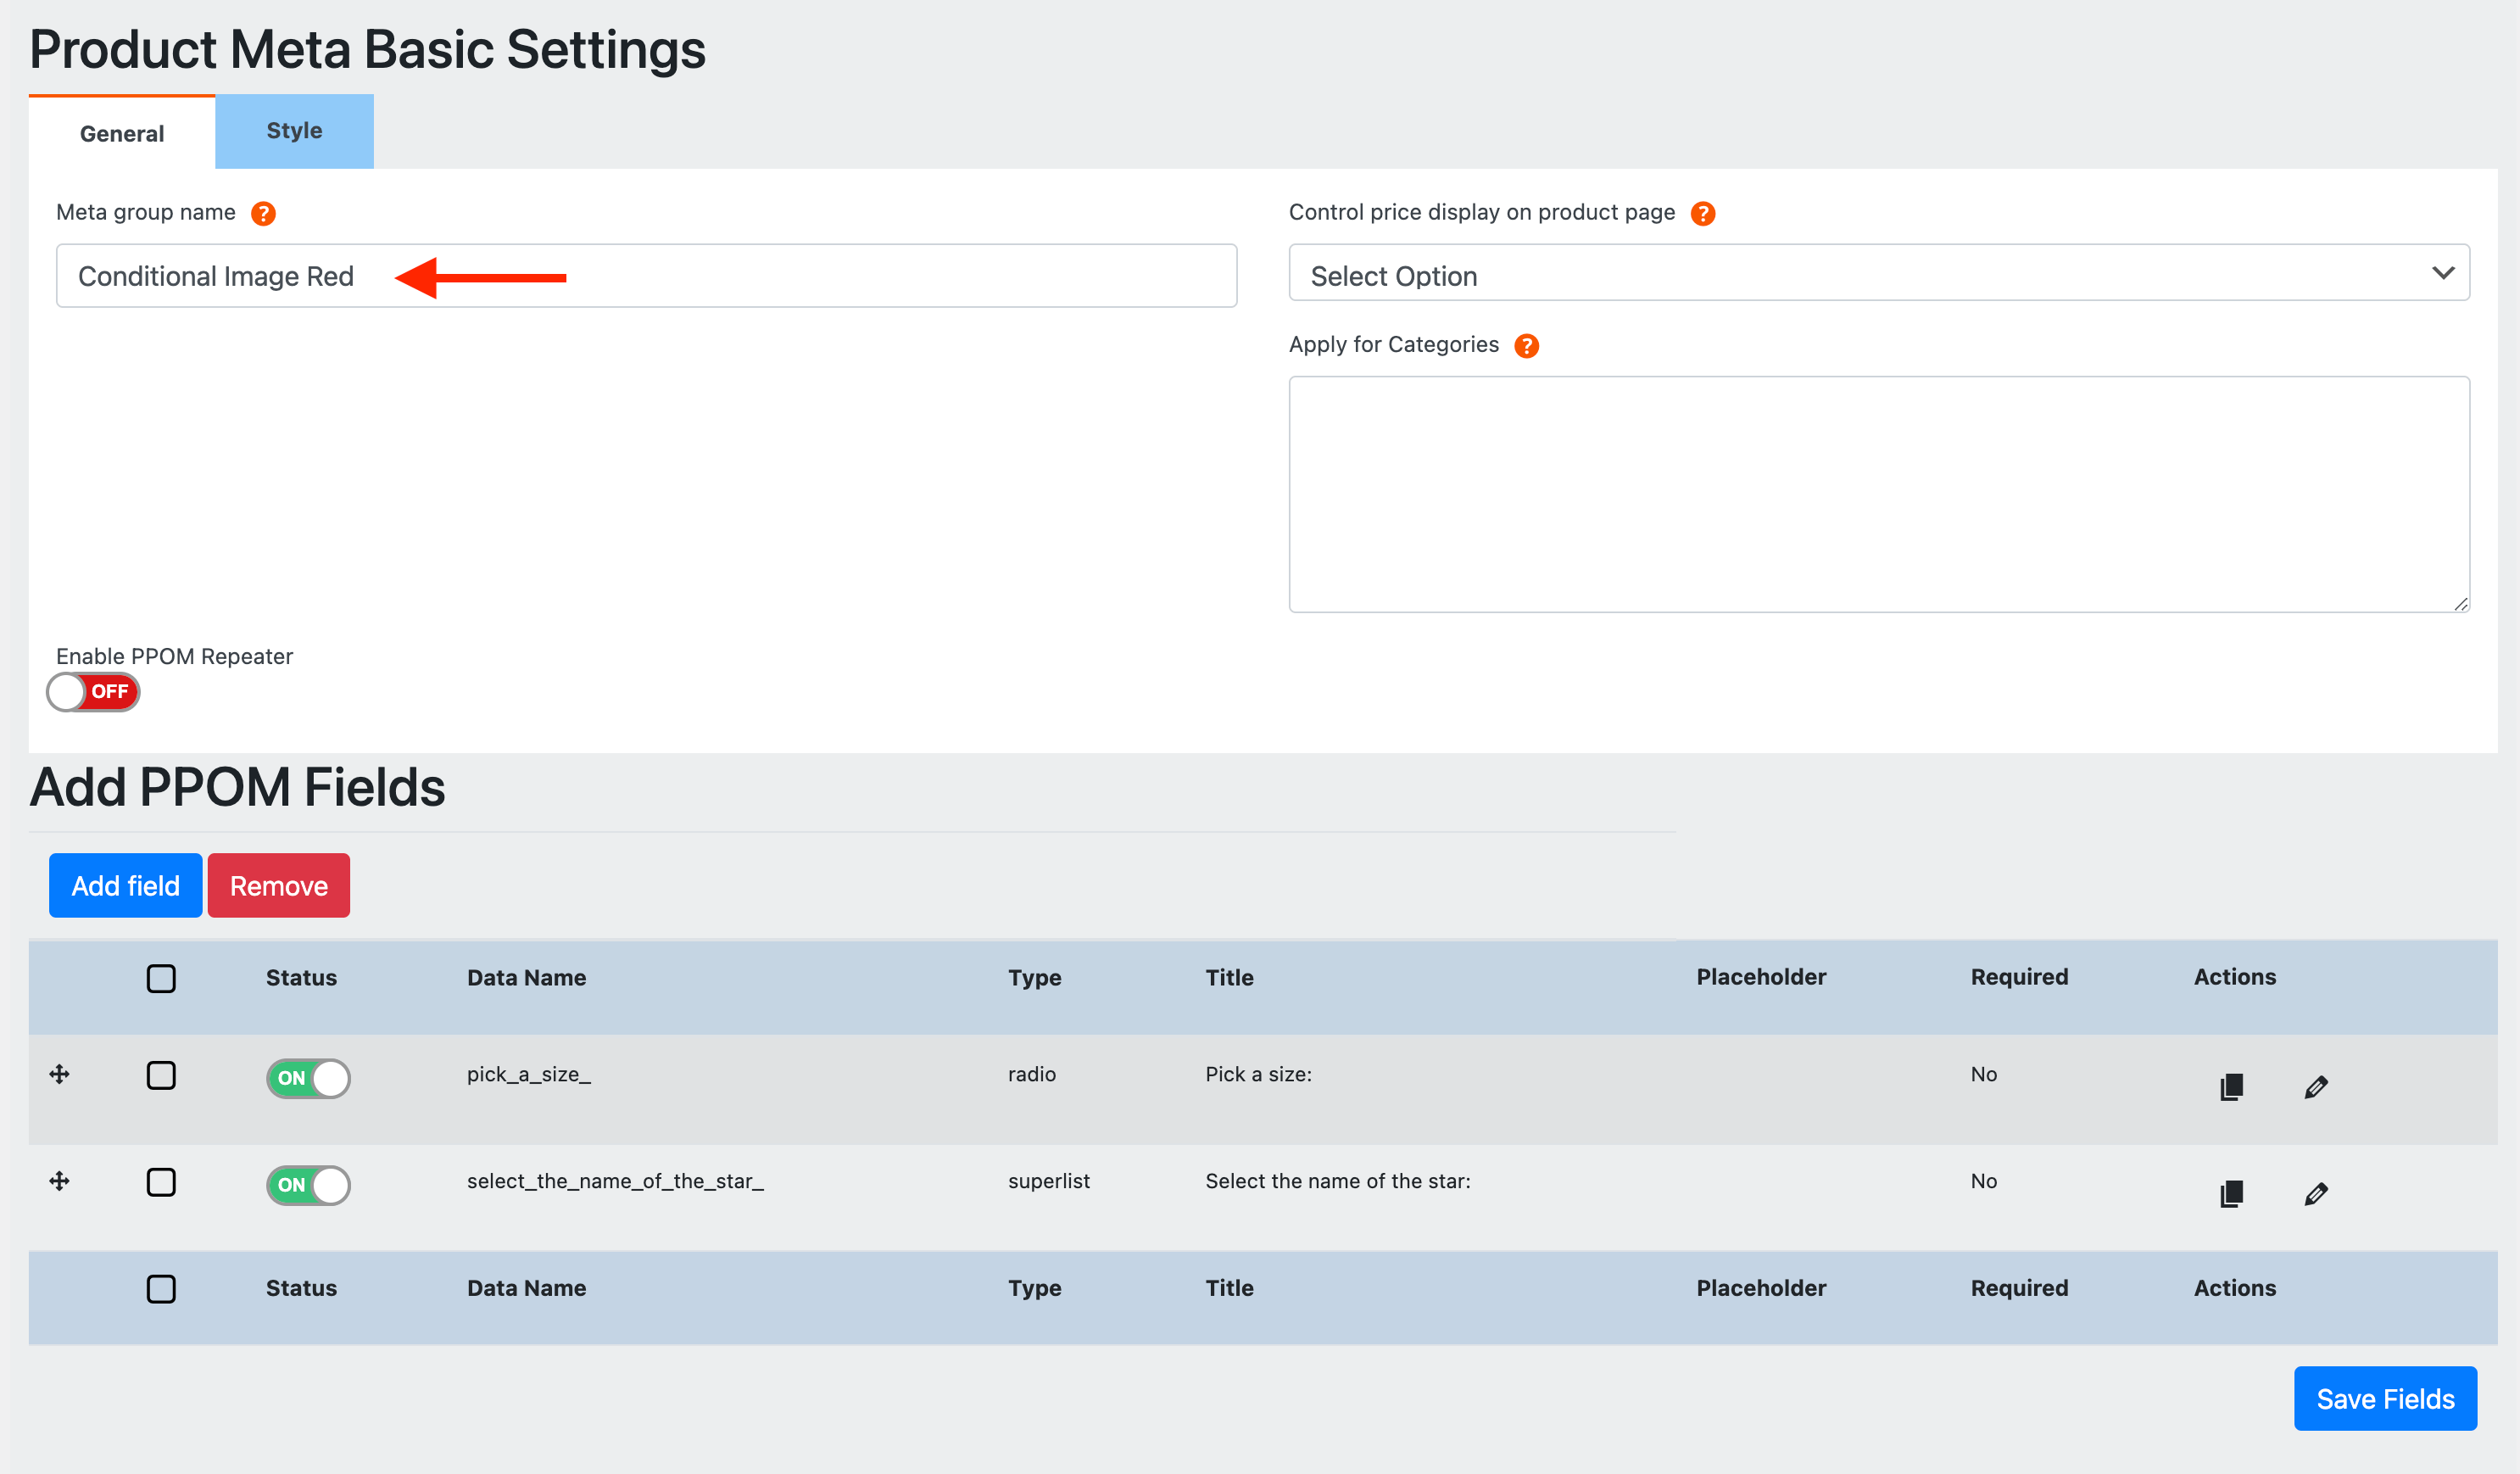
In this example, we have created the Conditional Image Red field group and added a radio and a super list input for the red variation.
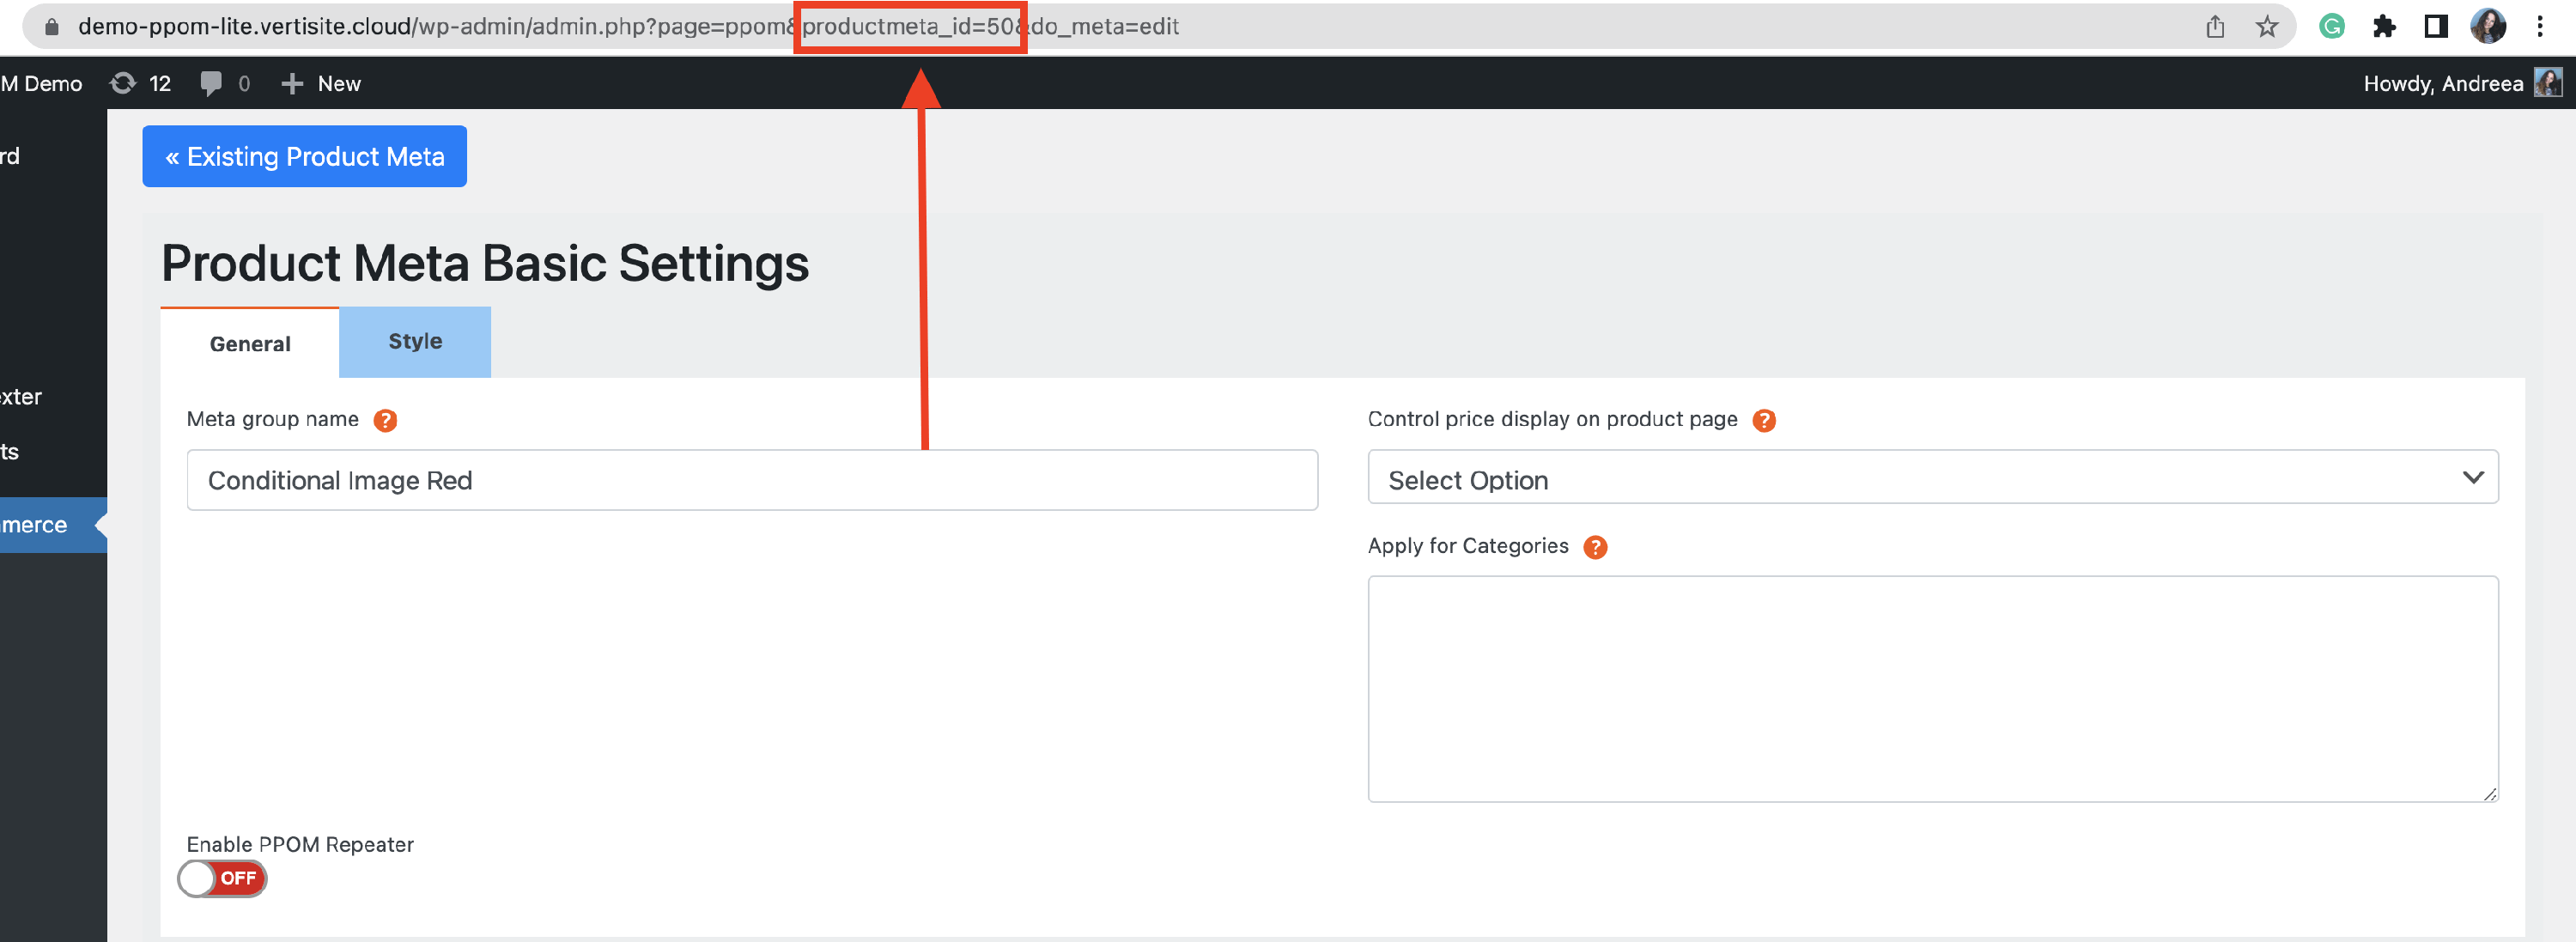
4. Save the changes, then copy the meta ID from the URL.
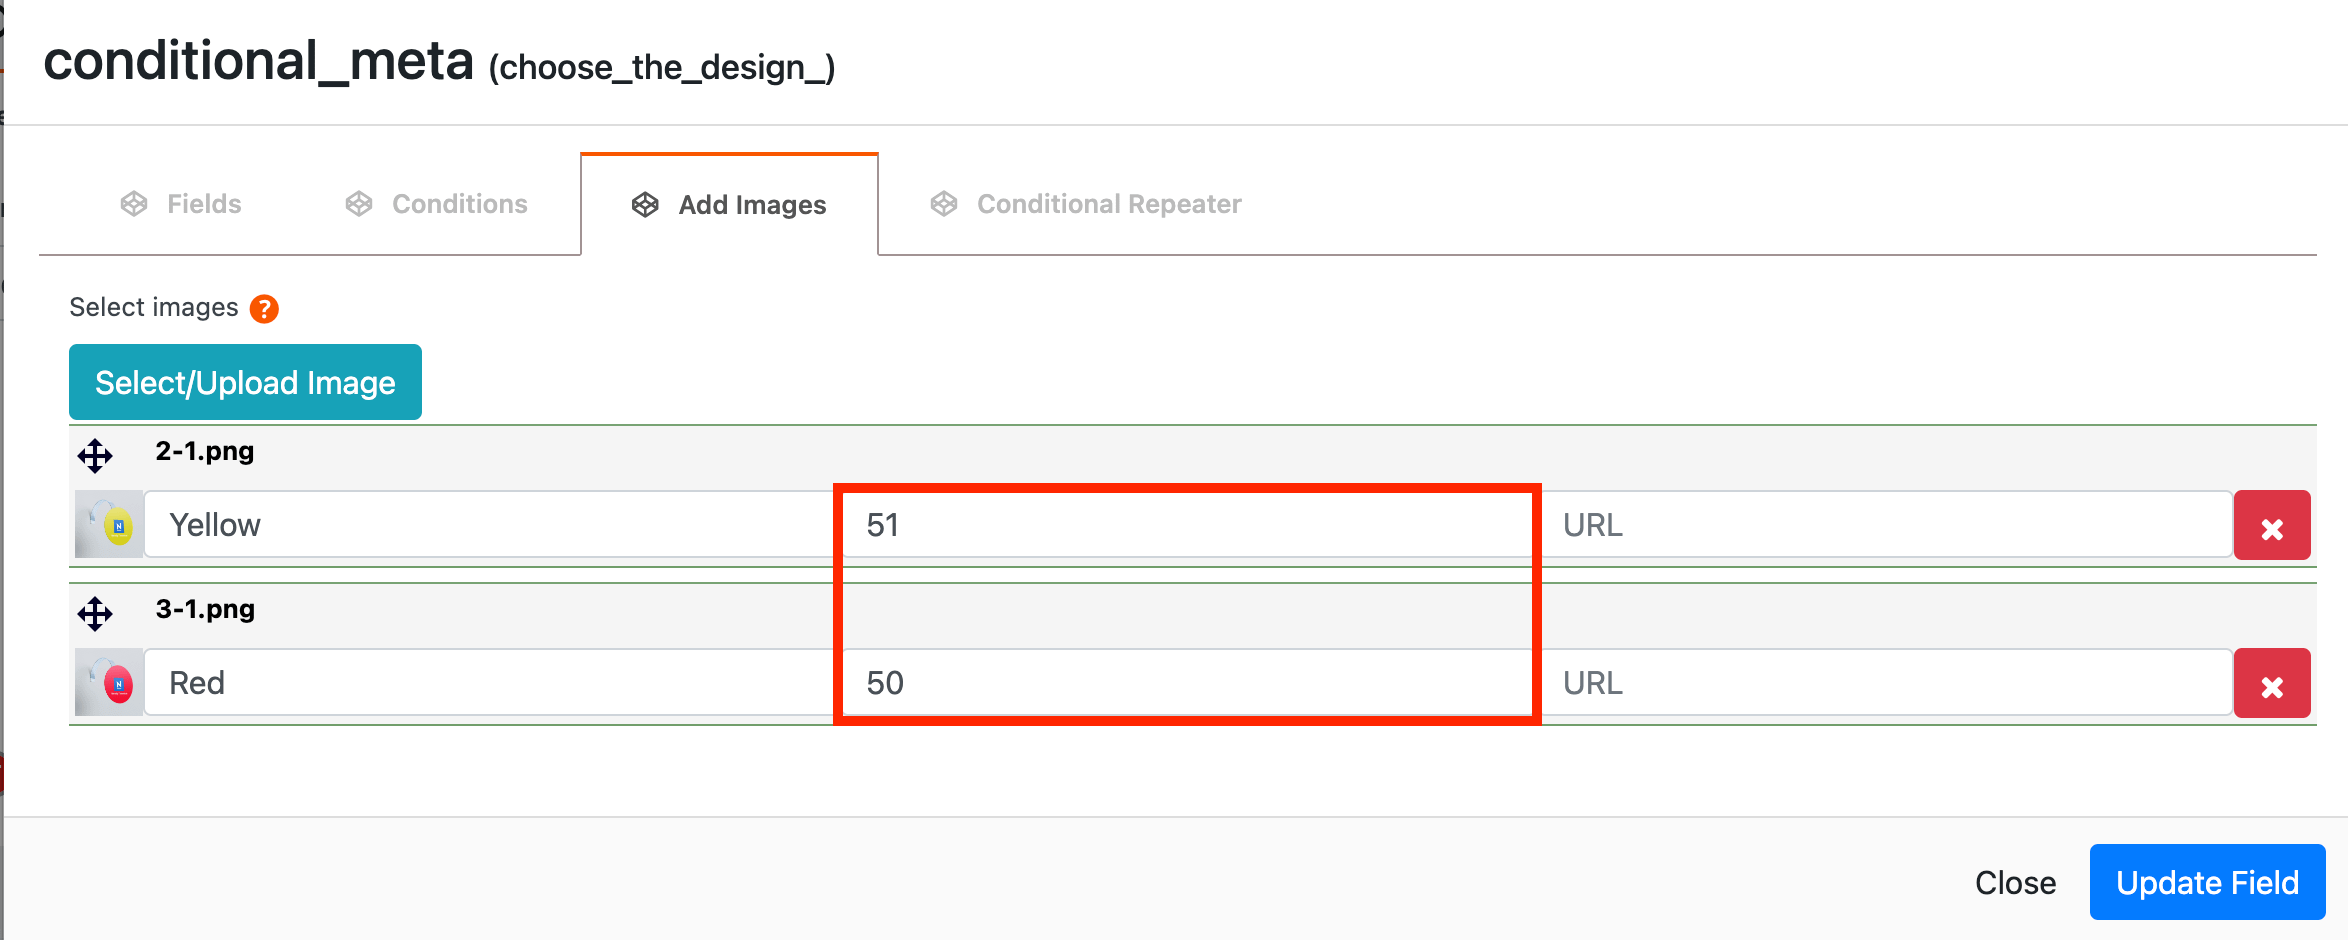
5. Return to the initial Conditional Images input > Add Images tab and insert the meta ID of the corresponding variation.
💡Result

Meta fields of the Yellow variation

Meta fields of the Red variation
📝 Note: Check the live behavior of the input using this demo.