How to Configure the Personalization Preview Input in PPOM?
📝 Note: This is a PRO feature included in all PPOM Pro plans. You can get from here.
The PPOM Personalization Preview meta field is a useful tool for printing or customizing products in an online shop. It enables the administrator to define a position and area for the text, among other particularizations, allowing the user to fill in the text and add it to the cart.
In this article
Configuring the Personalization Preview in Dashboard
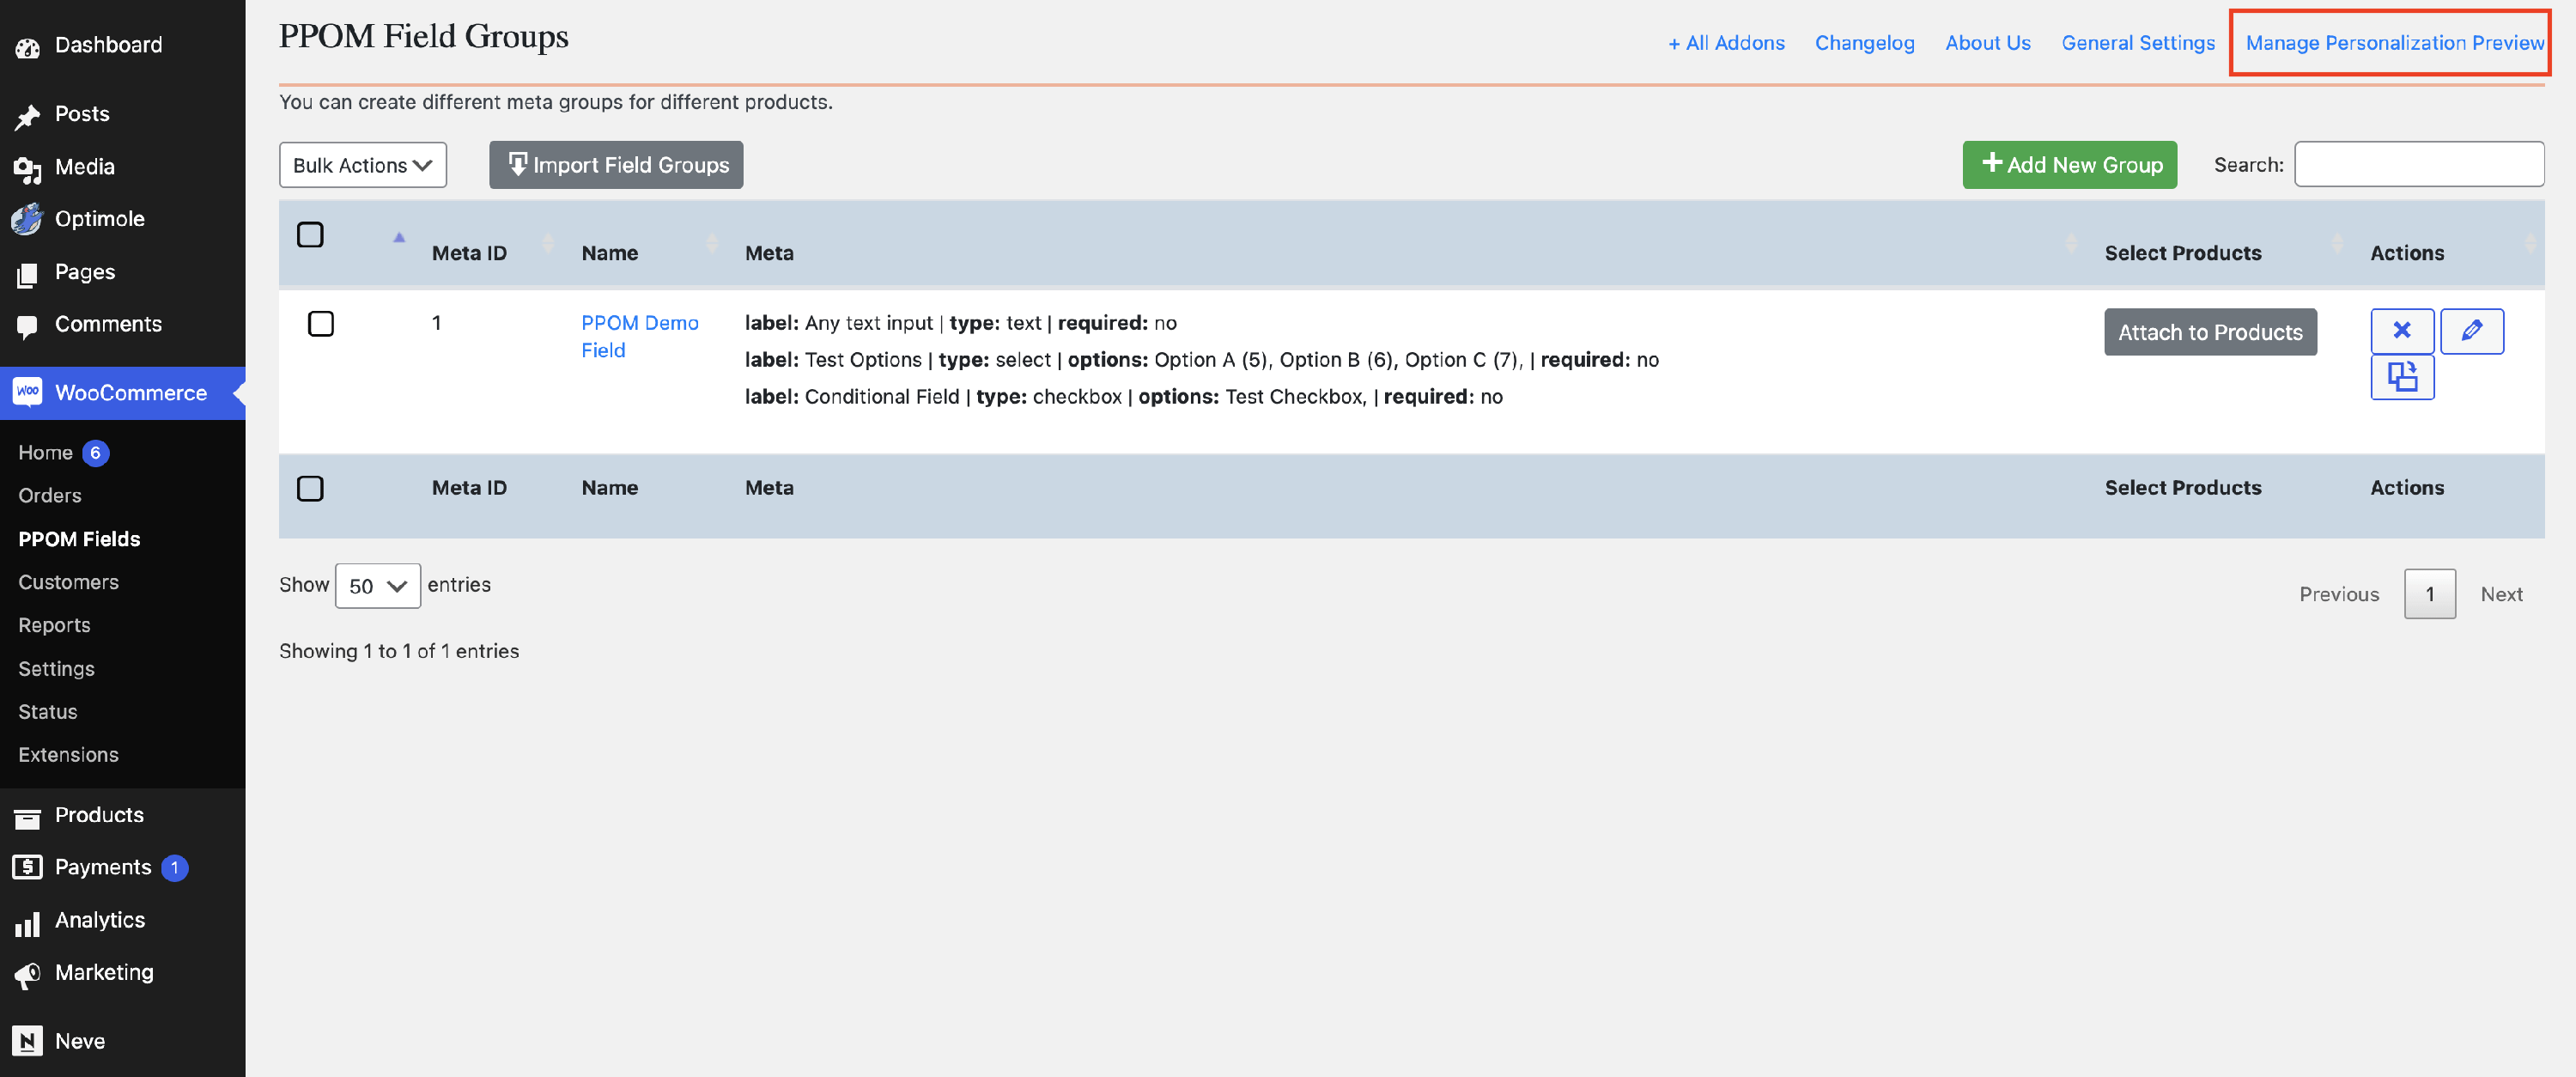
As a shop admin, you can configure the personalization preview directly from the PPOM Dashboard by clicking the Manage Personalization Preview button.
Then, create a new personalization preview. The creation screen guides you through four steps: Name it, Upload image, Place textboxes, and Publish.
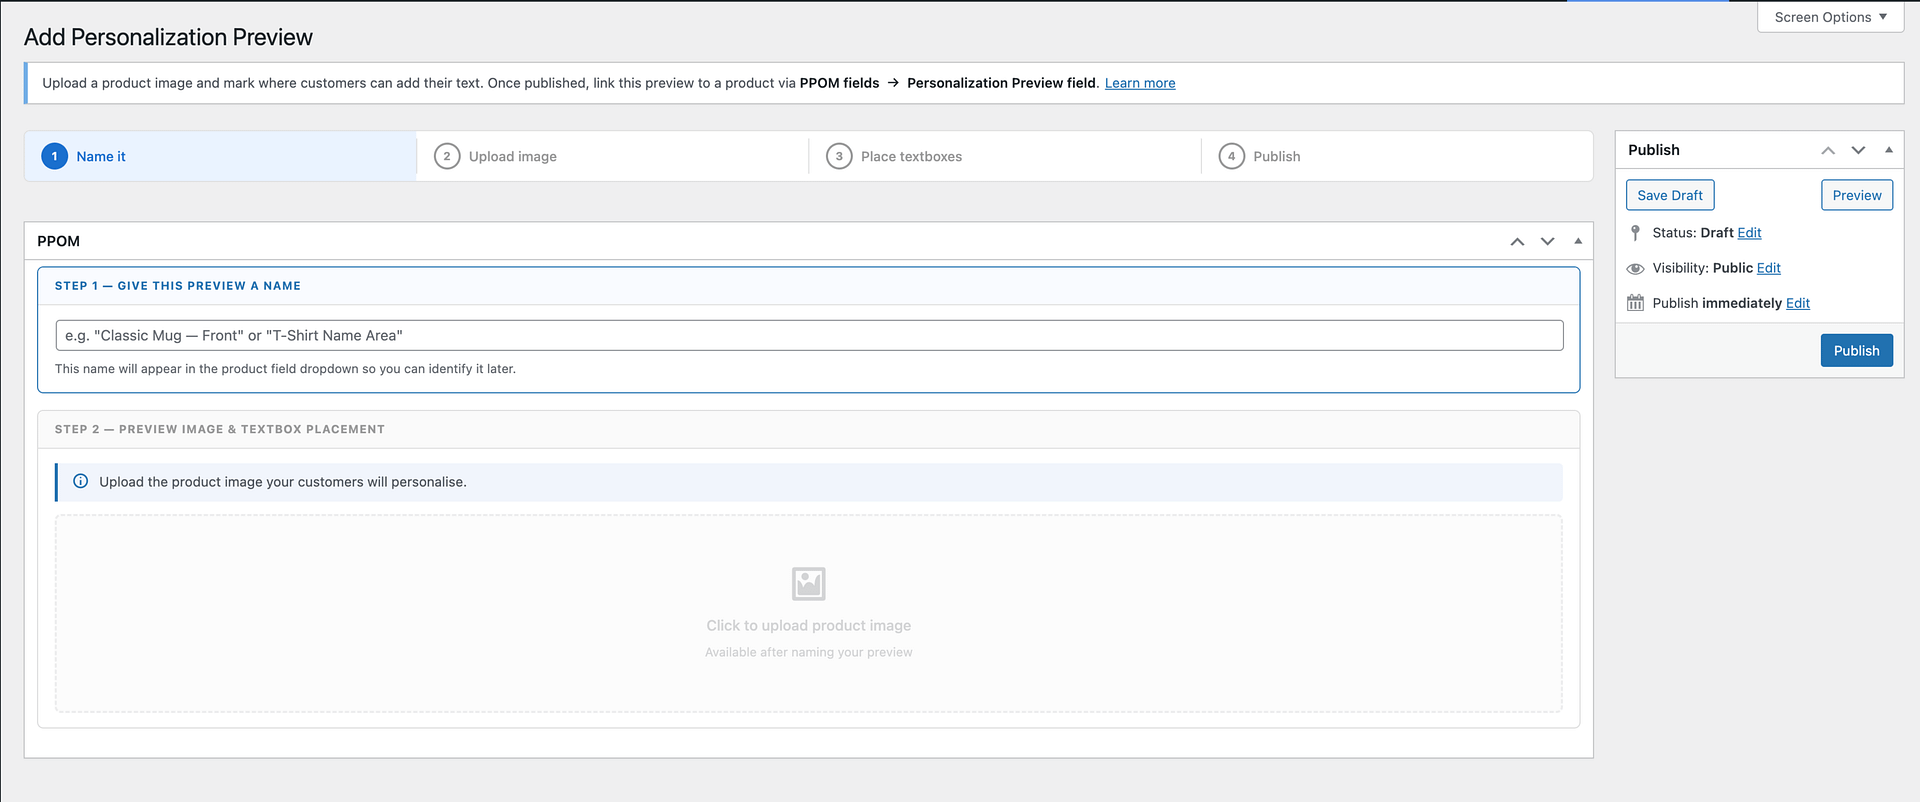
First, enter a preview name. This name appears later in the Personalization Preview field dropdown, so use something easy to identify, such as the product area being customized.
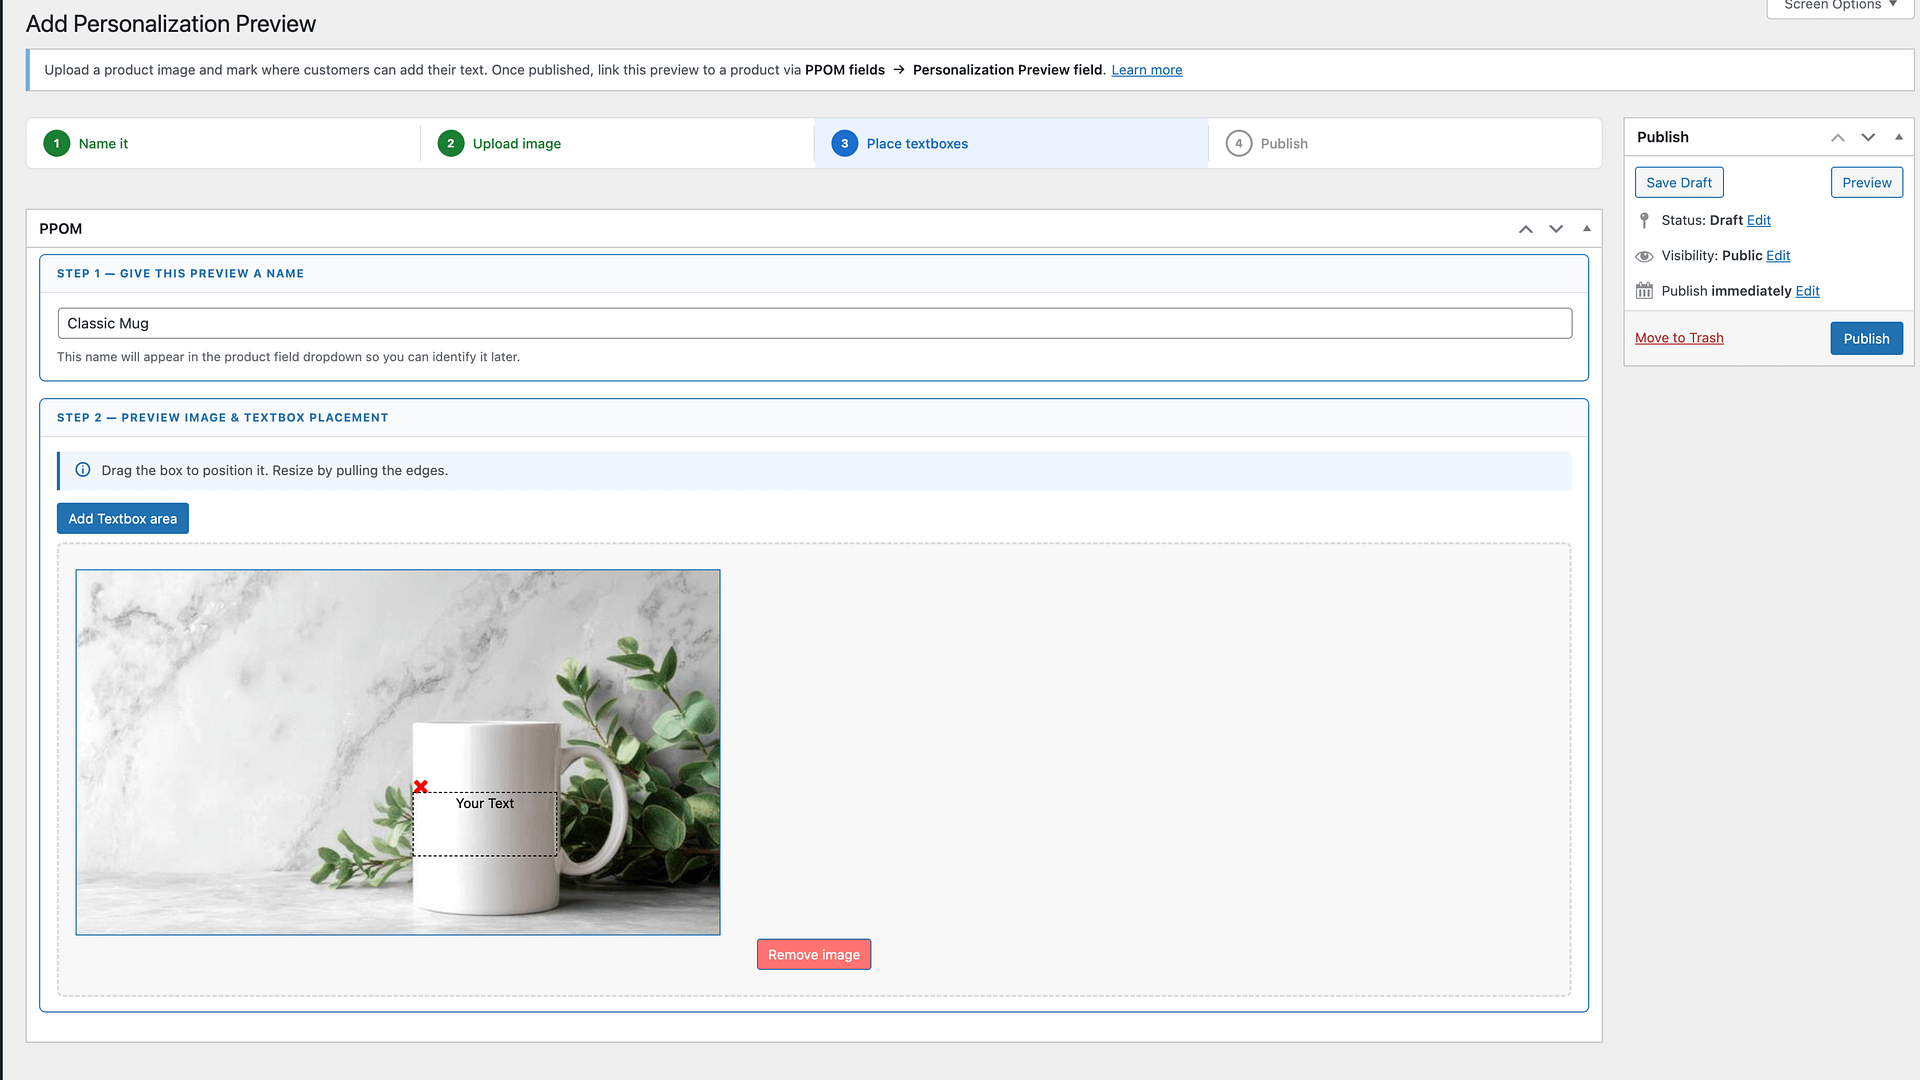
Next, upload the product image your customers will personalize. After the image is available, use Add Textbox area to place one or more text areas over the image.
There are available settings for text, such as a title, adding min-max restraints, predefining a font size or a font family, as well as adding text and background colors:
📝 Note: If you add multiple textboxes, the settings are individual, so you have to configure them one by one.
If a required step is missing, PPOM shows a warning in the setup progress bar before publishing.
Attaching the Personalization Preview to the Products
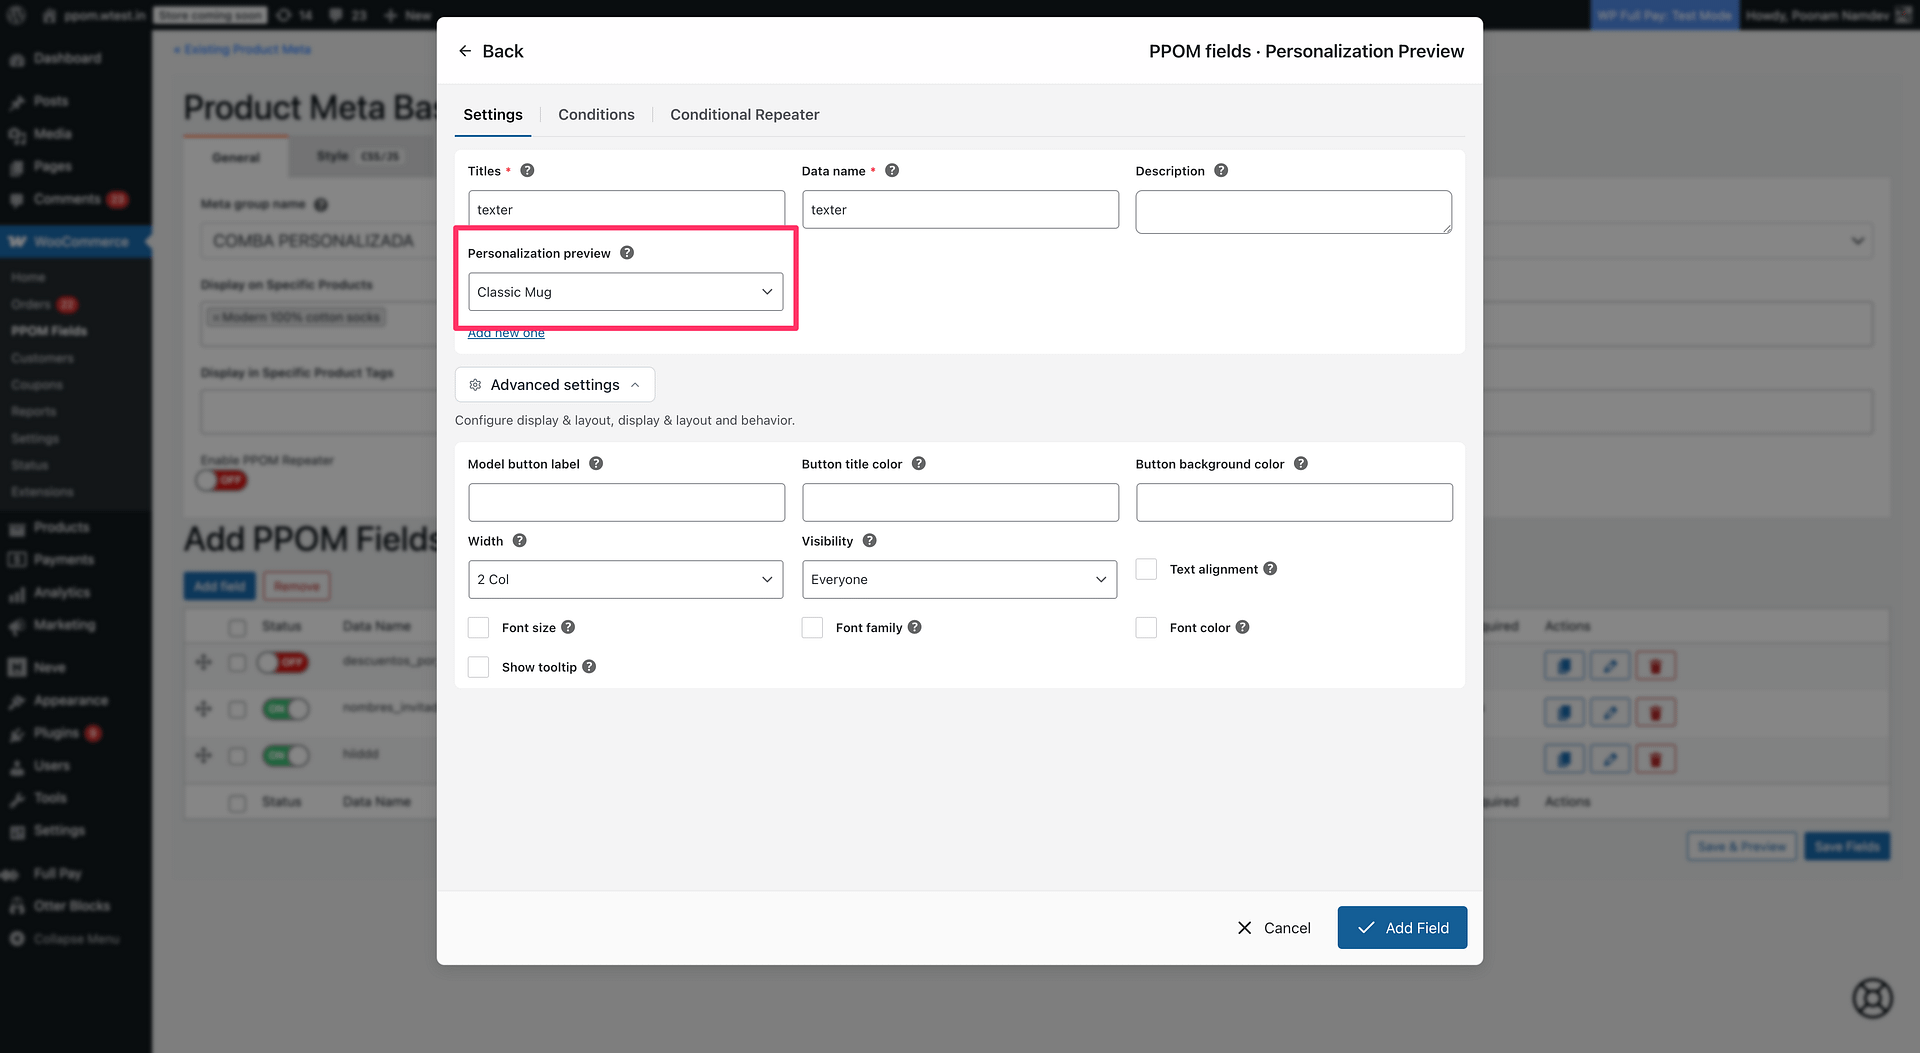
After configuring the Personalization Preview, you have to attach it to the products. For this, add it as a Personalization Preview field and make sure you select the previously created Personalization Preview Meta inside the settings:
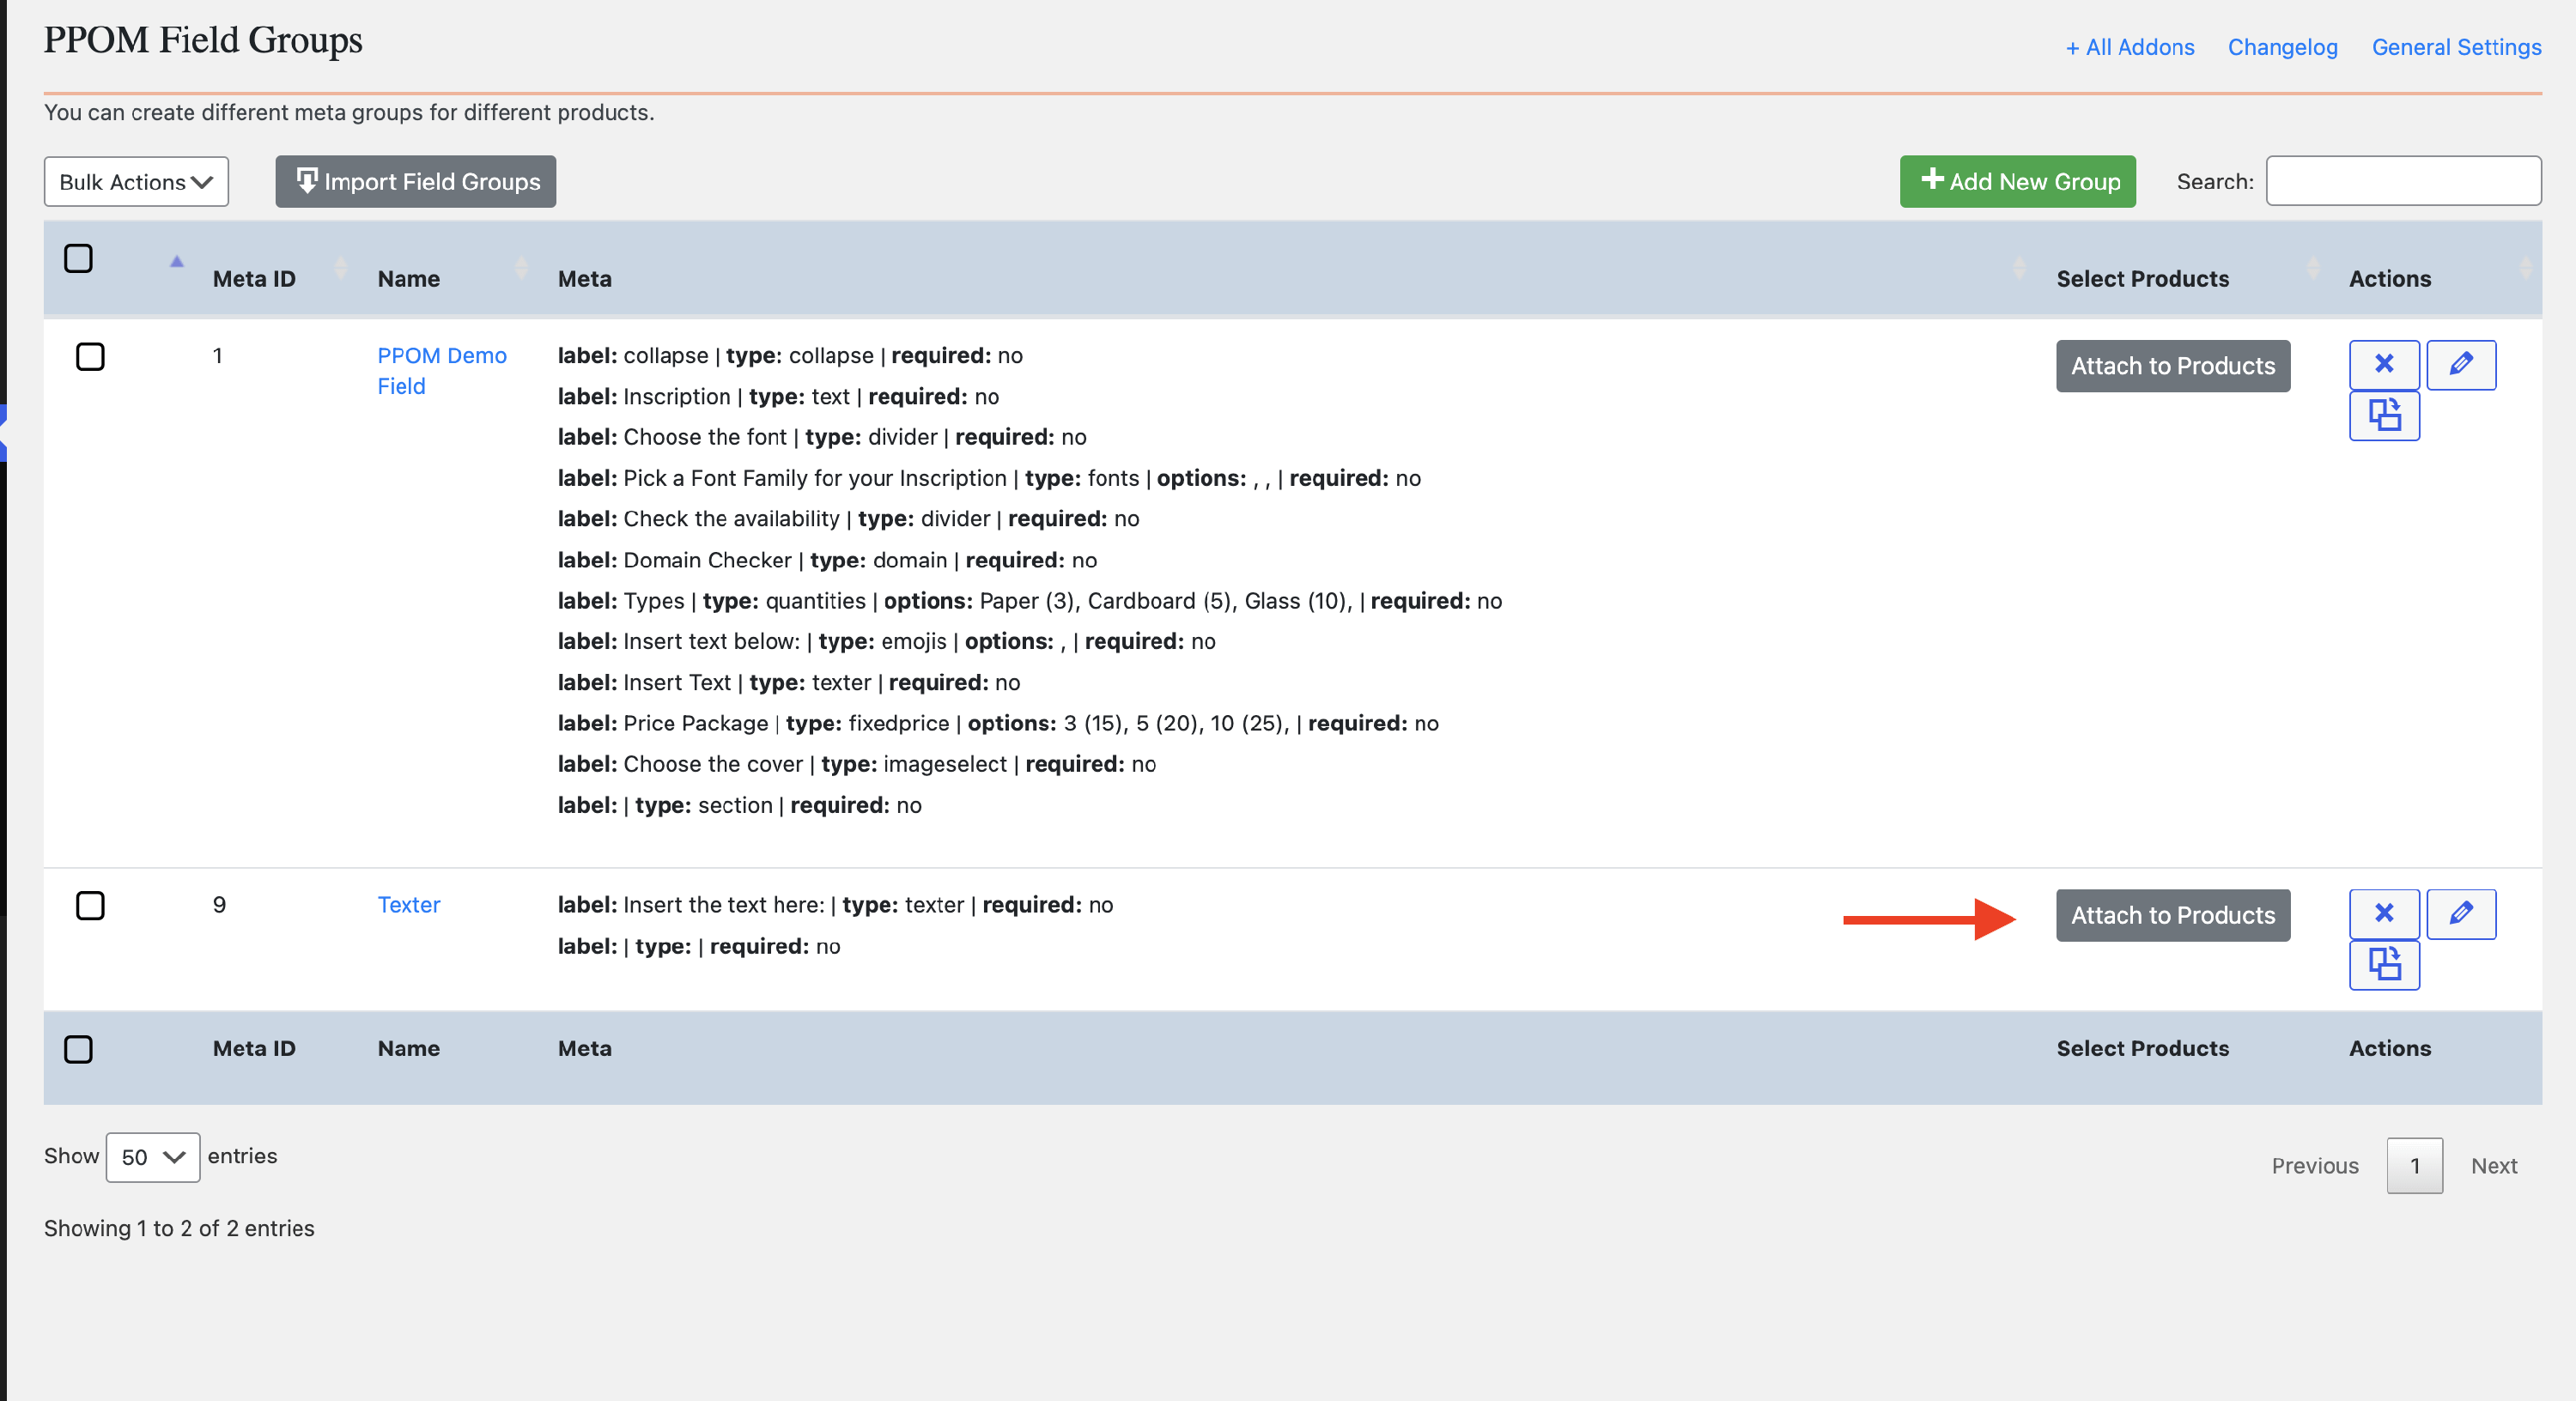
Save the fields, then go back to the field groups and use the Attach to Products button:
Personalization Preview for the Customer and User
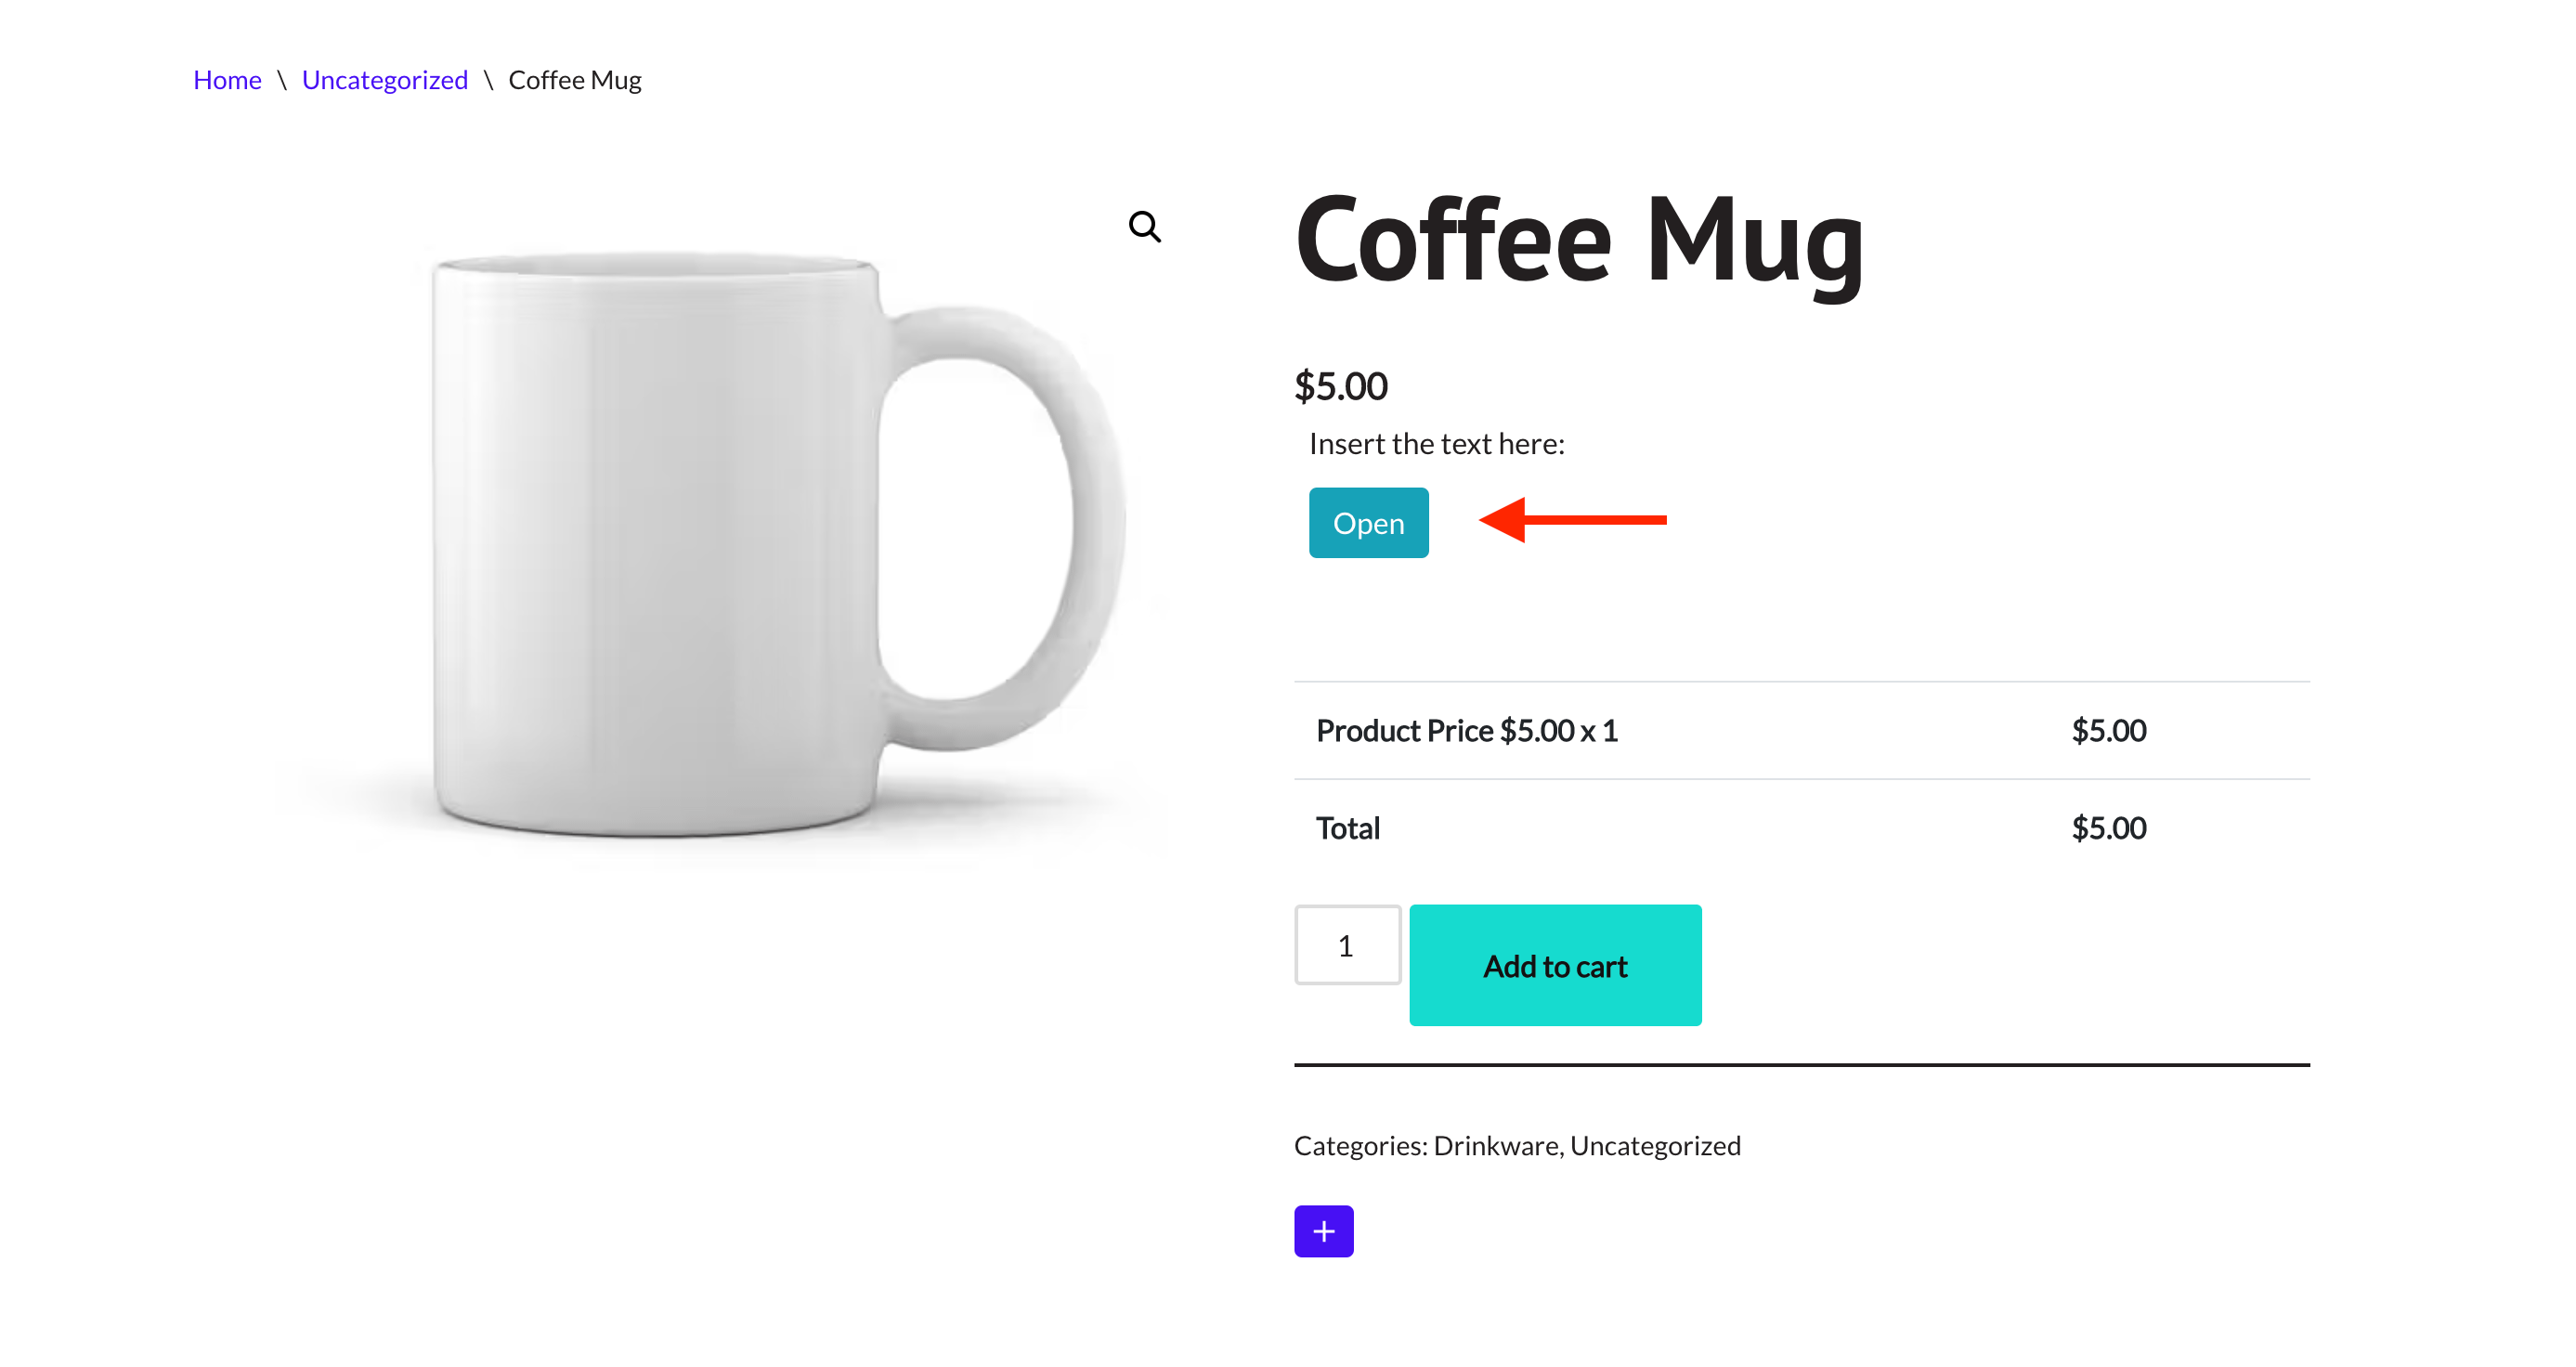
For the customer
On the website, the user will have a button that he can use to insert text:
A new modal will appear to add the desired text; it might differ due to the settings you provided (alignment, etc).
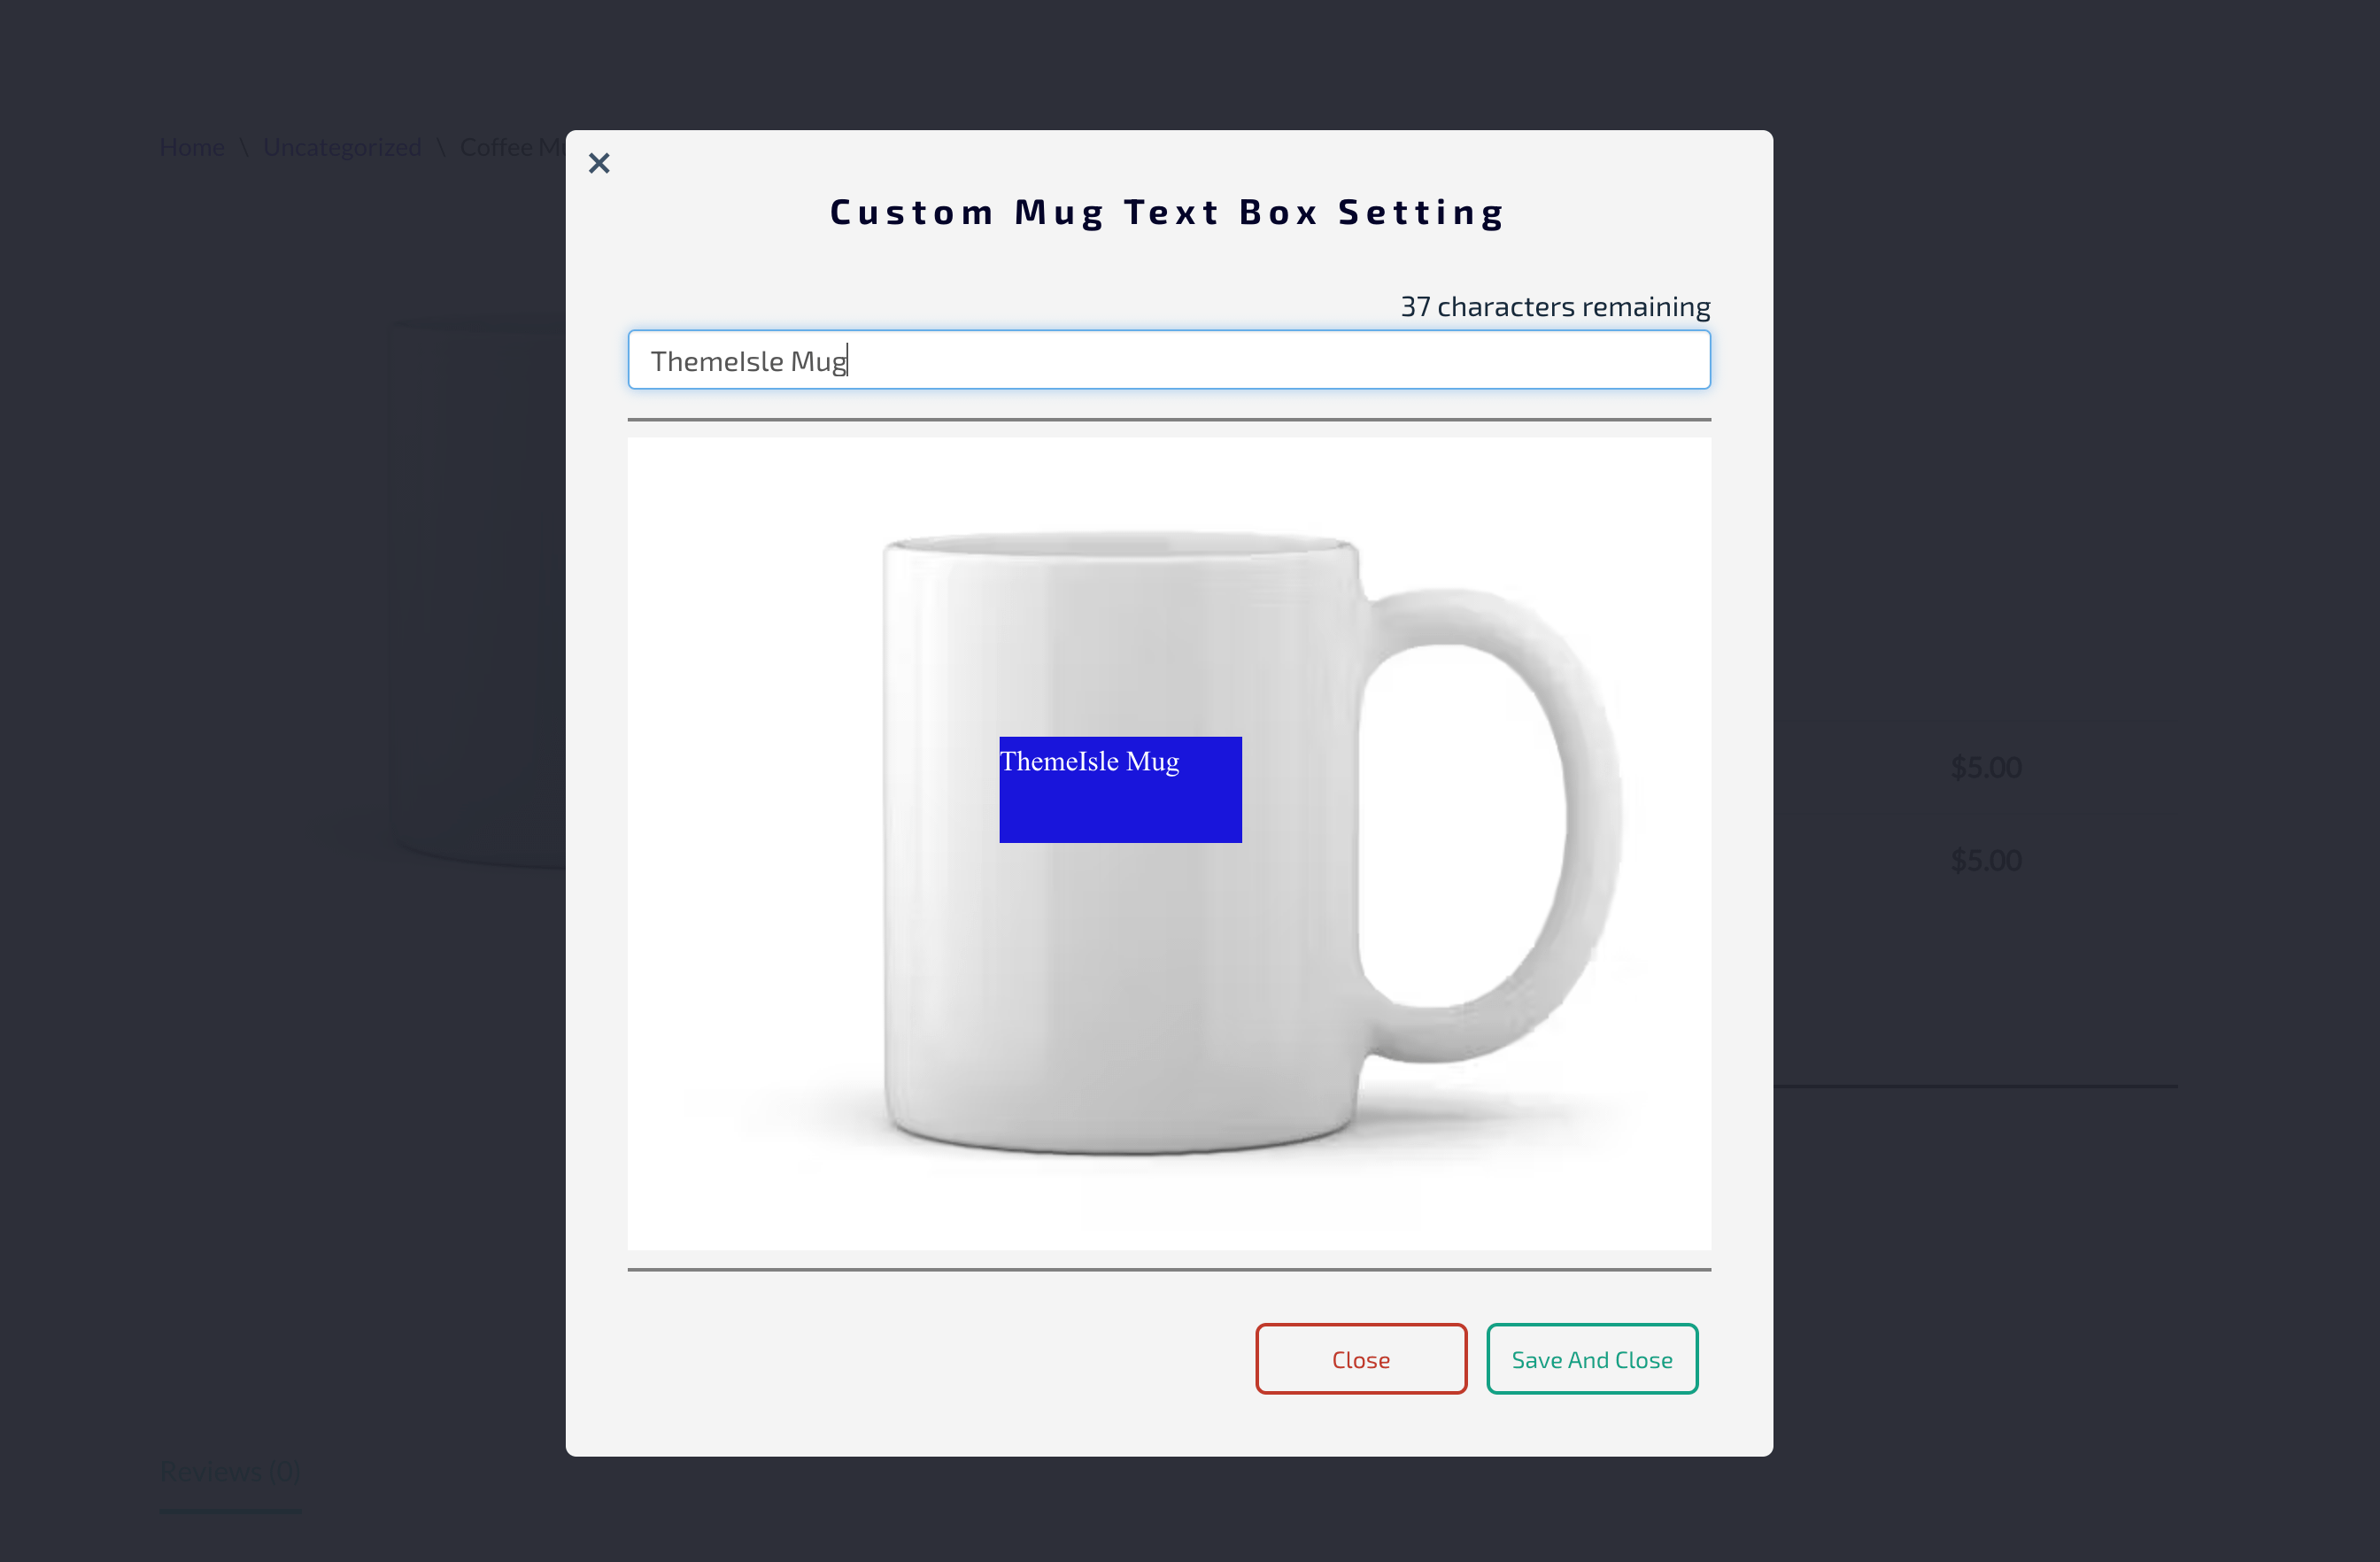
The last step is to save and close the modal, then check the cart page for the output. There will appear the product, as well as the inserted text.
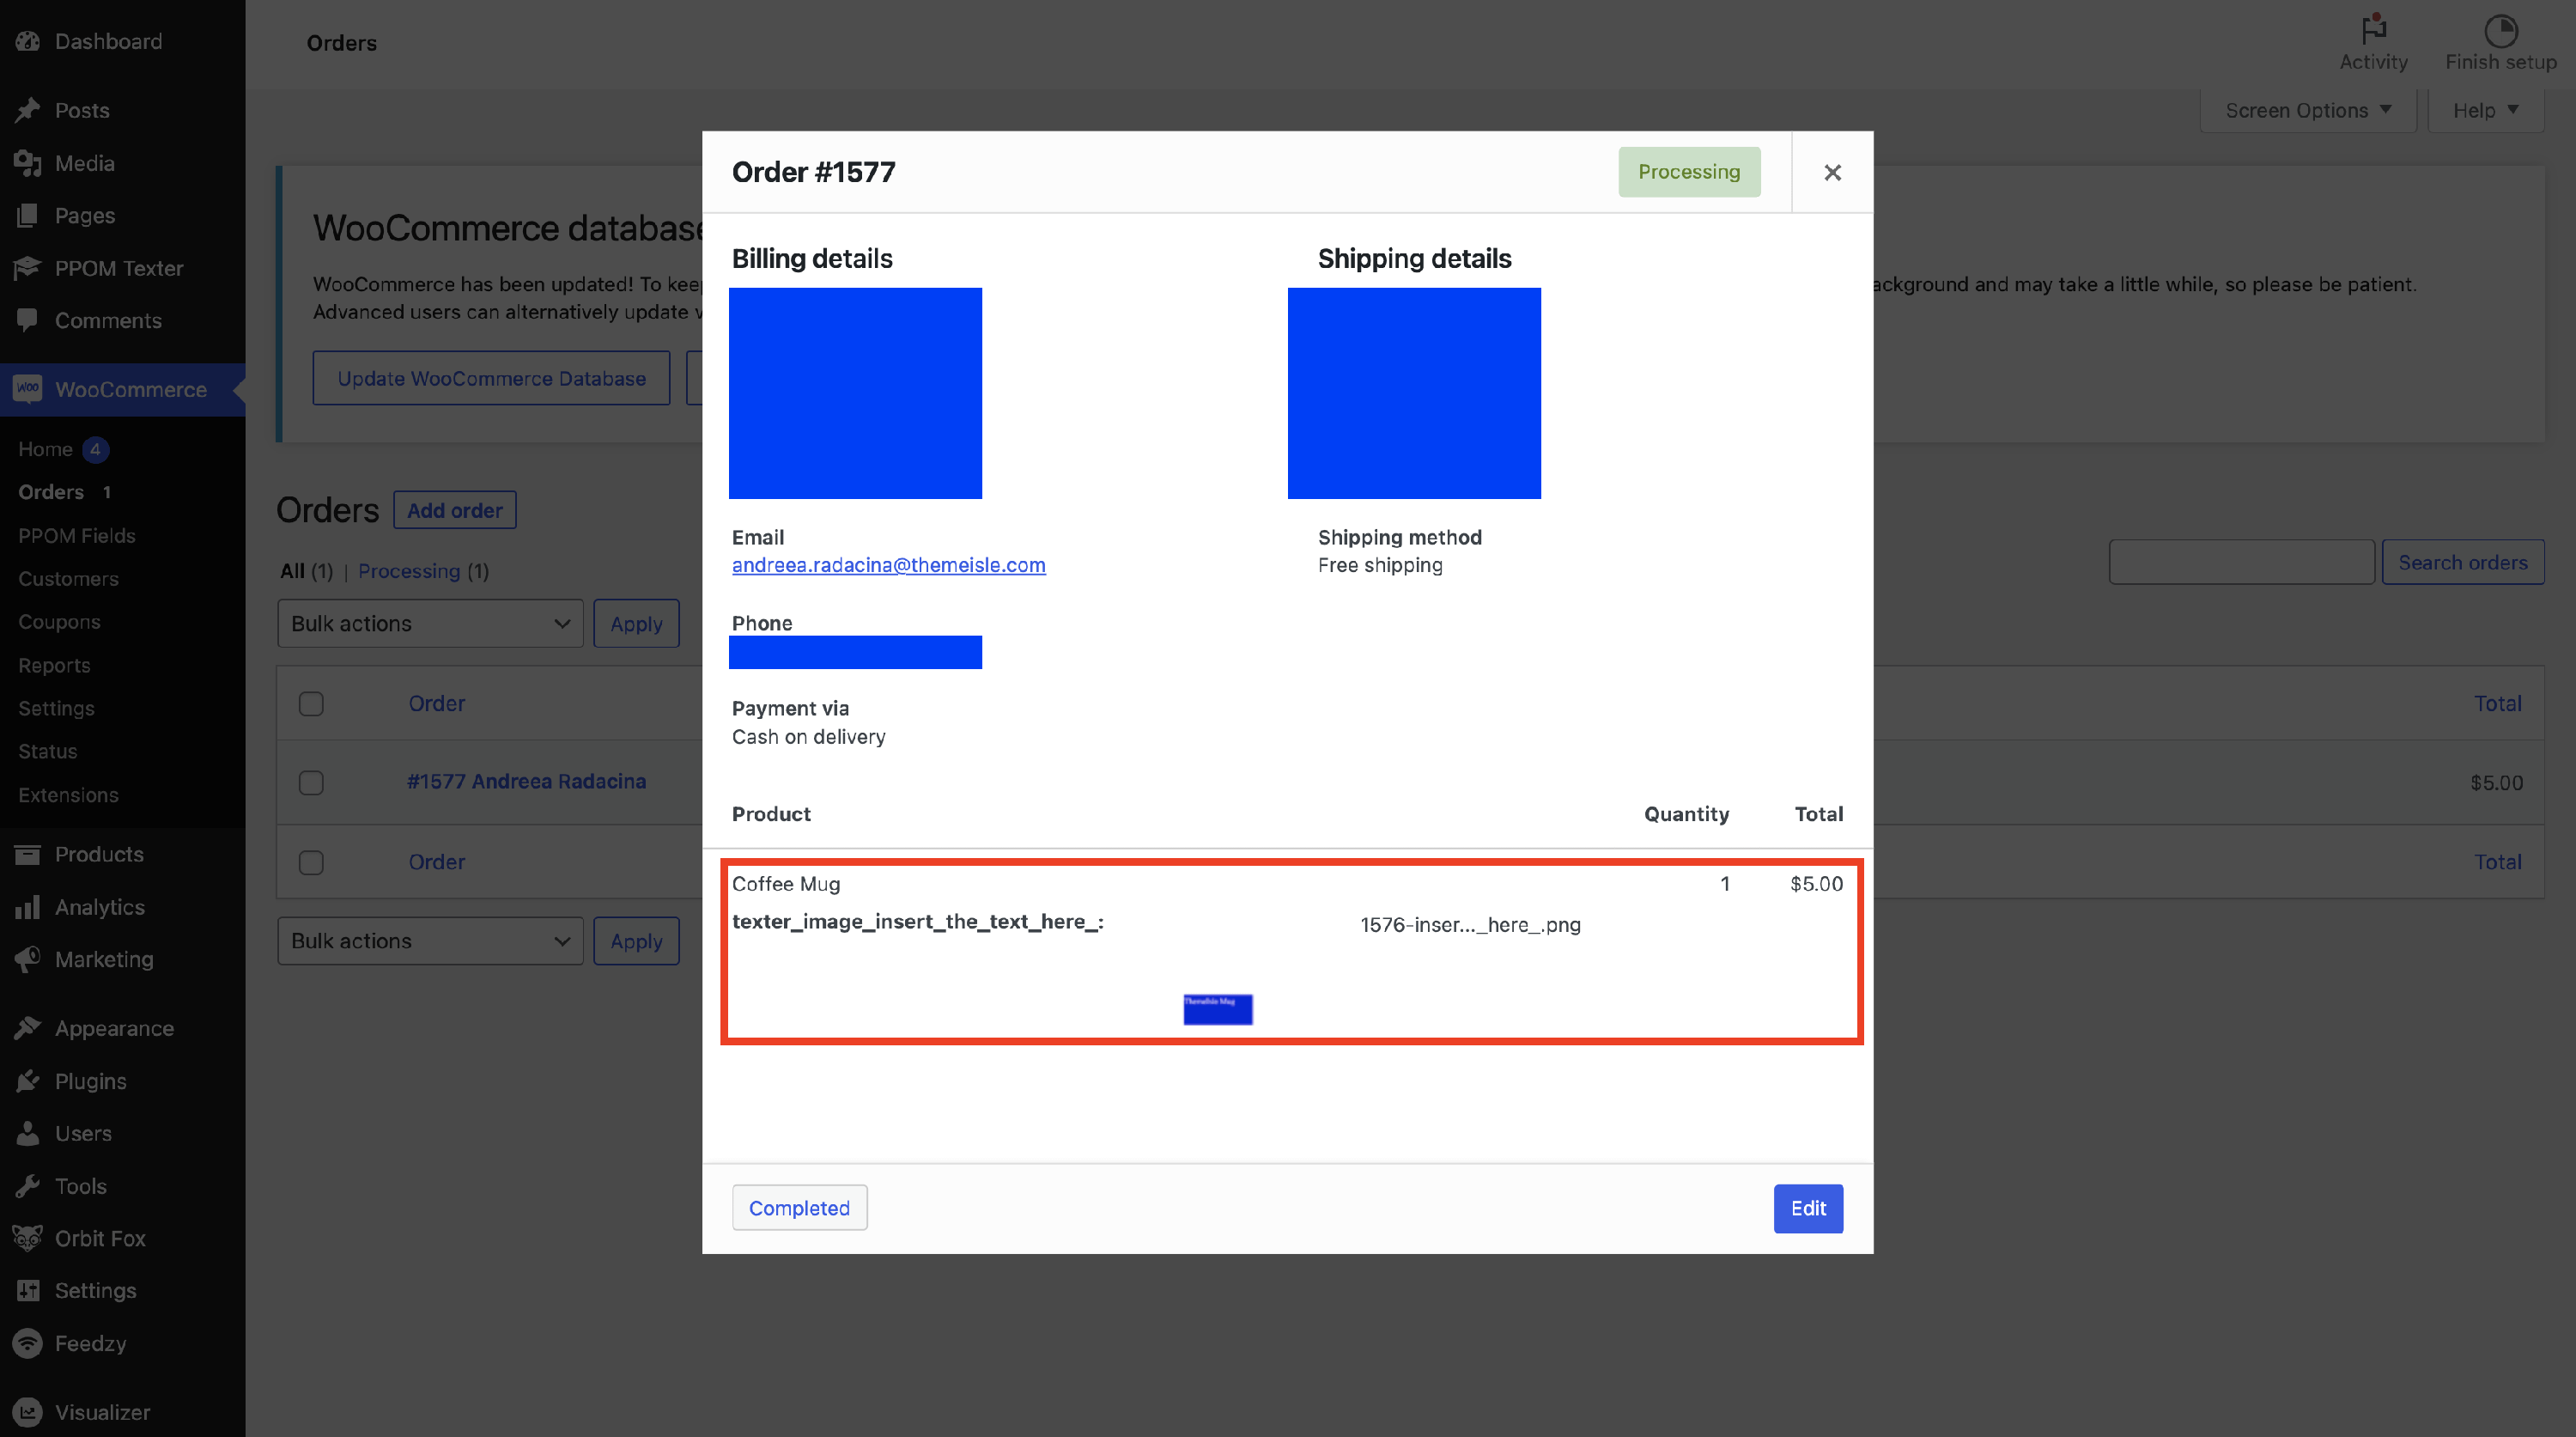
For the Admin of the shop
The admin will find the orders inside WooCommerce > Orders. The example provided in this doc will appear like this: