How to clear the Cache in WordPress
If you arrived here then you are probably facing an issue related to this particular topic. It might be a webpage not rendering properly, or maybe a plugin/theme not functioning correctly. Whatever the case is, by the end of this article, you'll learn the most important things about caching and how to handle the most encountered issues.
This guide will present the following:
In this article
What is caching?
A cache refers to a temporary storage location where all the static files are stored in order to be served faster and with ease to the user requesting the content. These static files are represented by CSS, Javascript, media files, and HTML that the website requires in order to look and run in the desired way.
You see, when it comes to a website, all of its files are usually stored on the hosting server so they can be delivered to a visitor whenever they access your website. When the visitor enters your website URL in the browser, the latter creates requests to the origin server asking to download the website files so that it can display them on your visitors' device. Those requests can take from a few seconds up to entire minutes depending on how many files there are, how fast your internet connection is, and other factors.
Now that we know what cache is, we find it important to also let you know that there are 2 main types of web cache.
- Client-Side Cache: otherwise known as browser cache. This means that the static files will be stored by your browser in your local storage meaning that when revisiting a said website, the browser will get the static files from the local storage and will show you the content faster.
- Server-Side Cache: the basic functionality is the same, although this time, instead of using the browser to store static files, these are stored on the server storage space. This means that cache files can be stored in various databases, making it a more efficient way for highly visited websites.
How to clear Browser Cache
This is the first step in clearing cache as a lot of websites are only being cached by the browser and not using any server-side caching. In this case, the following steps vary a bit depending on the browser you are using, however, you can write "How to clear browser cache" in Google Search and you'll find the exact answer you need depending on your browser. Here is a list that might help out with the most popular browsers and how to clear cache there.
How to Clear Cache in our plugins (Super Page Cache For Cloudflare, Optimole)
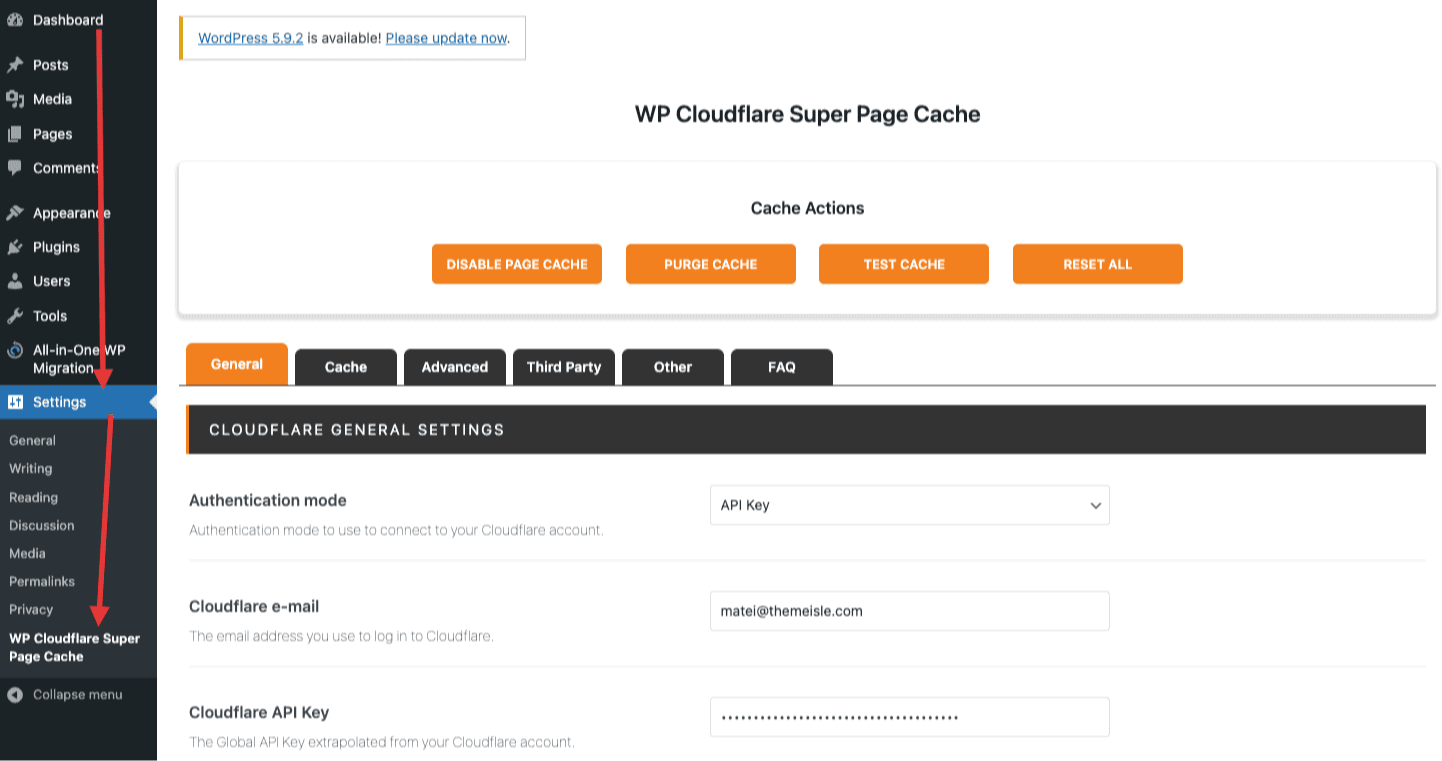
1) How to clear cache in Super Page Cache for Cloudflare
If you decided to use Super Page Cache for Cloudflare then clearing cache with this plugin has never been easier. It comes with a lot of settings that you can use to ensure the fastest speeds for your website and it will also automatically purge your cache from the Cloudflare account so you don't need to do it manually.
So how do you purge cache in this plugin?
1. Go to Dashboard > Settings > Super Page Cache for Cloudflare
2. Click on Purge Cache
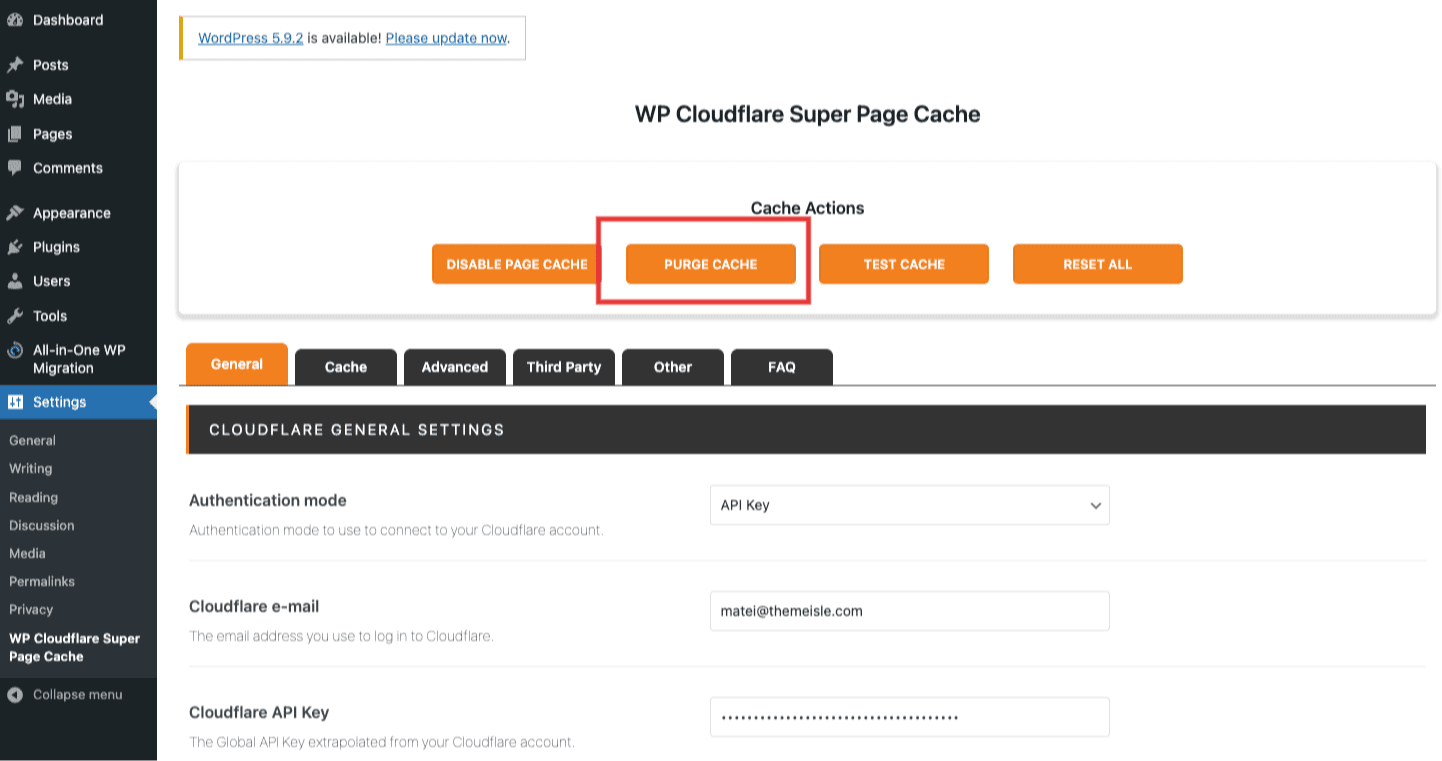
This plugin works perfectly out of the box, but in case you have made some changes and you wish to revert them back to the initial settings, you can do so easily by clicking on RESET ALL.
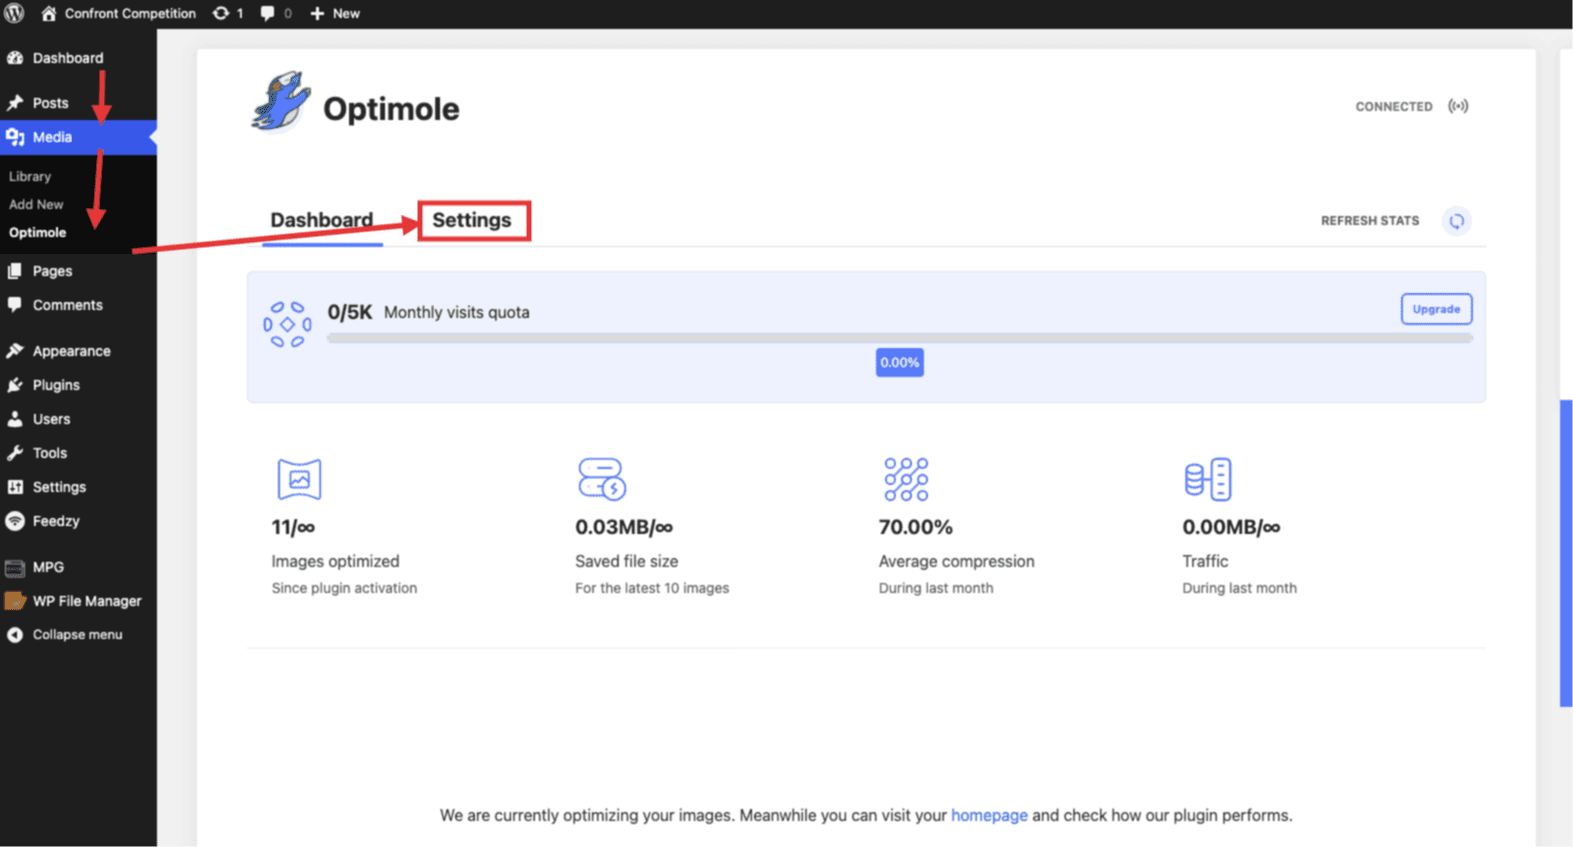
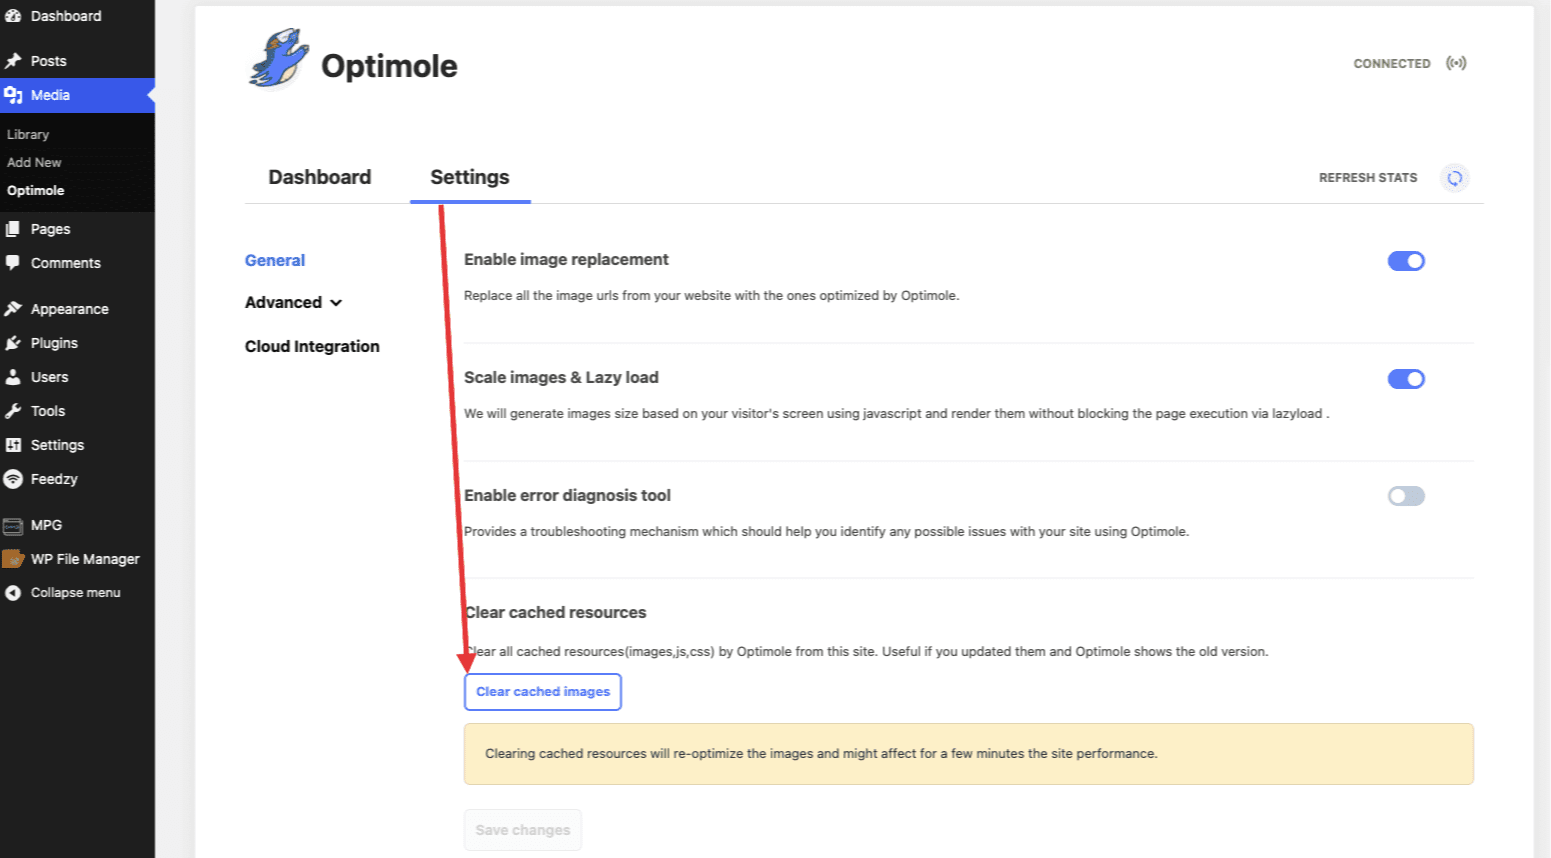
2) How to clear cache in Optimole?
In order to clear cache in Optimole, you need to follow these steps:
1. Go to Dashboard > Media > Optimole > Settings
2. Now you need to go to General and click on the Clear Cached Images button
How to clear cache in WordPress
Whenever you are working on a website, you will probably make multiple changes and tweaks to get your desired look and feel, and if you have been using caching in this period, you might see that your changes are not taking place on the front-end. That might be happening because you're seeing cached content (old version of the website) instead of the newly updated one.
Fortunately, clearing cache is quite easy to do with the help of plugins, and depending on what plugin you are using, it's as easy as clicking a button. Here are we only going to talk about the top 3 Caching Plugins at the moment based on their WP.ORG ratings and number of downloads.
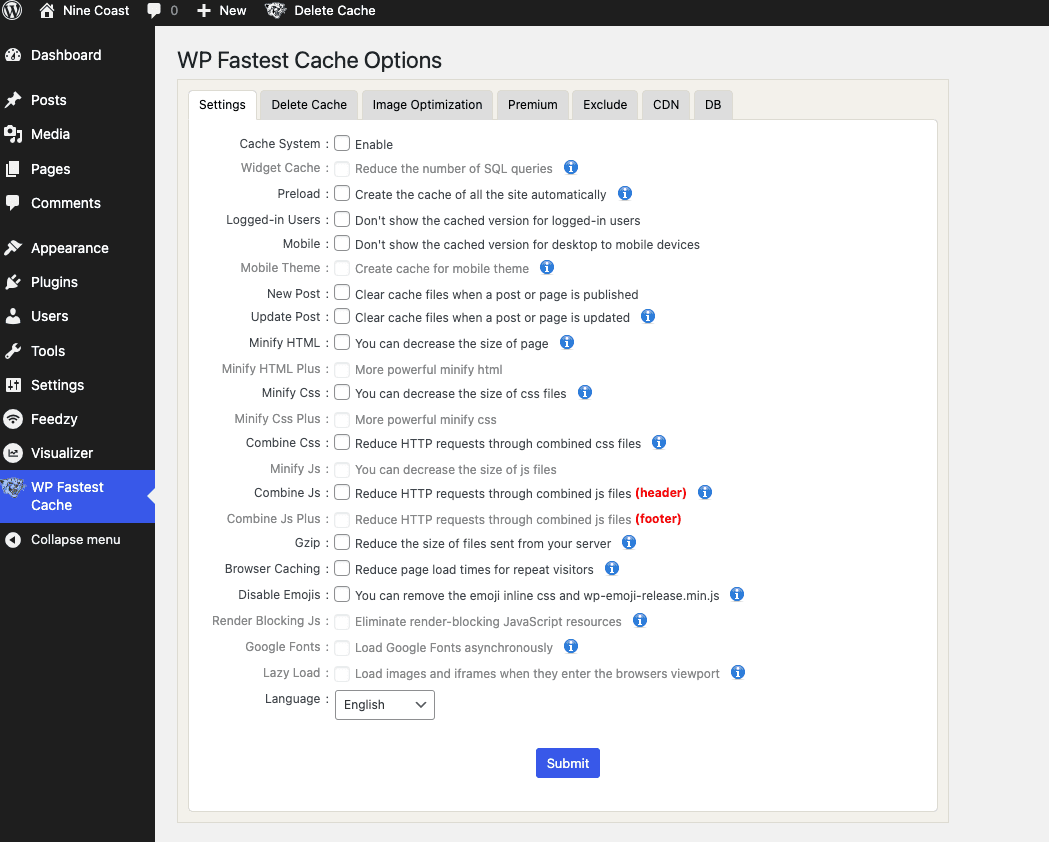
1) WP Fastest Cache
This plugin comes with a lot of features for clearing cache, minification, and much more. Here are the steps to follow if you want to clear cache whilst using this plugin.
1. After installing the plugin go to Dashboard > WP Fastest Cache and the settings panel will open.
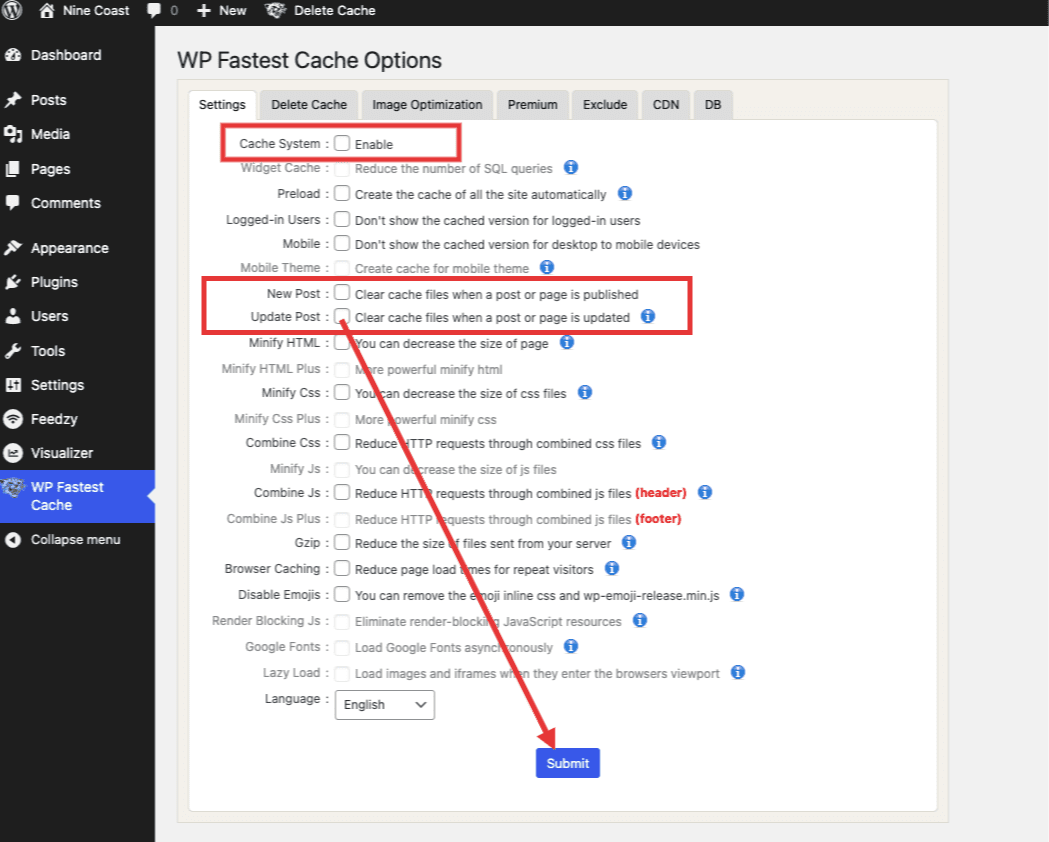
2. Click the tick box that says Cache System. Once you do that, the plugin will clear your cache on a regular basis.
3. If you also want to clear the cache whenever you add/update a post, make sure you check the respective tick boxes as well. Please keep in mind that you need to click on the Submit button once you are done setting up the plugin for changes to take effect.
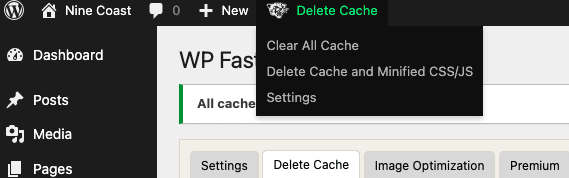
4. There is also the option to manually delete your cache in case you need it. To do so, you need to navigate to the Delete Cache Tab > Click on Clear All Cache or Delete Cache and Minified CSS/JS
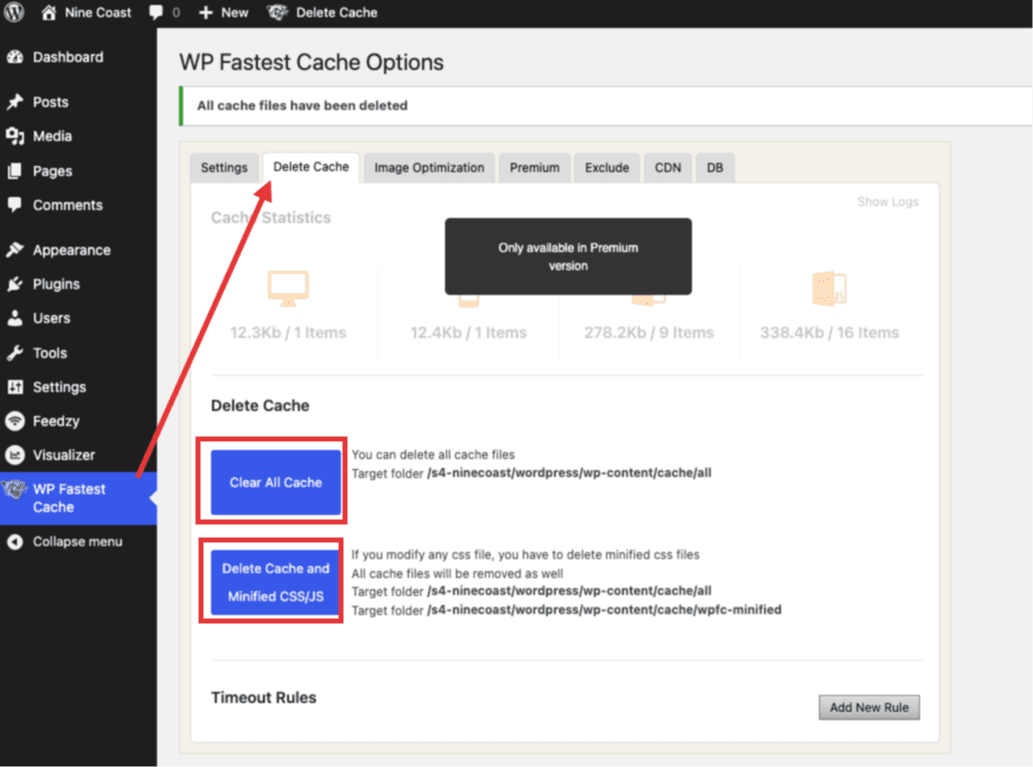
5. Once you set up your settings, you can also manually delete the cache by using the options in the Admin Bar of your WP Dashboard.
2) LiteSpeed Cache
This plugin is one of the most popular ones as it is quite versatile, comes with a lot of ways to clear your cache, and comes pre-installed on all Hostinger Plans as their hosting is Litespeed Server based. If you are using a different host, then you can simply download the plugin from the WordPress Plugins directory.
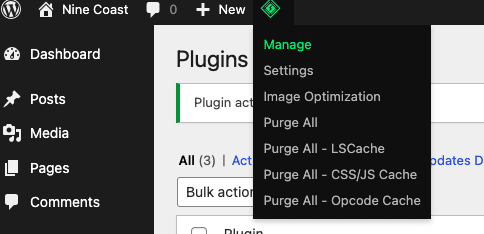
As mentioned previously there are multiple ways of clearing cache in Litespeed Cache and the easiest one is to use the options located in the WP Admin Bar.
However, if you want to enter in more details, then please follow the below steps:
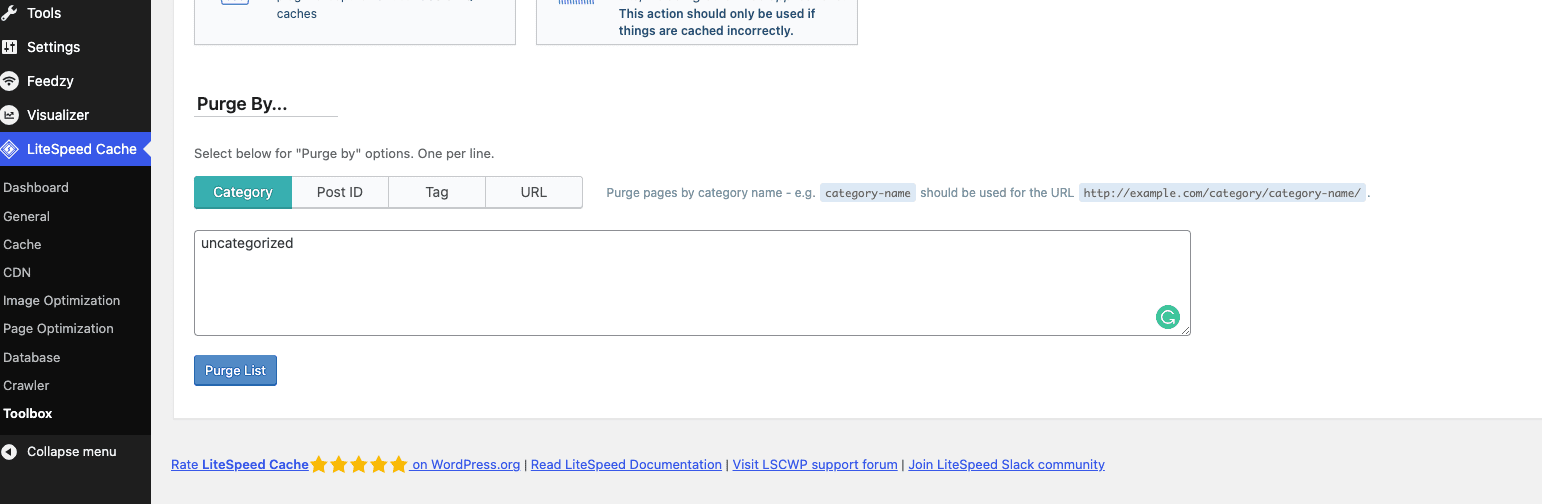
1. Go to Wp Dashboard > LiteSpeed Cache > Toolbox

2. As you can see, here you have multiple options to purge specific pages, however, if you want to purge all cache, then make sure you click on the Purge All option.
3. If you want to purge cache only based on a specific rule (Category, Post ID, etc) then you can scroll down to the Purge By section and insert the URL or Rule that you wish to implement the purging of the cache on.
In addition to this method, you can achieve the same result on a specific page if you are logged in as an Administrator by simply visiting the page and using the Purge this Page Option in the Admin Bar.

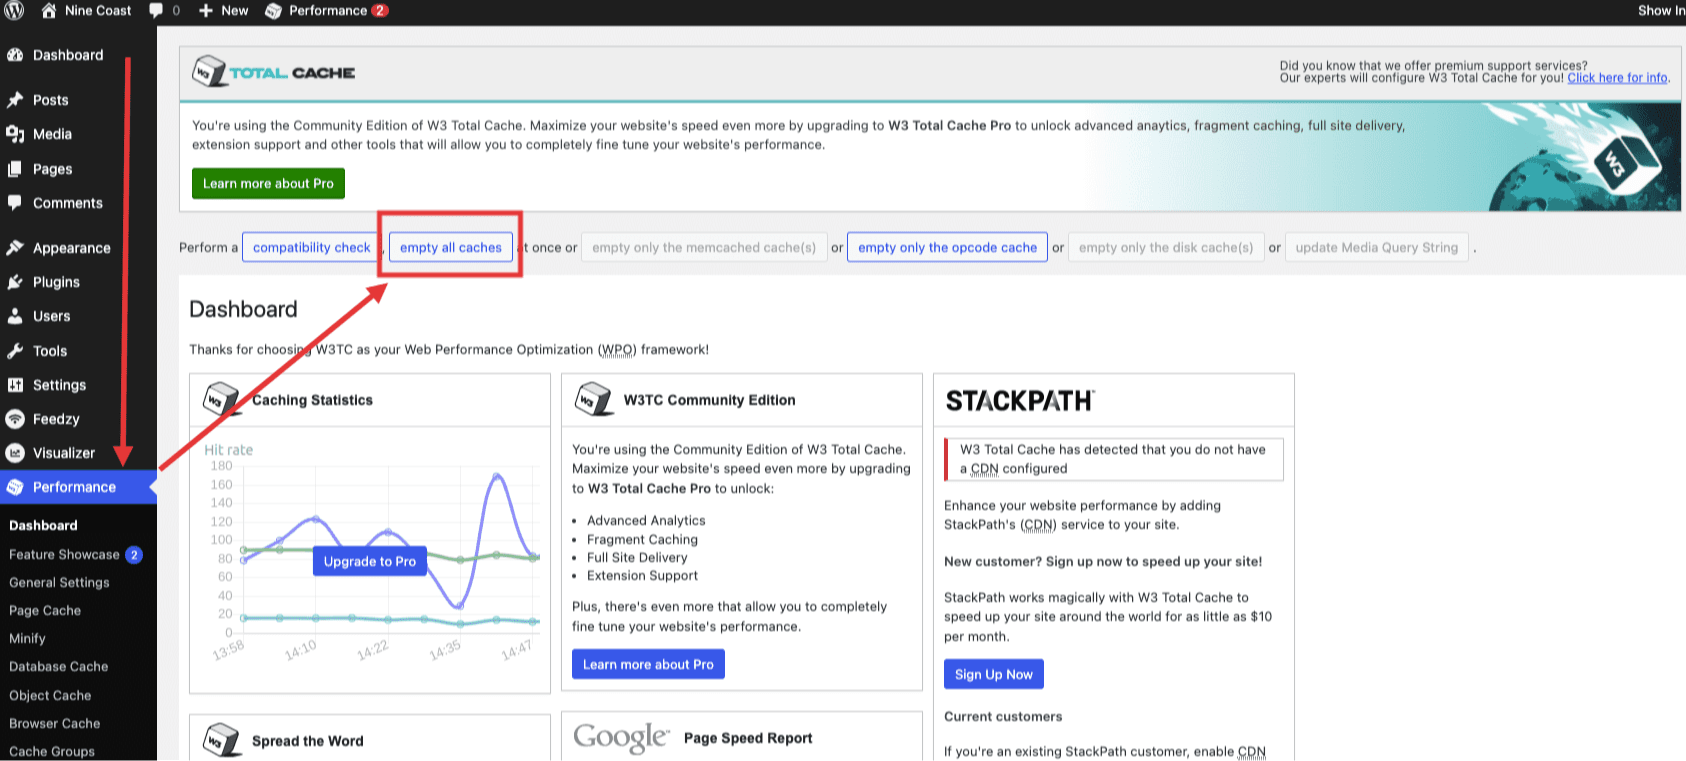
3) W3 Total Cache
This is again of the most used caching plugins on the platform with over 1 million active users. It is well known for its bandwidth-saving features, AMP support and many more.
When it comes to clearing the cache with this plugin, the possibilities are similar to the ones mentioned above, however, here is a step-by-step guide on how to empty all cache.
1. Install the plugin
2. Go to Dashboard > Performance > Dashboard > Empty All Cache