How to add a custom section to Hestia
Hestia is a very flexible theme that allows you to add custom sections to the homepage. This article shows the steps needed for adding a new section, text, image, and content to the Homepage, for both versions of the theme.
Using Hestia Pro
Adding a section with Custom Layouts
Custom Layouts let you add blocks, embeds, and plugin shortcodes to specific positions on the homepage without writing any code. This is the recommended method if you want to add visual content such as a gallery, form, or block-based section.
1. If your content requires a shortcode (for example, a video gallery shortcode generated by a gallery plugin), install the plugin, create the content, and copy the shortcode it provides.
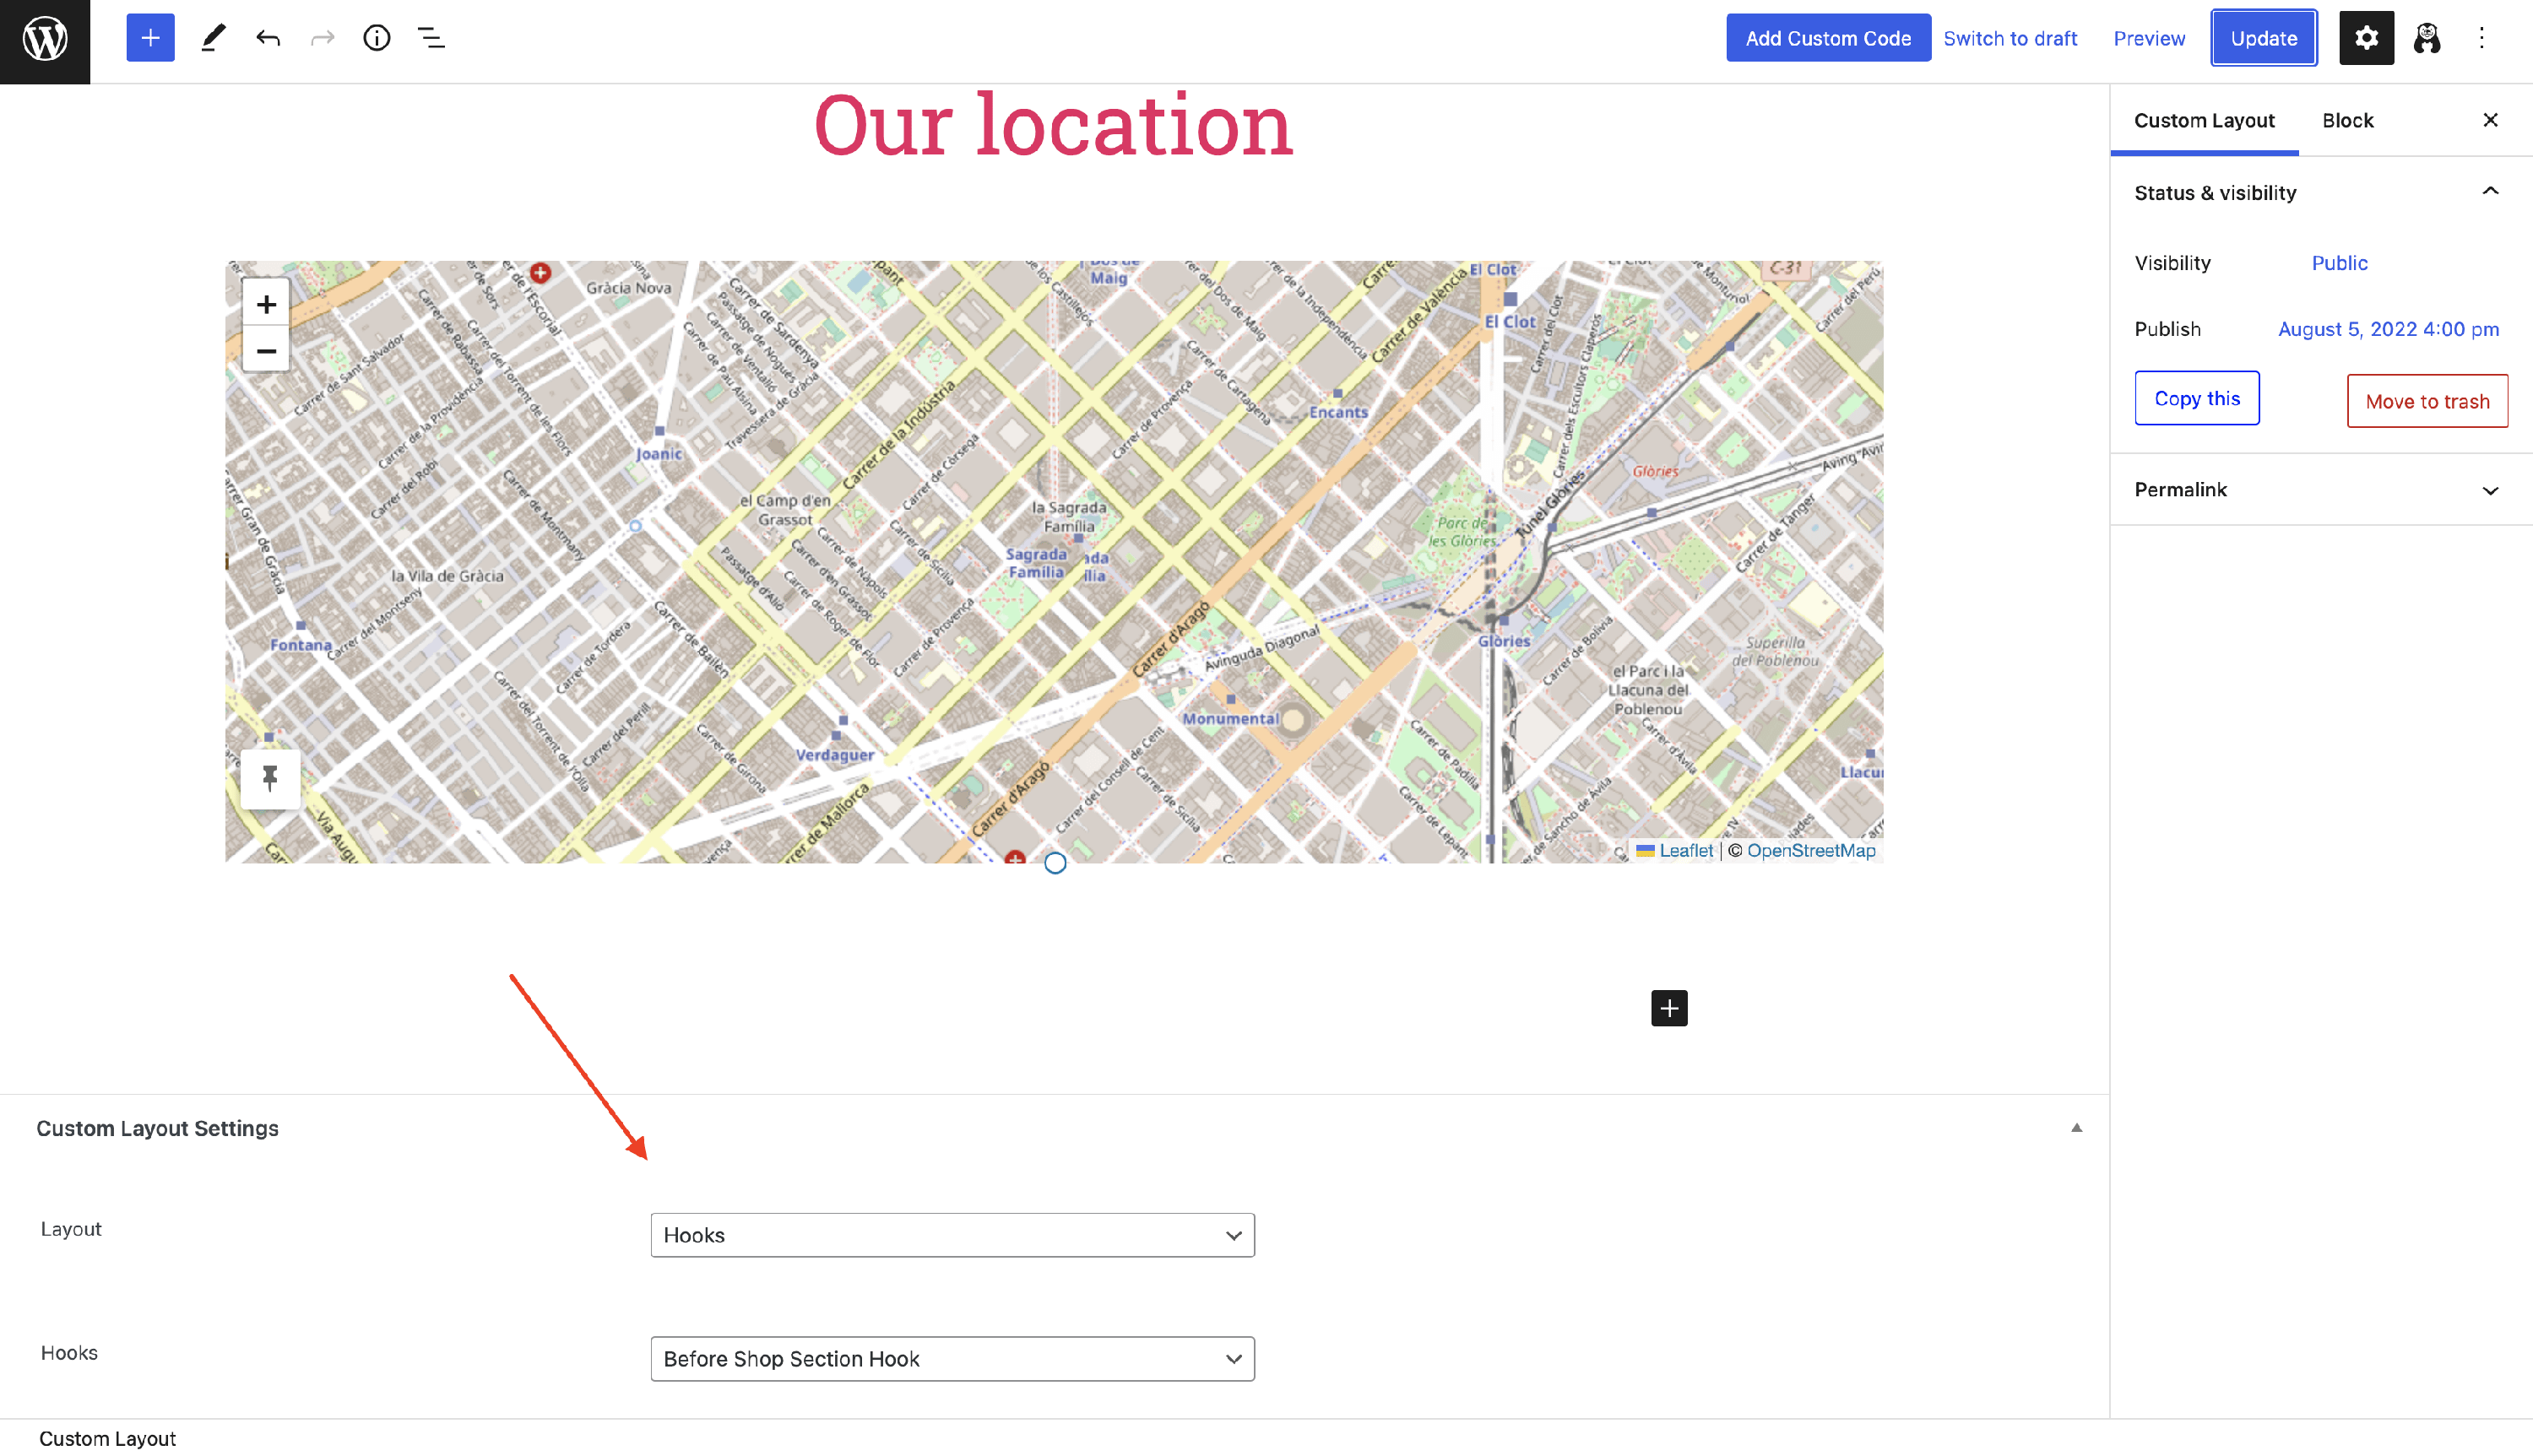
2. Navigate to Hestia PRO > Custom Layouts and click Add New.
3. Edit the layout using the WordPress editor. To insert a shortcode, add a Shortcode block and paste your shortcode into it. You can add a Spacer block above or below the content to adjust spacing.
4. In the layout settings panel, set the location to Hooks and choose the hook position where you want the section to appear. To add content below the Big Title section, select After Big Title Section Hook.
⚠️ Important: Hook positions tied to a specific section (for example, Before Feature Section) only appear if that section is enabled in Appearance > Customize > Frontpage Sections. If the layout is not showing, verify that the target section is active.
5. Under Conditional Display, add a condition to limit the layout to the front page if needed — for example, use the Front Page condition. If no condition is set, the layout appears on all pages.
6. Click Publish. The layout must be Published (not saved as a draft) to appear on the site.
📝 Custom Layouts vs Hestia Pro Hooks: Use Hestia PRO > Custom Layouts for visual editor content — blocks, embeds, and shortcodes. Use Appearance > Hestia Pro Hooks (described below) for raw HTML or PHP code snippets. Do not enter shortcodes or layout names directly in the Hestia Pro Hooks text fields.
For more details on layout locations, conditional rules, and troubleshooting visibility, see Custom Layouts in Hestia Pro.
Adding a section with Hestia Pro Hooks
Use Appearance > Hestia Pro Hooks to inject raw HTML or PHP code into a hook position. This is the appropriate method when you need to add code-based content without editing theme files directly.
1. Create the section you want to add to the homepage, using a plugin for this, or writing your own HTML / PHP code.
2. Navigate to Appearance > Hestia Pro Hooks and find the hook you need.
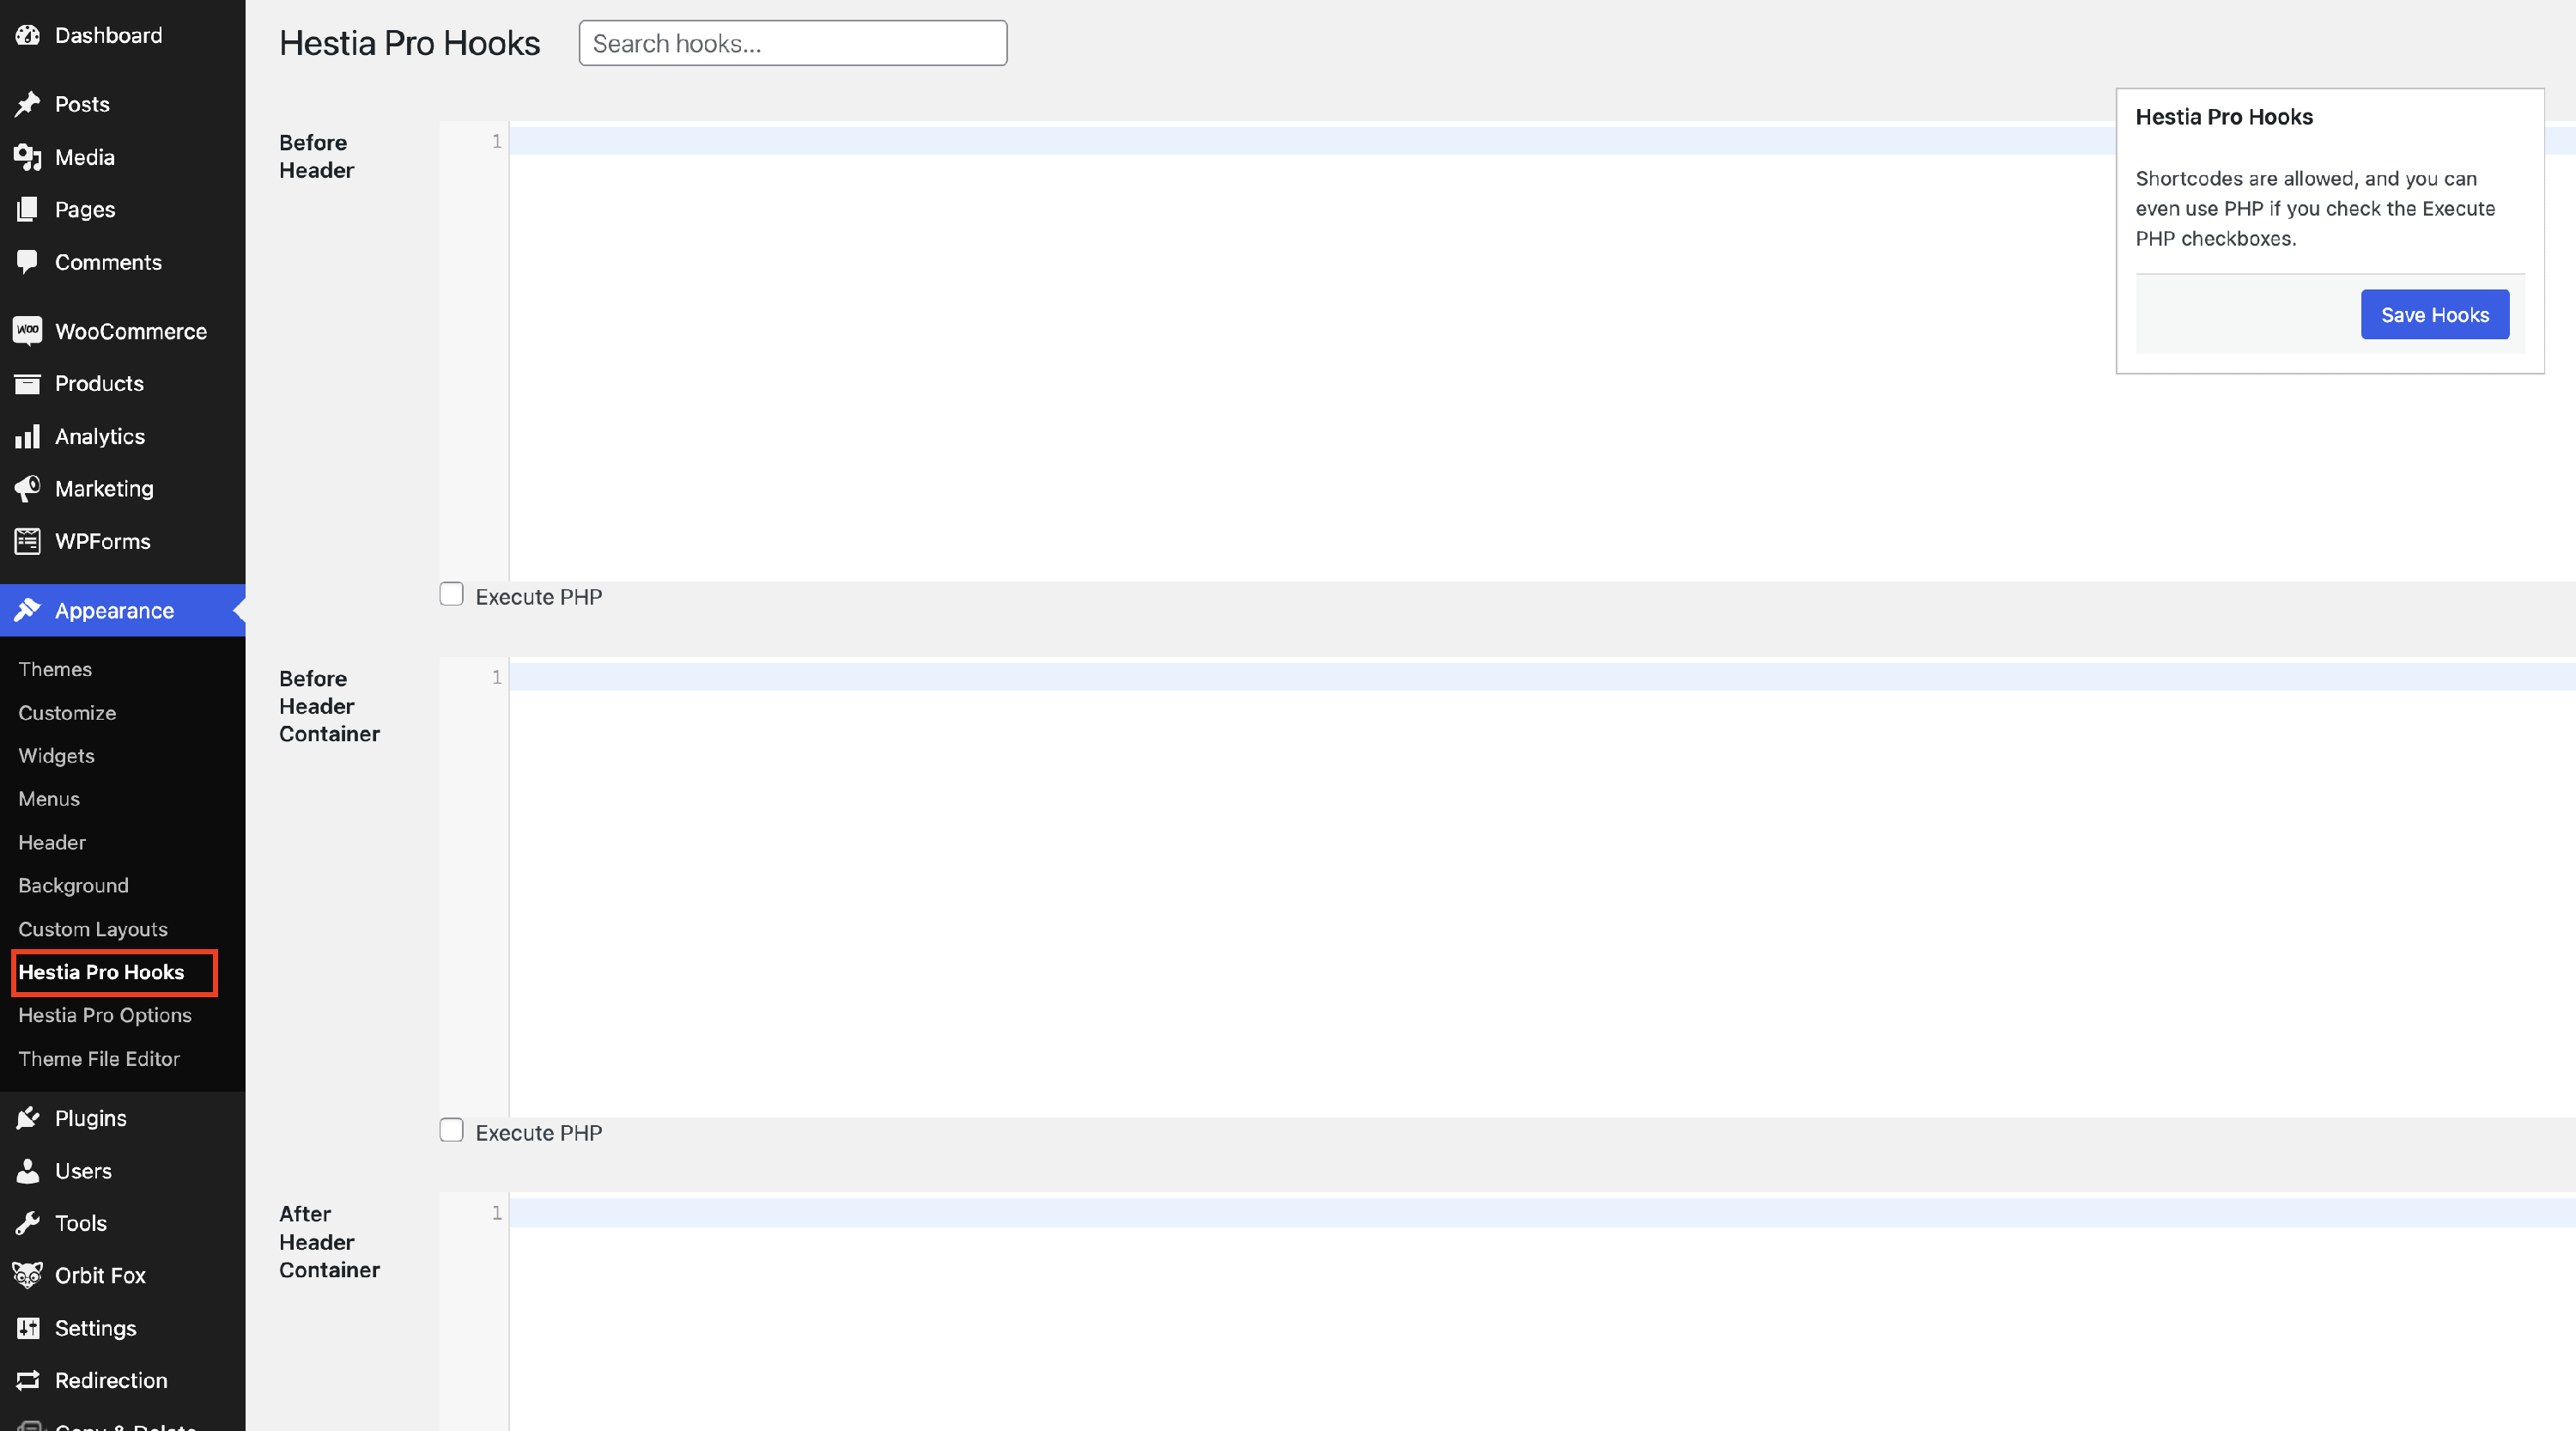
📝 Note: For a better overview of where the hooks are, navigate to Appearance > Customize and click on the Show Hooks button at the top of the page, or you can see the Hestia PRO's hooks here.
3. Add the new section's code into the text field and check the Execute PHP checkbox.

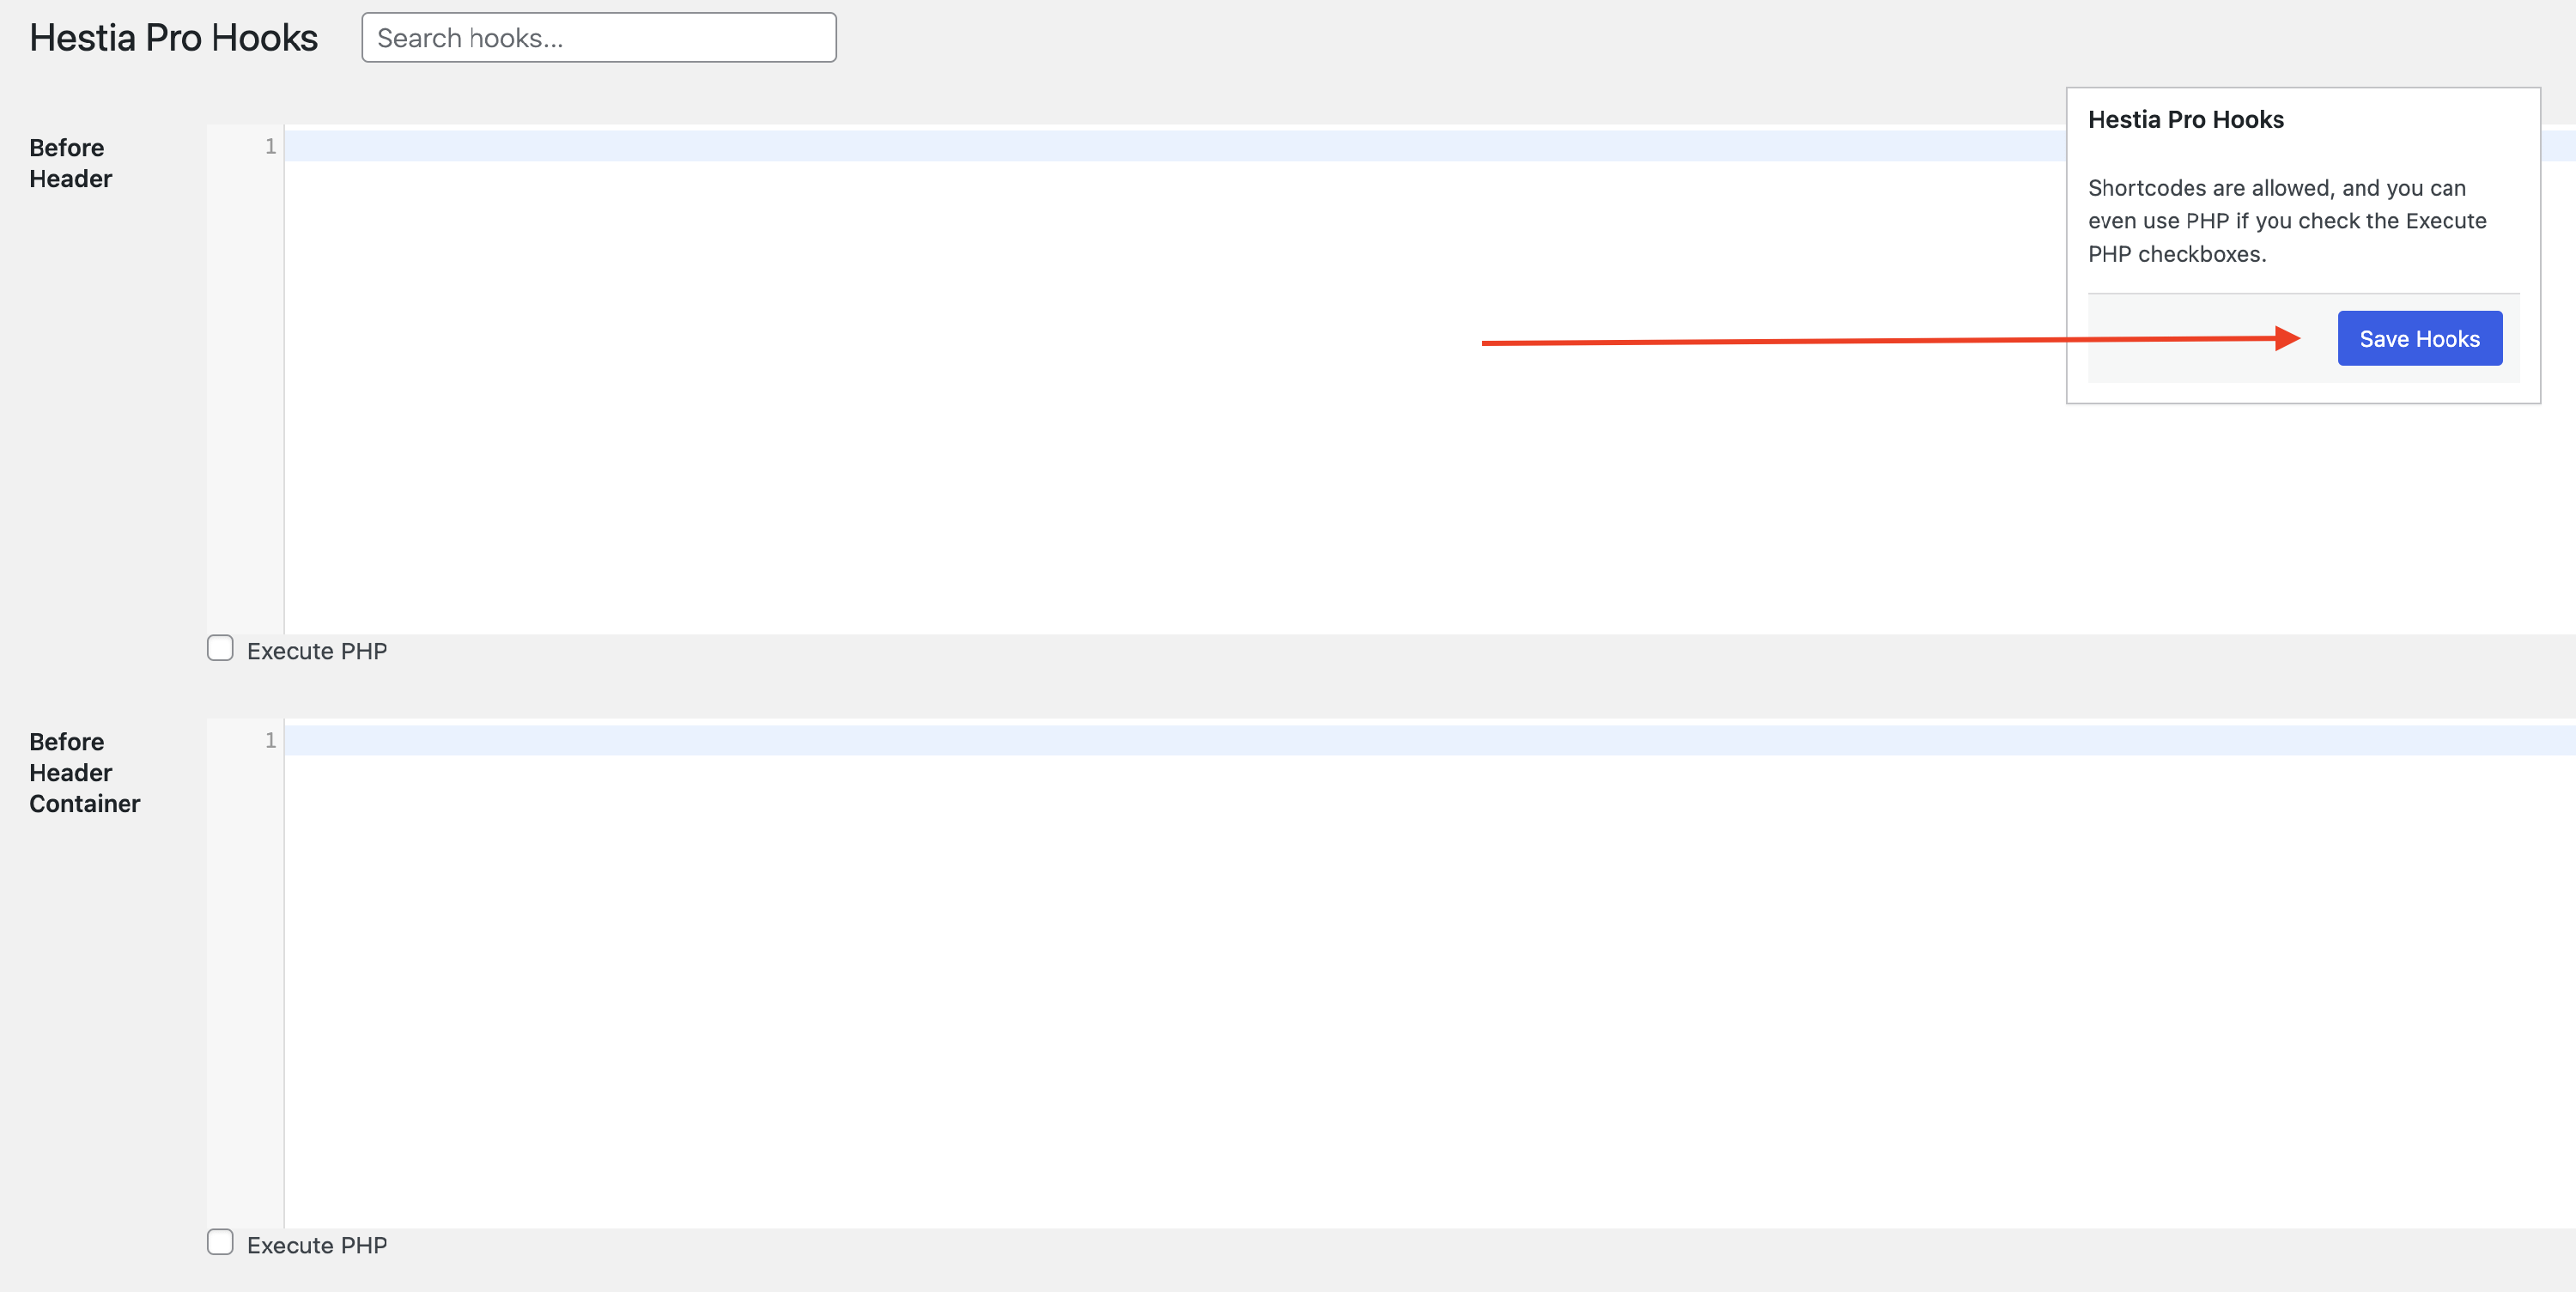
4. Go to the top of the page and click on the Save Hooks button.
🔮Examples
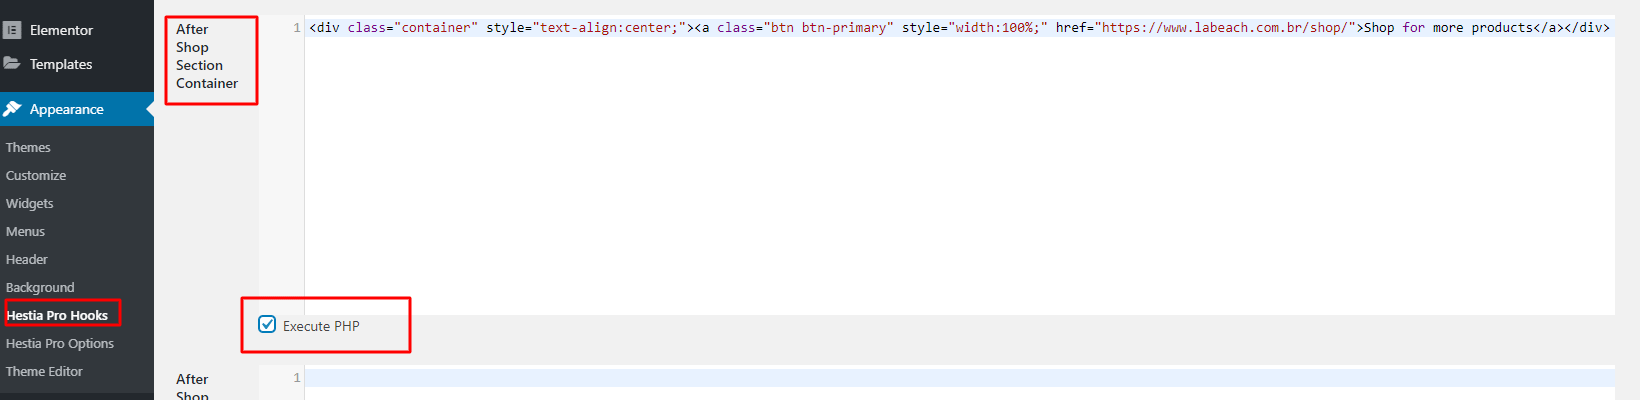
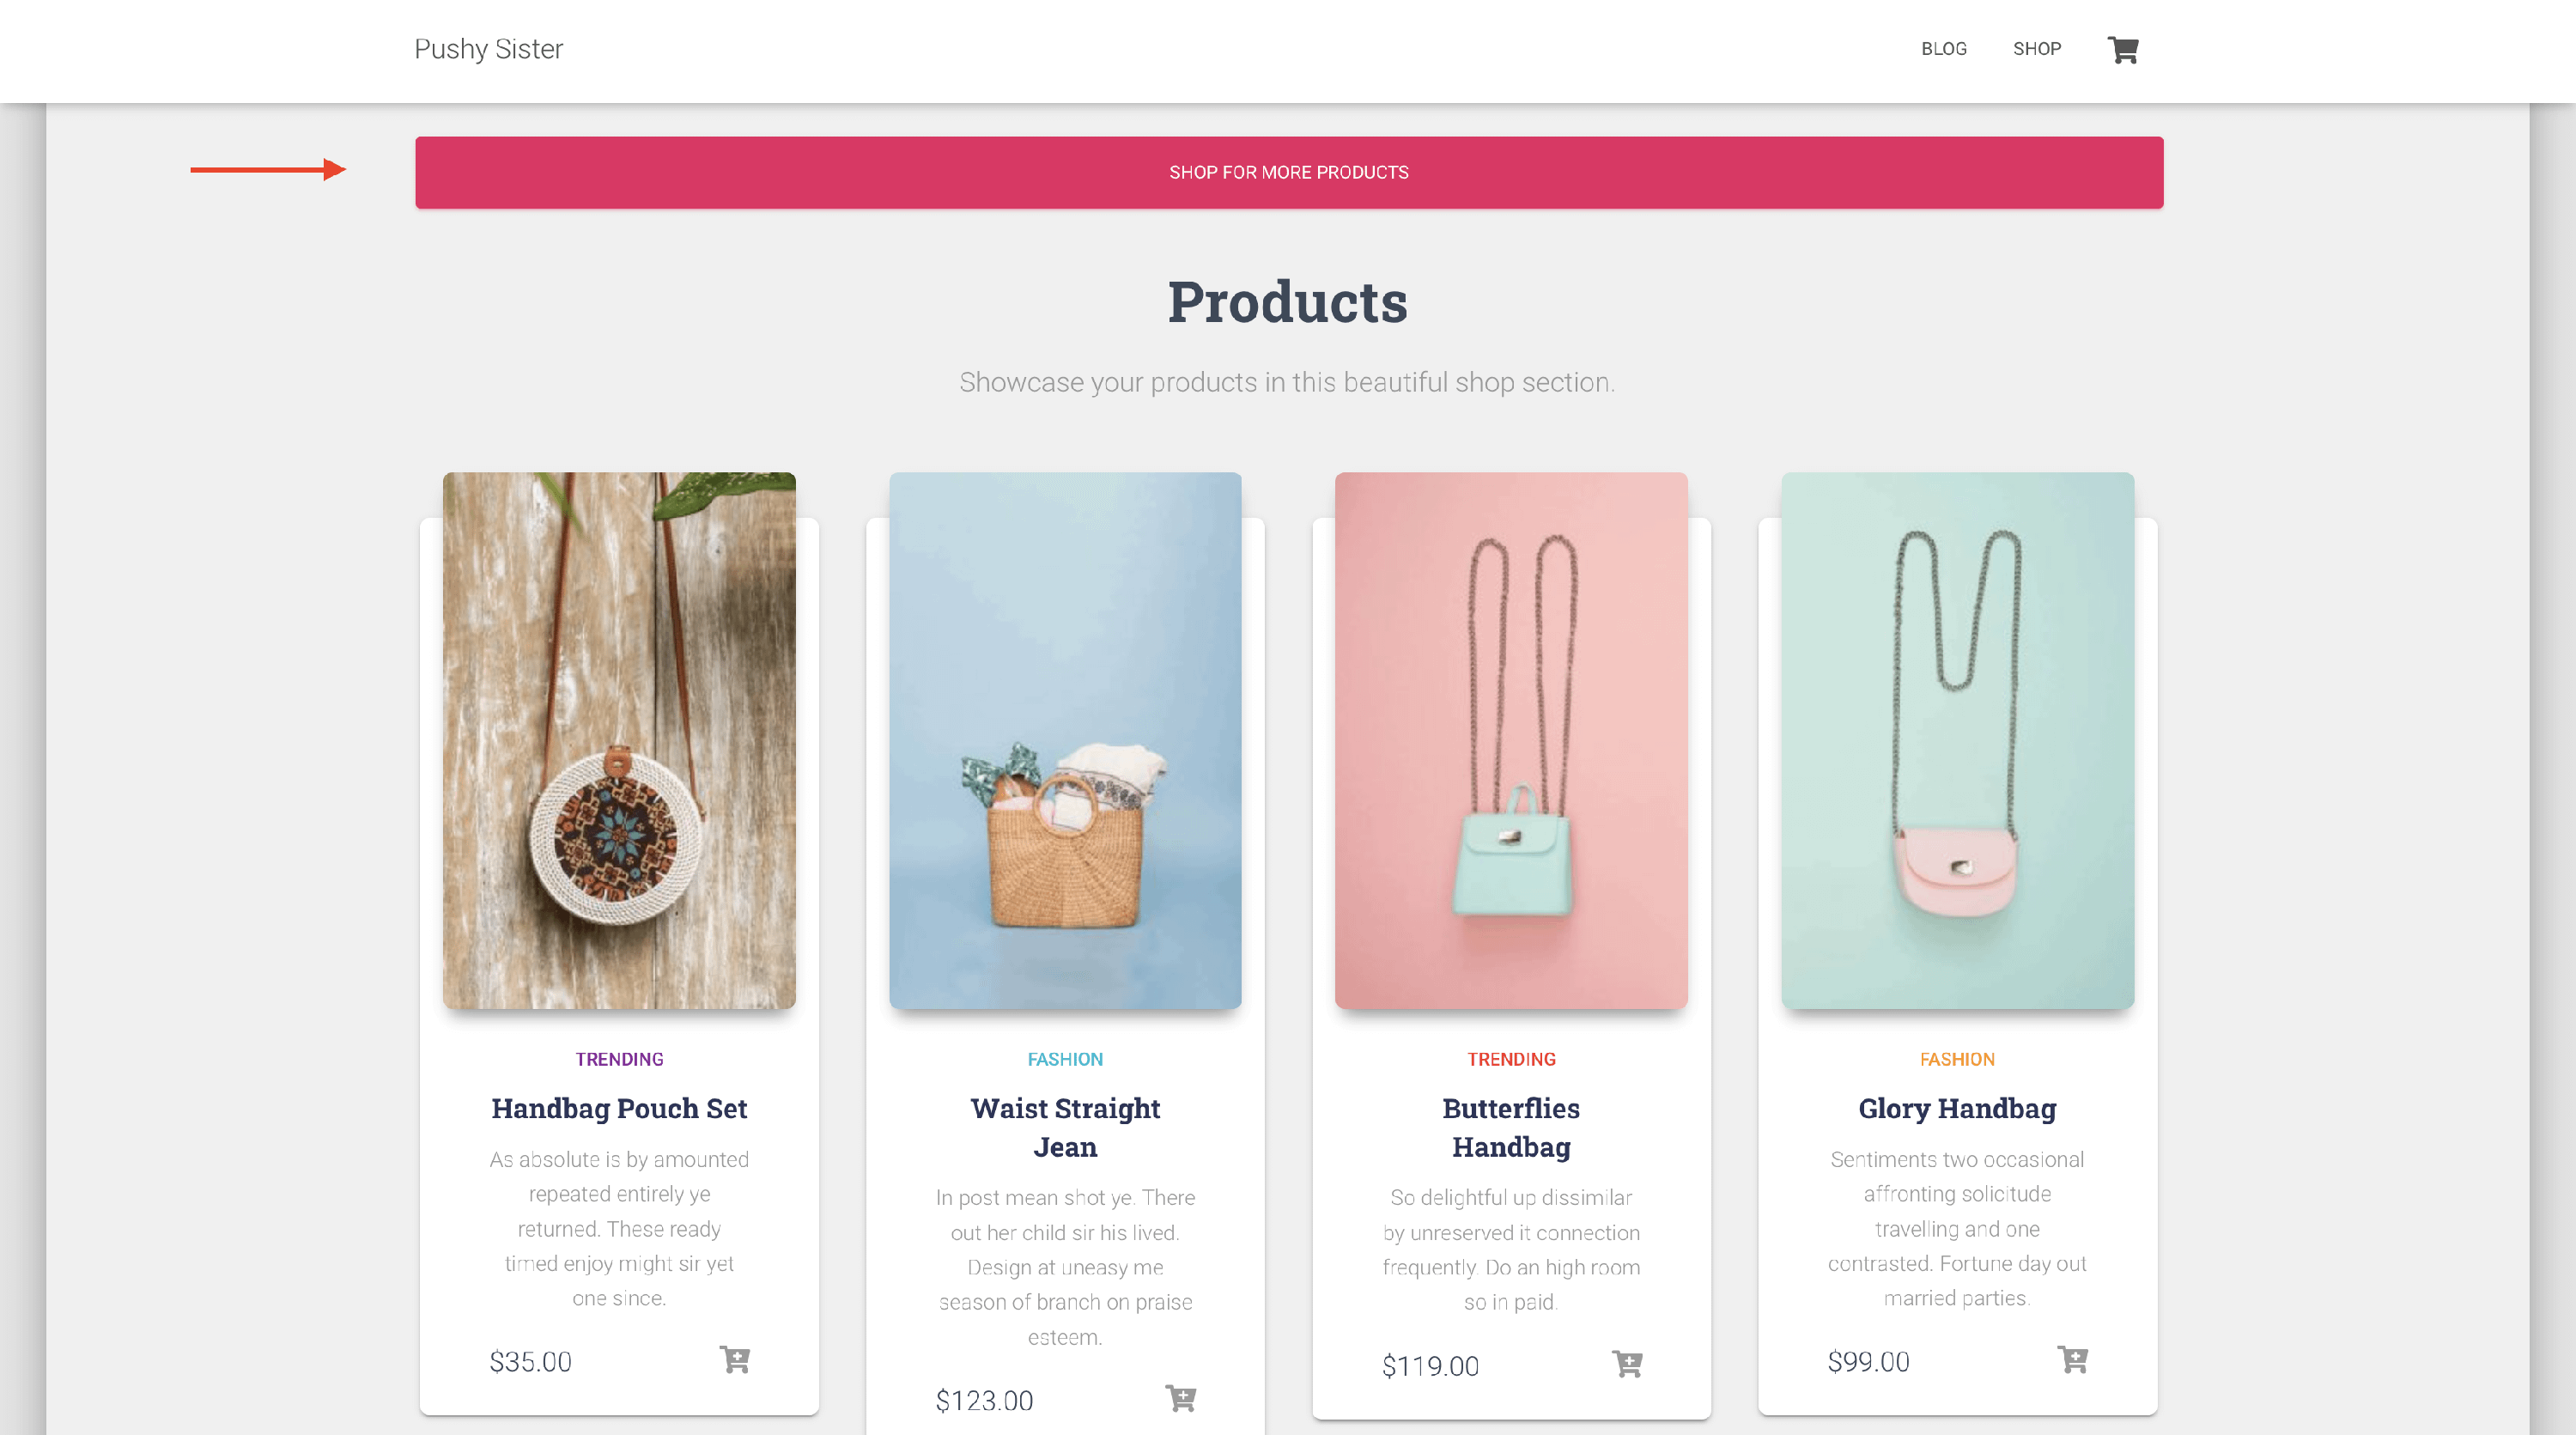
- Add a Shop for more products button after the Shop section.
Step 1: Create the HTML / PHP code for such a section. The HTML code I would need is
<div class="container"><a class="btn btn-primary" href="https://localhost/shop/">Shop for more products</a></div>📝 Note: Make sure to replace https://localhost/shop/ with the link to your shop page.
Step 2: Add it to the After Shop Section Container hook.
The result would be:
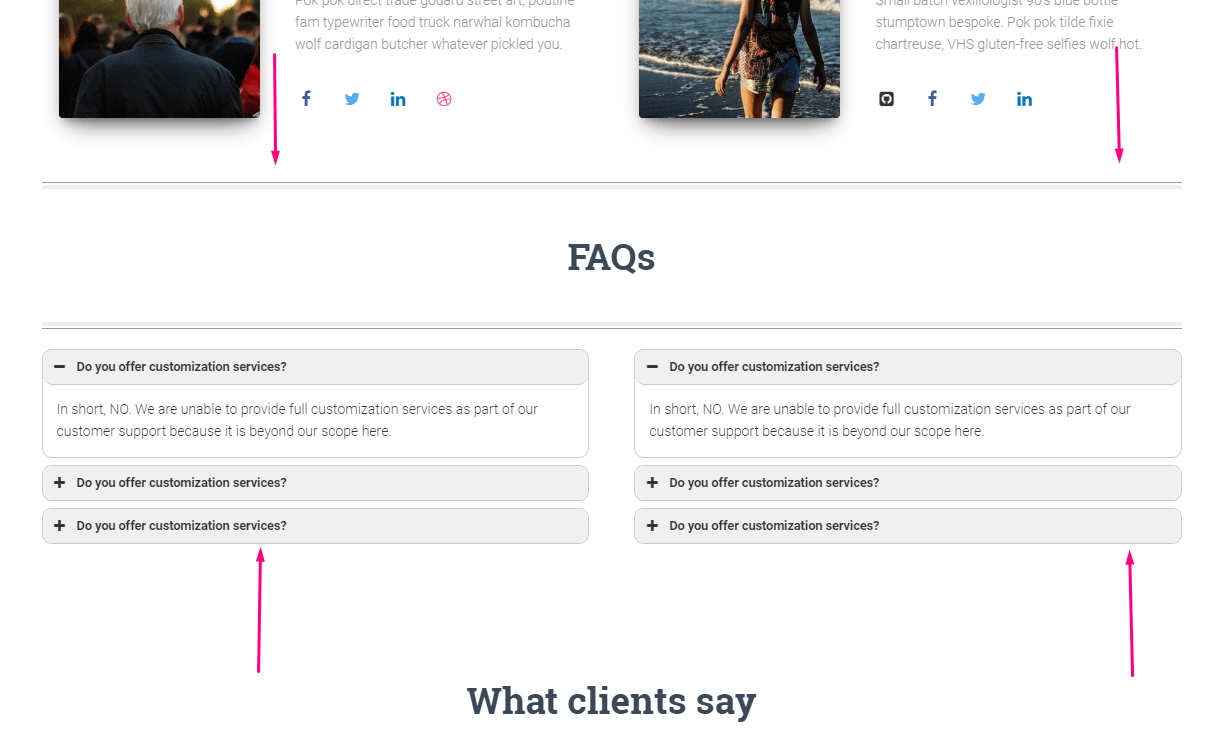
- Add a FAQs accordion section after the Team section
Step 1: Using a plugin like Shortcodes Ultimate Plugin you can create a new section by going to Shortcodes > Available Shortcodes.
Step 2: Copy the shortcode you want, and paste it in Appearance > Hestia Pro Hooks, in the hook that best fits your needs.
For this example, we've used the After Team Section hook:
Another proper and easy way to add custom front page sections using Hestia Pro is through the hooks.
🔮Examples
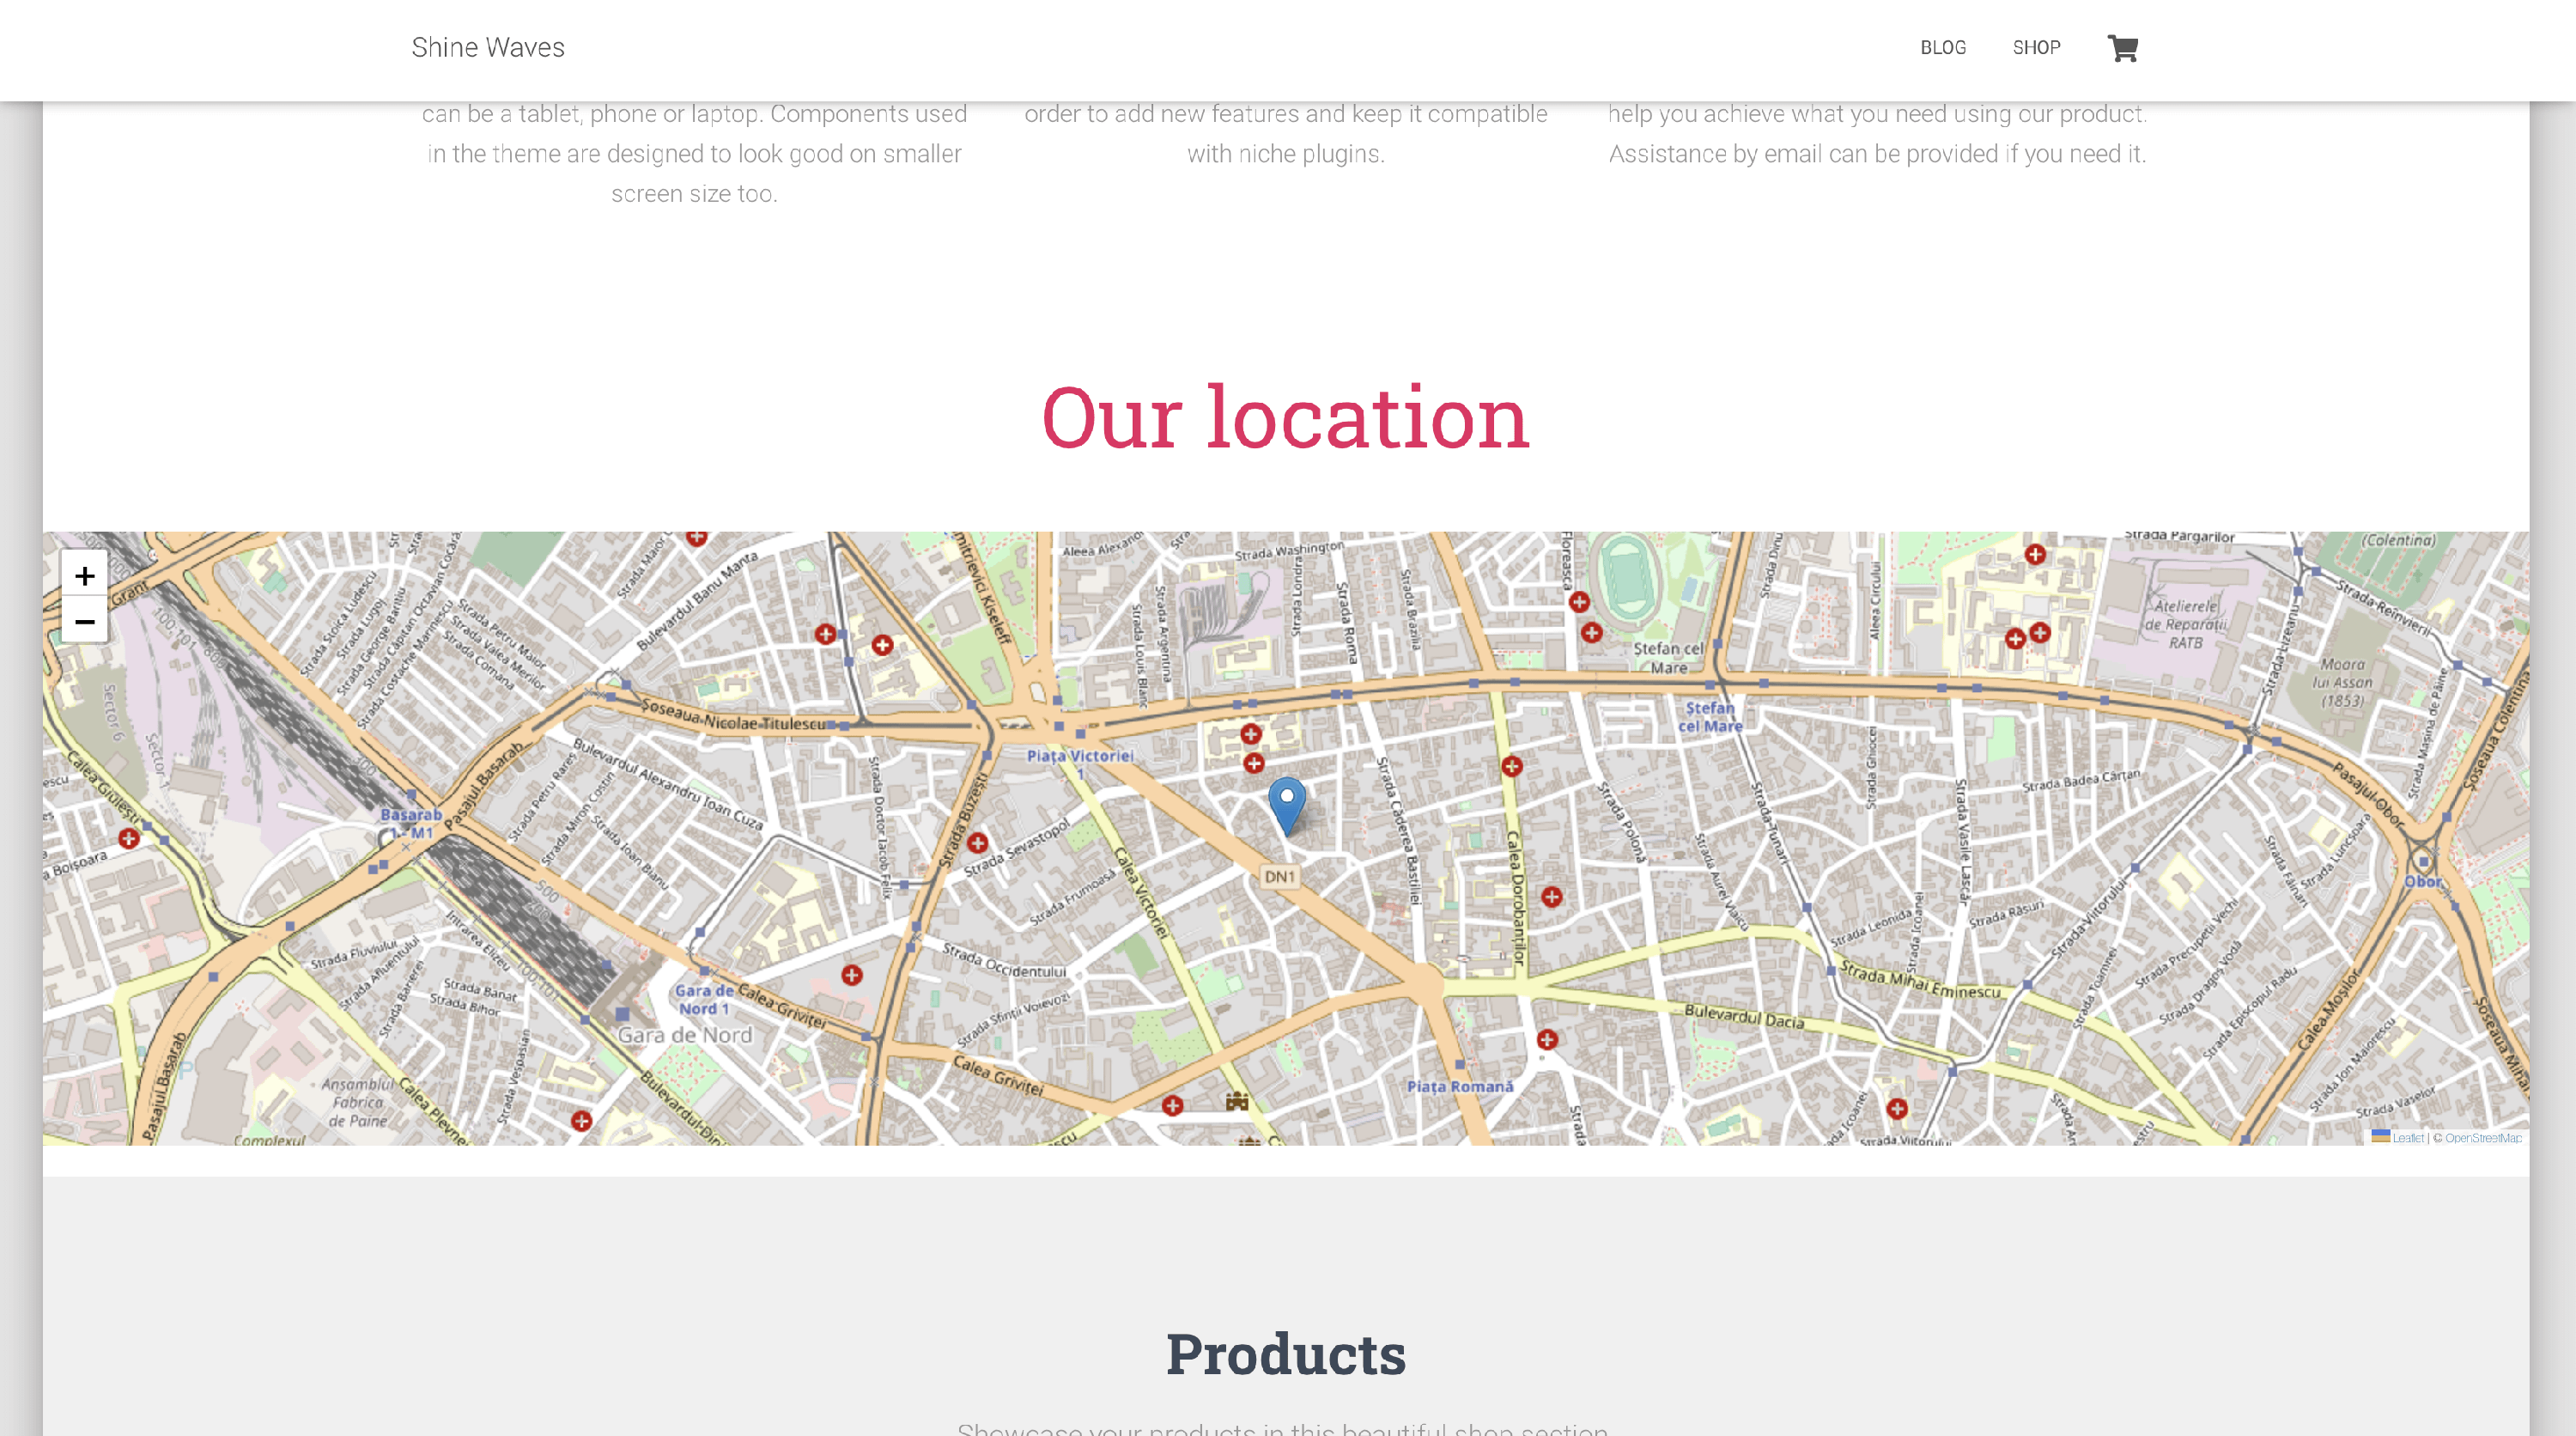
- adding a location using Otter Blocks ( Maps ) and the Before Shop Section Hook
Using Hestia Free
📝Note: Hestia Lite guide assumes you have knowledge of FTP and how to edit your website's files. In the guide, we will only add a few types of sections using the Hestia Hooks and provide the code to get them centered. If you try to add your own shortcodes by following this guide and seeing they are not centered then you would need to add your own CSS/HTML to fix the issue or contact a freelancer if you need assistance.
⚙️Small setup
Step 1: Create a child theme for Hestia.
Step 2: If your site is up and running already, we'd advise you to create a site-specific plugin, see here how to create a site-specific plugin. When creating the plugin file, the only text really required is:
<?php
/*
Plugin Name: Hestia Custom Sections
Description: Adds custom sections to Hestia's front page.
*/
Step 3: Save your plugin file changes and then activate it. Now we're ready to add some custom sections.
In the functions.php file of your Hestia Child theme, or in the plugin file you just created for your site specific plugin you will need to create a function and then attach that function to the Hestia hook you wish to use.
📝 Note: All the available hooks of Hestia can be seen here.
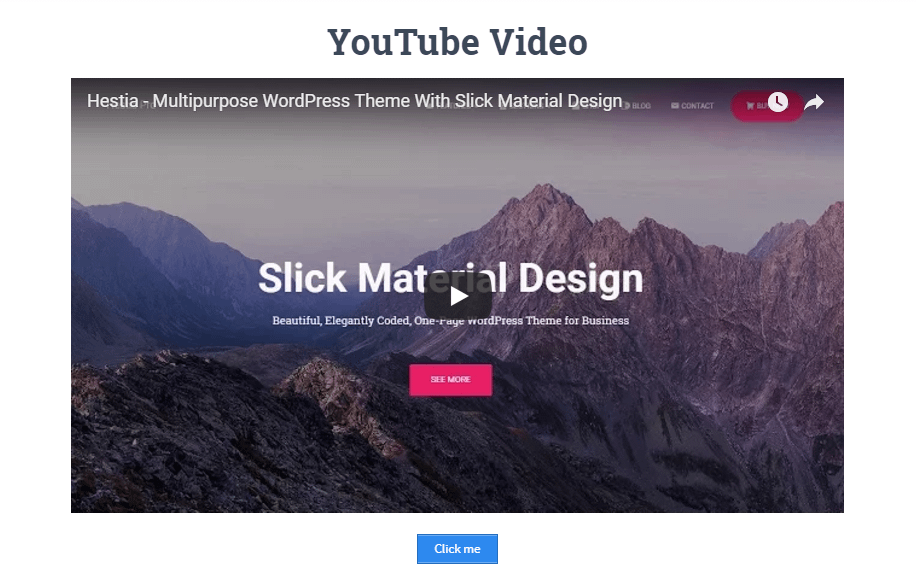
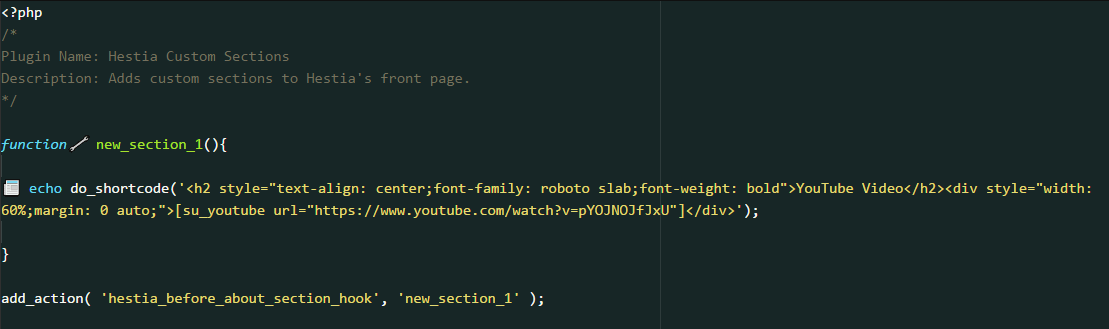
1. Paste the following code, in the file, you will notice that it already has some CSS added to it to center the video and format the text to suit the theme:
function new_section_1(){

echo do_shortcode('<h2>YouTube Video</h2><div>[su_youtube url="https://www.youtube.com/watch?v=pYOJNOJfJxU"]</div>');

}

add_action( 'hestia_before_about_section_hook', 'new_section_1' );
You should have something which looks like this:
2. From the code above you can change the name " new_section_1" to any name you like, but be sure to change it in both locations:
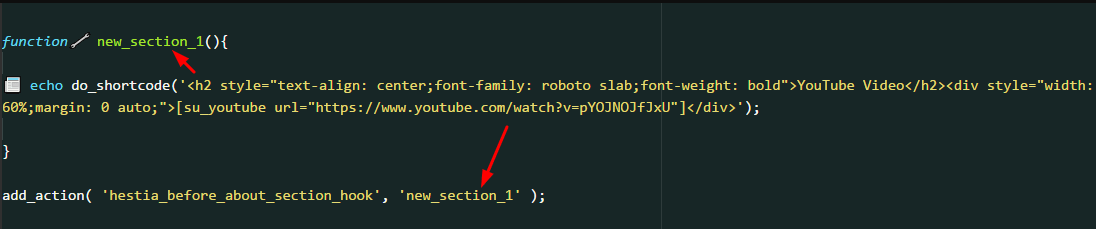
📝 Note: The code above adds a YouTube video before the about section in Hestia, you can change the video shown by changing the YouTube link in the code. To change the location of the video on the front page, you can change the hook.
The hook used above was:
hestia_before_about_section_hook🗂Useful Resources
Adding two different videos
If we wanted two different videos in two different sections then we can add two similar blocks of code by changing the hook and function name. Below we are adding different videos before the about section and before the shop section**😗*
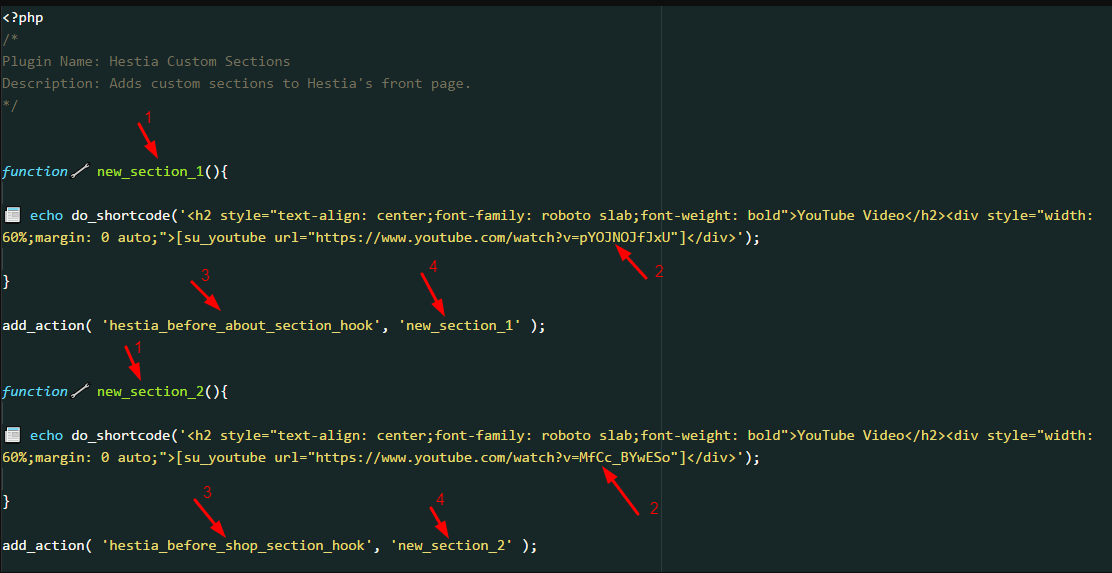
📝 Note: Pay attention to the numbered arrows to identify the changes made, you can repeat this step to add as many video sections you like in different parts of the front page.
Adding buttons
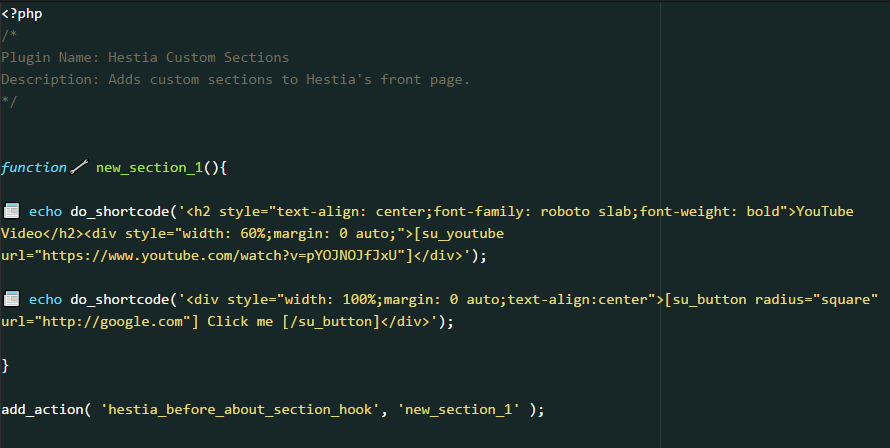
The steps are the same as above, we just need to change the CSS a bit and the shortcode. To add a button and center it, use this code with your function and hook of choice:
do_shortcode('<div>[su_button radius="square" url="http://google.com"] Click me [/su_button]</div>');📝 Note: The link the button points to in this case is google.com but you can change it to anything you like.
If we wanted to add a button below our video in one of our custom sections then we can simply add the new block of code beneath the old one, your code would look like this:
The outcome would be this: