ShopIsle Pro Documentation
ShopIsle is a beautiful theme for e-commerce websites that comes with a modern and elegant design. This theme has a full-screen animated slider, smooth parallax scrolling, subtle animations, video ribbons, a product showcase section, and many more. This theme is perfect for creating an online store.
Quick Links
In this article
Installation
The first thing you will need to do is to download the theme from your purchase history.
After downloading the theme in your local system, you need to log in to your WordPress dashboard and navigate to Appearance » Themes » Add New » Upload Theme and select the theme zip file you downloaded previously and click the Install Now button.
In a few seconds, WordPress will upload and extract the theme from the archive. The last step is to press the Activate link that comes with the message confirming the installation.
You need to activate the license key to get the automatic updates of the theme in your dashboard.
Setting Up Homepage & Blog
To set up your front page, you first need to create two pages. One will become the front-page, and the other will be where your posts are displayed. For example, you have created two pages named "Home" and "Blog". Now go to Settings » Reading, and set the Front page displays to a static page. Here, select your recently created pages "Home" as your front page and "Blog" as posts page.
Recommended Image Size
- Logo Size: 150x150 pixels
- Slider Images: 1600px width x 1101px height
- Product Images: 262px width x 325px height
- Headers Images: 1200px width × 280px height
Customize the Appearance
You can easily customize the ShopIsle Pro Theme by navigating to the Appearance » Customize.
Adding Logo and Site Icon
In the Site Identity section, you can add the logo of your website, site title, tagline, and a site icon.

Header options

This section contains two different sections, First one is very top bar where you can set up the top bar according to your requirement. The second section is the header in which you can set the default header image. The recommended header size is 1200 × 280px.
Blog page header title and subtitle are also changed through the header section.
Colors

The Colors section gives you full control to change the color scheme of your website. Along with that, you can change the color of the header text, background, navbar background, menu items, menu hover, and footer background.
You need to install and activate the WooCommerce plugin to set up an online store. It's a free eCommerce plugin that allows you to sell anything on your website
Frontpage Sections
You can customize pretty much everything on the front-page, and here's how:
Frontpage Sections
Slider Section

- Add new slider - For each slide, you can add a picture, a title, a subtitle, a button label, and its link. You can add as many slides as you want.
- By default, your Slider section is visible. You can check the Hide slider section button and the slider will disappear from your homepage.
- In the slider shortcode section, you can add a shortcode of any slider plugin to replace the theme's default slider.
Banners Section

In this section, you can add the section title. By default, there are three banners on your homepage but you can add as many banners as you want. In each banner, you can add an image and a link to that image.
Products section

- In this section, by default, WooCommerce latest products are displaying. If you want to have different products, you have two options. Either enter a WooCommerce shortcode or select a category of products to display.
- By default, your Products section is visible. You can check the Hide products section button and the section will disappear from your homepage.
Video section

- Add a title for your video and embed the video from YouTube. A short video about your products would be probably the best way to promote them.
- Add a video thumbnail image.
- You can adjust the padding value to increase or decrease the size of the video section.
- By default, your Video section is visible. You can check the Hide video section button and the video section will disappear from your homepage.
Services Section
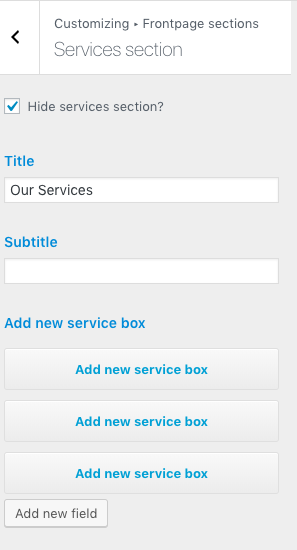
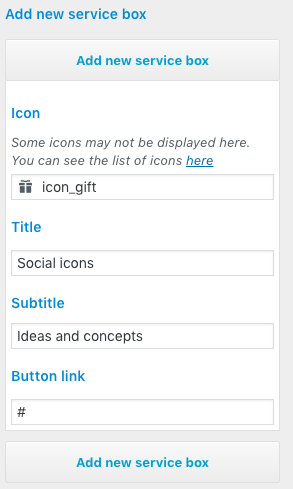
Add new service box - For each service, you can add an icon, a title, a subtitle, and its link. You can add as many services as you want.
Icon - There are more icons than the ones listed in the theme, you can find the full list on the Icon Font page and scroll down to the section "Complete List of Class Names". There, when you find an icon that you like just copy the name and paste it in the Icon input in the service box. Don't worry, the icon appears immediately so you can see if you copy-pasted the right icon name.
Ribbon section

In this section, you can add a background image with some text, a button text, and the button link.
Products slider section

- By default, WooCommerce products from the first category found are displayed in this section. You have the option to choose a different category, to add a title and a subtitle.
- The Products slider section is visible on each page by default. There are two different options to hide this section on your front page and single product page.
Map Section

Map - In this section you can add a map. To use this section first install Intergeo Maps plugin then create a map and paste its shortcode here to display on frontpage.
Categories section

In this section, you can show multiple product categories. Add a title and subtitle for your category sections and choose the categories to display on front-page,
Shortcodes section

In this section, you can execute any shortcode. Add a title, a subtitle and the shortcode to display a new section on the front-page. You can add as many shortcodes as you want.
Footer Options

In this section, you can edit the copyright of your site and you have the option to add social media icons. Select the icon you want with your social link. You can add as many icons as you want.
Advanced options

This section gives you many options:
- You can disable the preloader with a simple click.
- You can set the font size.
- Here you can customize the content for the 404Not found page. The best part is the Background Image for 404 Page and the “Back to” button. Never lose again your visitors from that page.
Background Image

Here you can set the background image of your website.
ShopIsle Pro theme has unique page templates for About and Contact page. In order to customize them you need to follow this document: About and Contact Page Cistomization.
Widget
 From this section, you could add widgets to footer areas by selecting the section you want and then clicking “Add a Widget”.
Adding a Quick View button
Adding a quick view button which will display a short description of each product has always been a nice-to-have tool for your e-commerce website, which is why we've made it easy with ShopIsle Pro. The quick view button can be implemented by using the YITH WooCommerce Quick View plugin. If you would like to make further customizations to this feature, the entire documentation of this plugin is available on its landing page on WordPress.org -> https://wordpress.org/plugins/yith-woocommerce-quick-view/.


ShopIsle Pro is compatible with Mega Menu and if you're interested in using the plugin, you can follow the instructions from this documentation: Creating Mega Menus